This section will walk you through deploying the Airdrop Machine smart contract using Remix IDE. The Airdrop Machine is designed to distribute tokens across multiple addresses, supporting both standard and [Merkle tree-based](https://www.investopedia.com/terms/m/merkle-tree.asp) airdrops.
By following these instructions, you'll learn how to clone the necessary repository, prepare the contracts, and deploy them in Remix IDE.
## **Step 1: Clone the Repository**
Clone the Airdrop template repository from the link below:
```bash
git clone https://github.com/rsksmart/airdrop-template.git
```
This repository contains all the smart contract code you need to deploy the Airdrop Machine. You’ll use this code to get the smart contract address required for your project.
> Basic knowledge of deploying and testing smart contracts in Remix IDE is required. If you’re unfamiliar, please refer to the [Remix Quickstart Guide](/developers/quickstart/remix/) for a detailed tutorial.
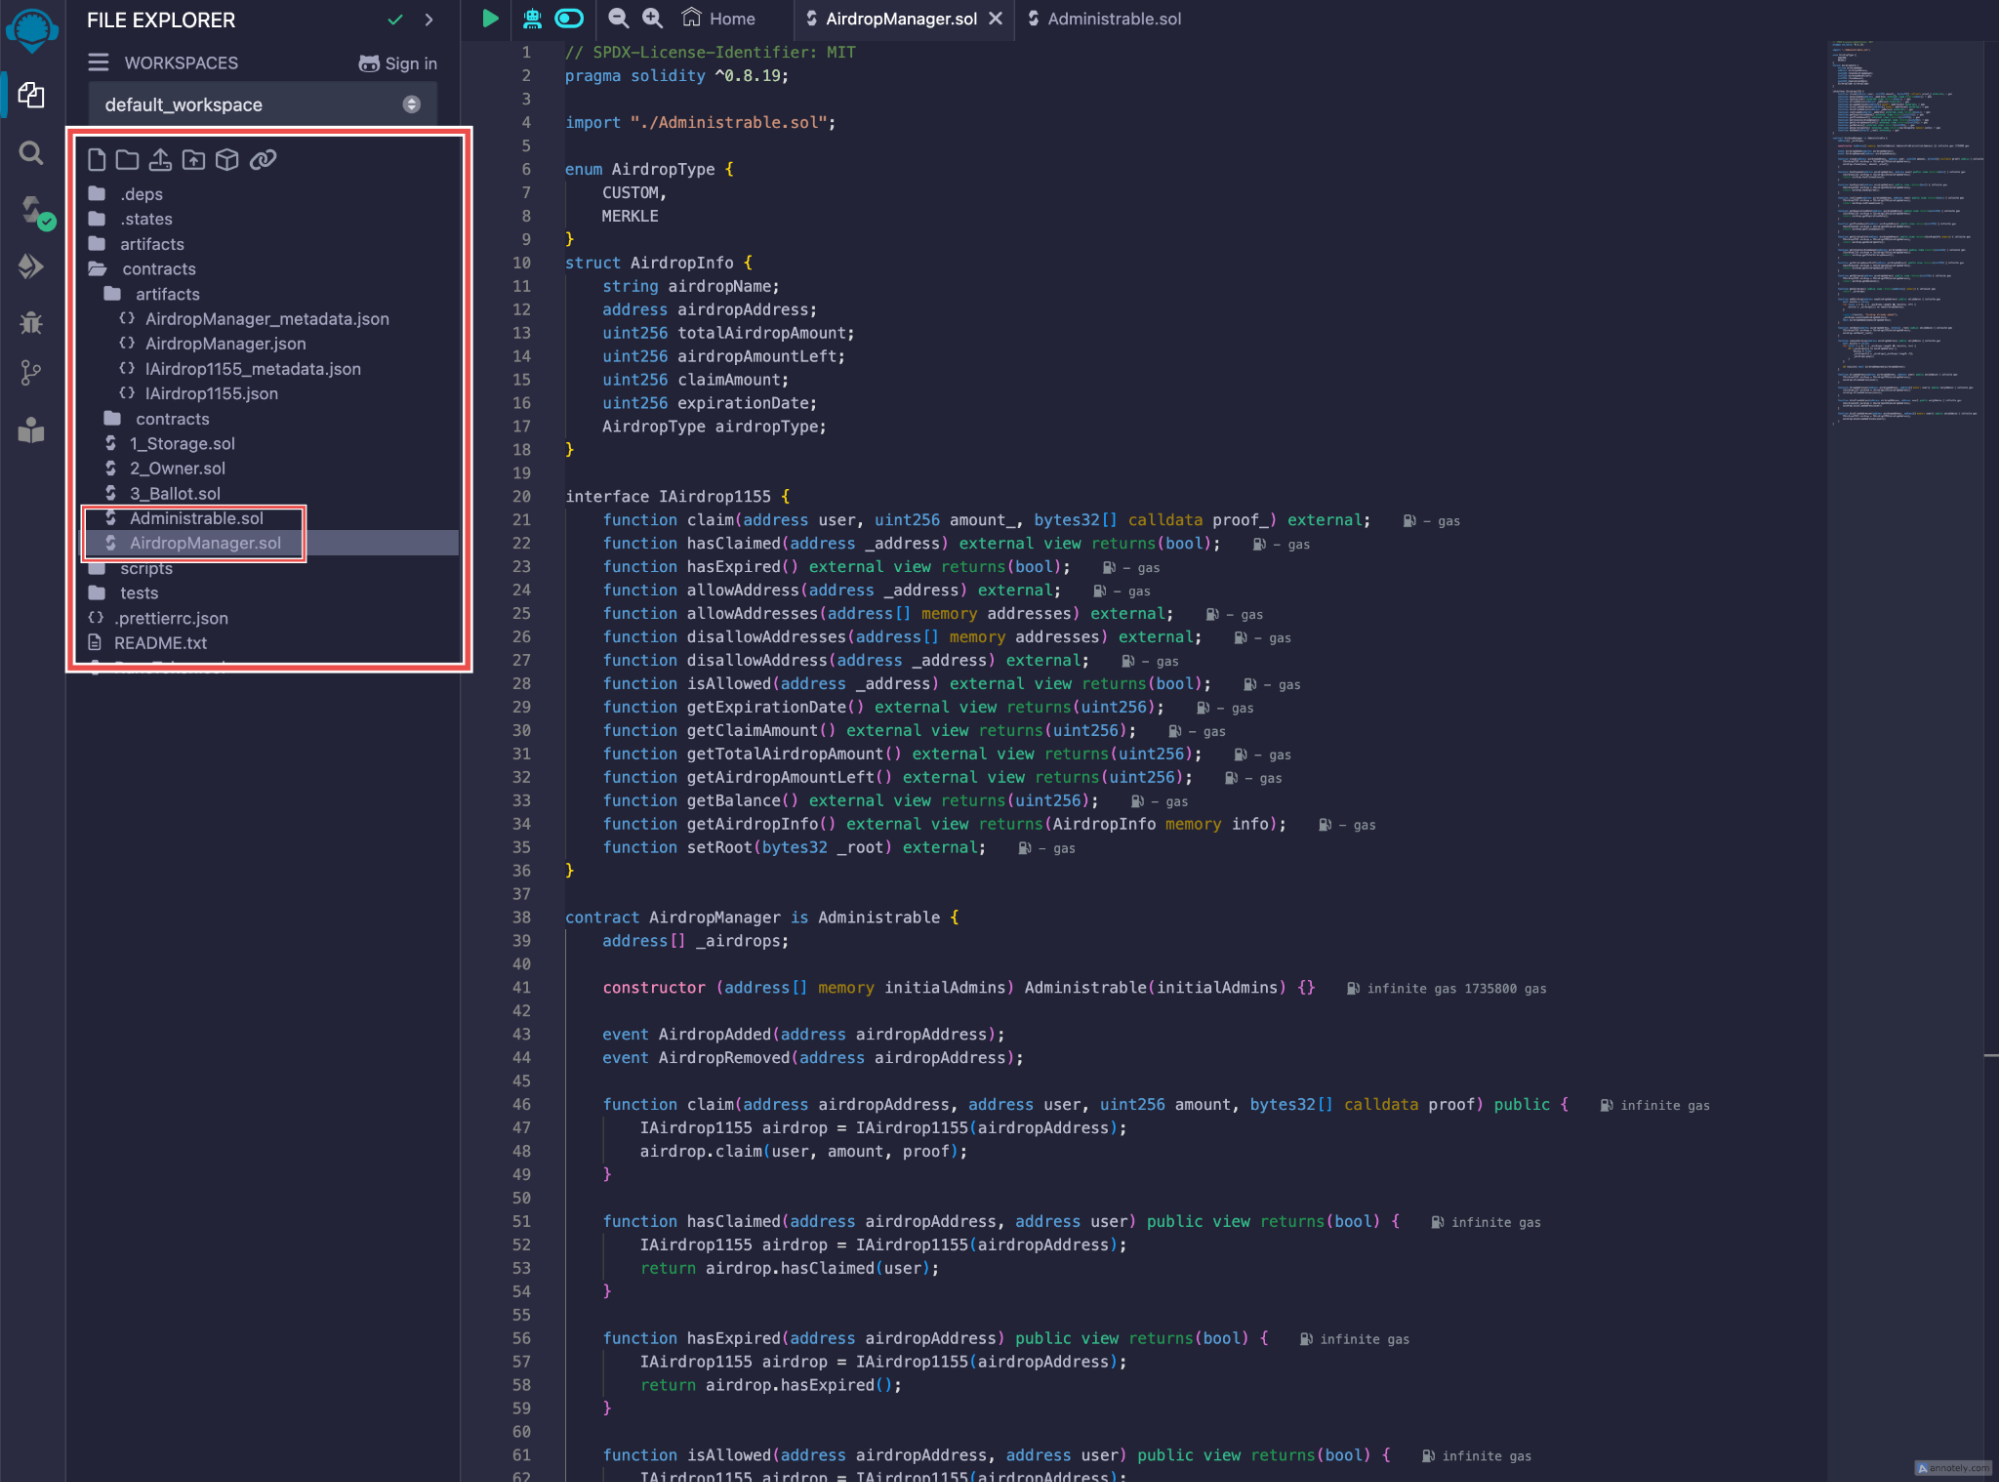
## **Step 2: Prepare the Contracts for Remix IDE**
1. Navigate to the cloned repository and locate the `contracts` folder.
2. Copy the code from both `AirdropManager.sol` and `Administrable.sol` contracts. These files are crucial because the `AirdropManager` contract imports functions from `Administrable.sol`.
3. Paste the contents of both contracts into Remix IDE.
 **Note:** If you're using the latest Solidity version, be aware that some Rootstock contracts may not be fully compatible. We recommend using Solidity version **0.8.20** for better compatibility.
## **Step 3: Compile and Deploy the AirdropManager Contract**
After pasting the contracts into Remix IDE, follow these steps to successfully compile and deploy them:
* **Select Solidity Version**
* Ensure the compiler version is set to **0.8.20** to maintain compatibility with Rootstock contracts.
* **Compile the AirdropManager.sol Contract**
* Click the **Compile AirdropManager.sol** button to compile the contract.
* Make sure there are no errors before proceeding to the next step.
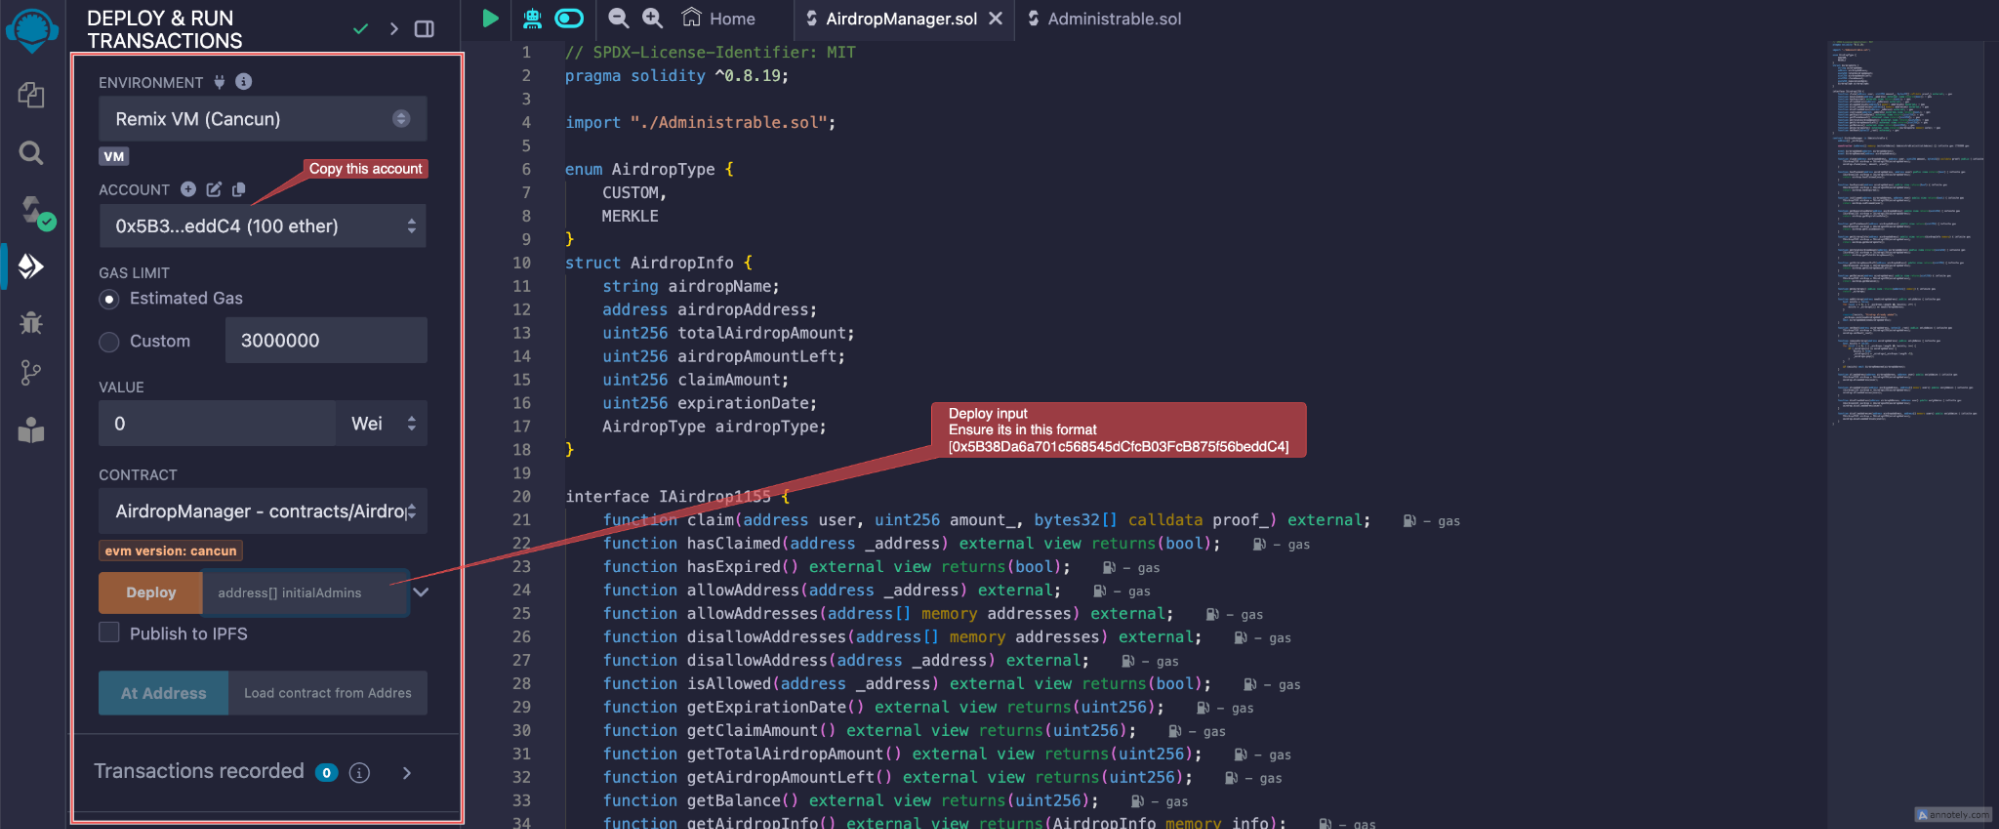
* **Deploy the AirdropManager Contract**
* Go to the **Deploy & Run Transactions** tab in Remix.
* From the **Environment** dropdown, select the Remix VM (Cancun)
* In the **Accounts** section at the top of Remix, copy the first account address.
* Paste this address into the contract deployment input field.
:::tip[Important]
Make sure to enter the address inside square brackets, like this: `[0x5B38Da6a701c568545dCfcB03FcB875f56beddC4]`. If entered incorrectly
(e.g., without brackets), you will encounter the following error:
```
“creation of AirdropManager errored: Error encoding arguments: Error: expected array value (argument=null, value="0x5B38Da6a701c568545dCfcB03FcB875f56beddC4", code=INVALID\_ARGUMENT, version=abi/5.7.0)”.
```
:::
> Double-check that the account address is properly formatted with square brackets to avoid this issue.
**Note:** If you're using the latest Solidity version, be aware that some Rootstock contracts may not be fully compatible. We recommend using Solidity version **0.8.20** for better compatibility.
## **Step 3: Compile and Deploy the AirdropManager Contract**
After pasting the contracts into Remix IDE, follow these steps to successfully compile and deploy them:
* **Select Solidity Version**
* Ensure the compiler version is set to **0.8.20** to maintain compatibility with Rootstock contracts.
* **Compile the AirdropManager.sol Contract**
* Click the **Compile AirdropManager.sol** button to compile the contract.
* Make sure there are no errors before proceeding to the next step.
* **Deploy the AirdropManager Contract**
* Go to the **Deploy & Run Transactions** tab in Remix.
* From the **Environment** dropdown, select the Remix VM (Cancun)
* In the **Accounts** section at the top of Remix, copy the first account address.
* Paste this address into the contract deployment input field.
:::tip[Important]
Make sure to enter the address inside square brackets, like this: `[0x5B38Da6a701c568545dCfcB03FcB875f56beddC4]`. If entered incorrectly
(e.g., without brackets), you will encounter the following error:
```
“creation of AirdropManager errored: Error encoding arguments: Error: expected array value (argument=null, value="0x5B38Da6a701c568545dCfcB03FcB875f56beddC4", code=INVALID\_ARGUMENT, version=abi/5.7.0)”.
```
:::
> Double-check that the account address is properly formatted with square brackets to avoid this issue.
 ## **4\. Deploy the Contract**
* After correctly entering the address, click **Deploy**.
* This will deploy the `AirdropManager` contract, which manages the entire airdrop process, including both custom and Merkle tree-based airdrops.
## **5\. Copy the Contract Address**
## **4\. Deploy the Contract**
* After correctly entering the address, click **Deploy**.
* This will deploy the `AirdropManager` contract, which manages the entire airdrop process, including both custom and Merkle tree-based airdrops.
## **5\. Copy the Contract Address**
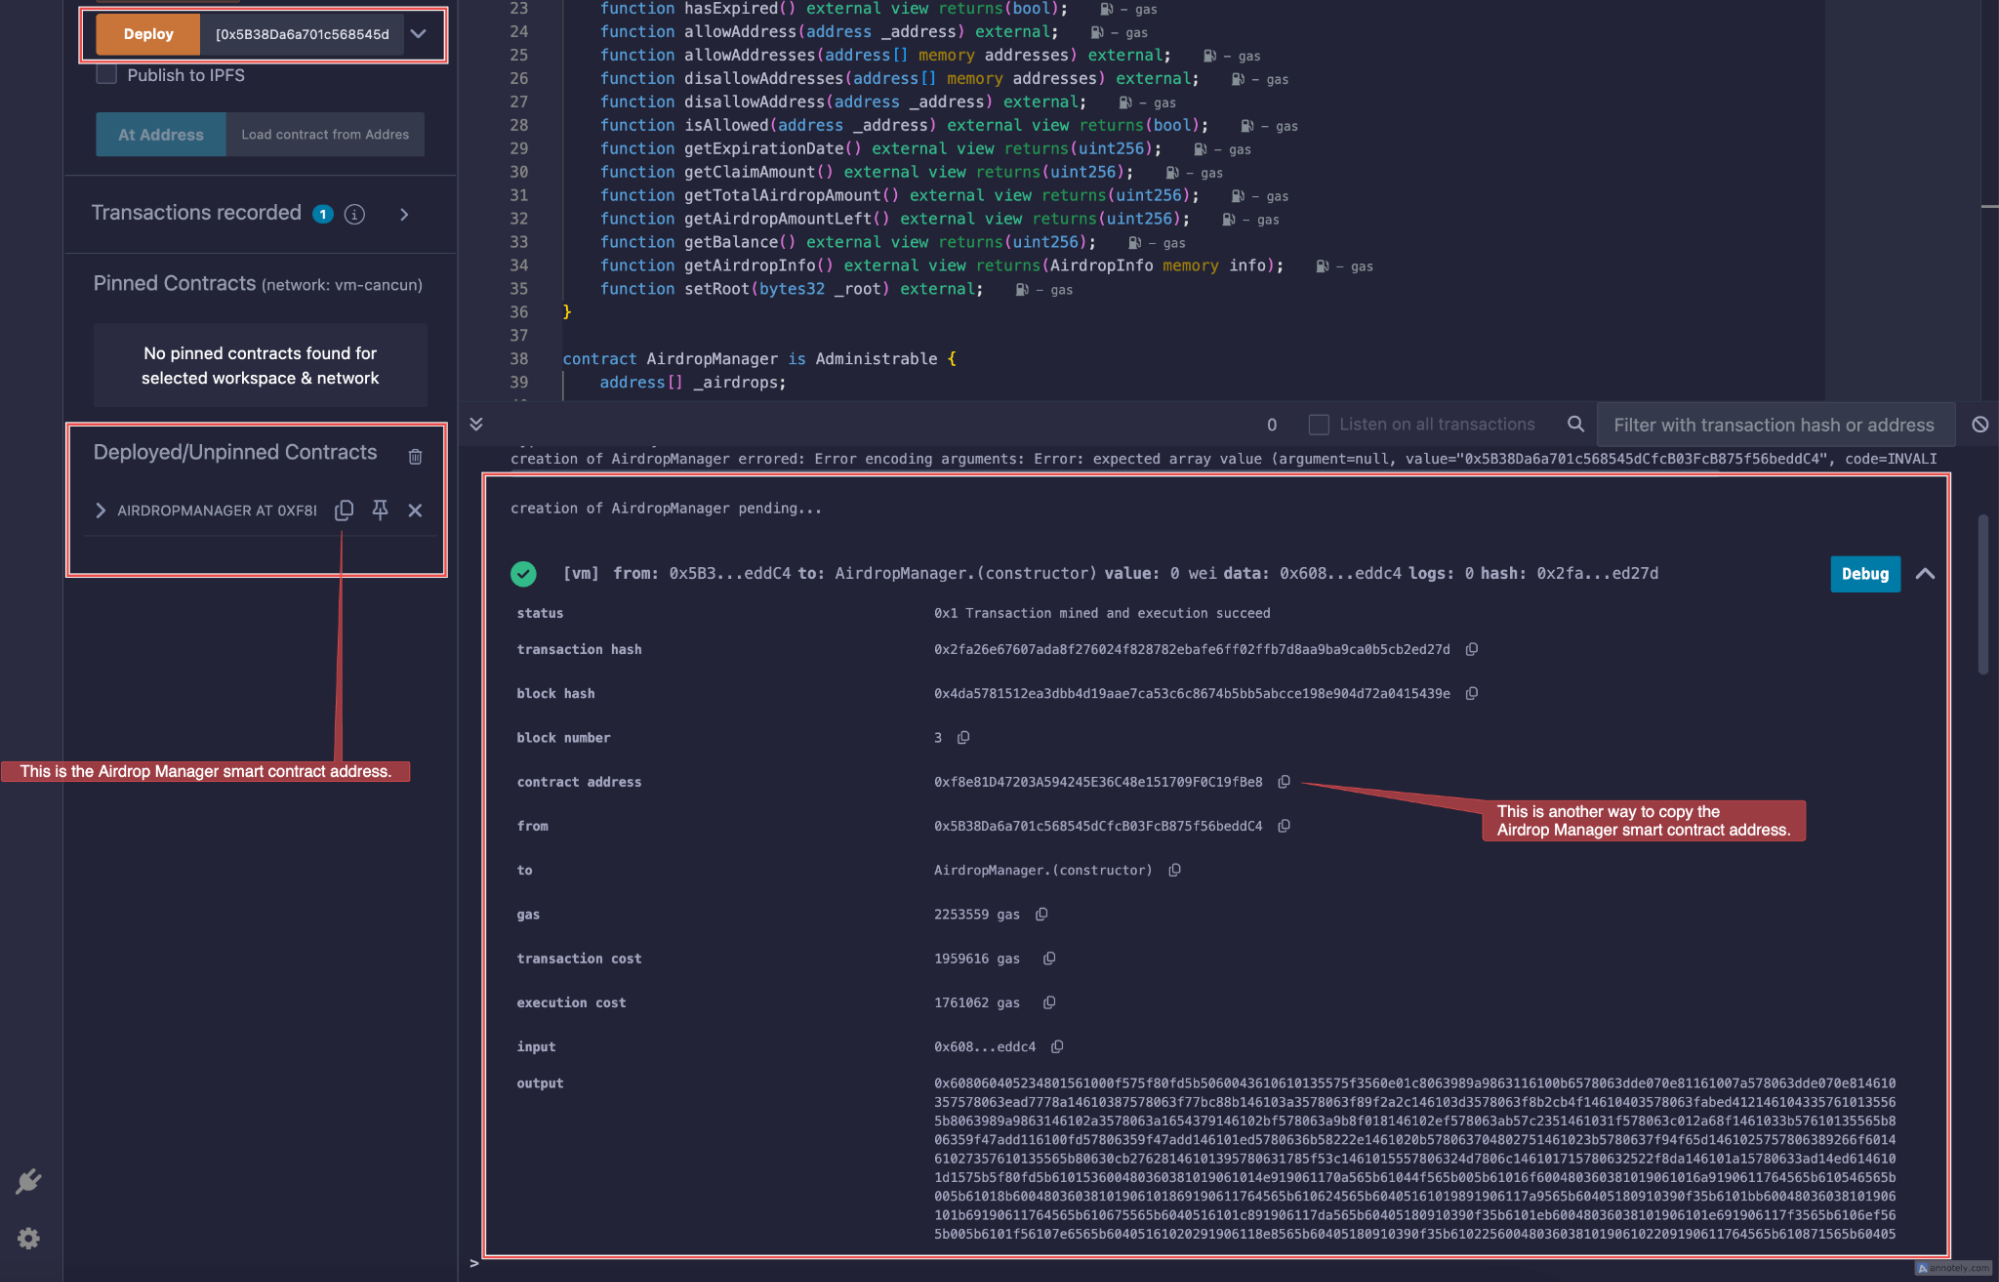 * Once deployment is successful, copy the contract address of the deployed `AirdropManager`.
* This address will be required in your Airdrop UI project.
* Once deployment is successful, copy the contract address of the deployed `AirdropManager`.
* This address will be required in your Airdrop UI project.