> For the complete documentation index, see [llms.txt](/llms.txt).
This guide explains how to navigate the provided interface, connect your wallet, create an EAS Schema, and explore attestations in detail.
## Getting Started
EAS Dashboard on DevTool (fig 1.)
````mdx-code-block
Connecting Your Wallet (fig 2.)
> Adding your wallet only provides access to view your schema and attestations.
Creating an EAS Schema (fig 3.)
2. **Fill Out the Schema Details**:
* **Name**: Enter a descriptive name for the schema.
* **Type**: Select the type of data (e.g., `Address`, `string`, `bool`, `uint8`, etc.).
* If multiple fields are required, click **Add New Field** to define additional data points.
* **Resolver Address** (optional):
* Add a resolver smart contract address if you need custom verification or actions associated with this schema.
* **Is Revocable?**:
* Enable this option if attestations under this schema can be revoked later.
3. **Submit the Schema**:
* Click the **Create Schema** button to deploy the schema on-chain.
4. **Confirmation**:
* Upon successful submission, the schema appears in the list with a unique ID
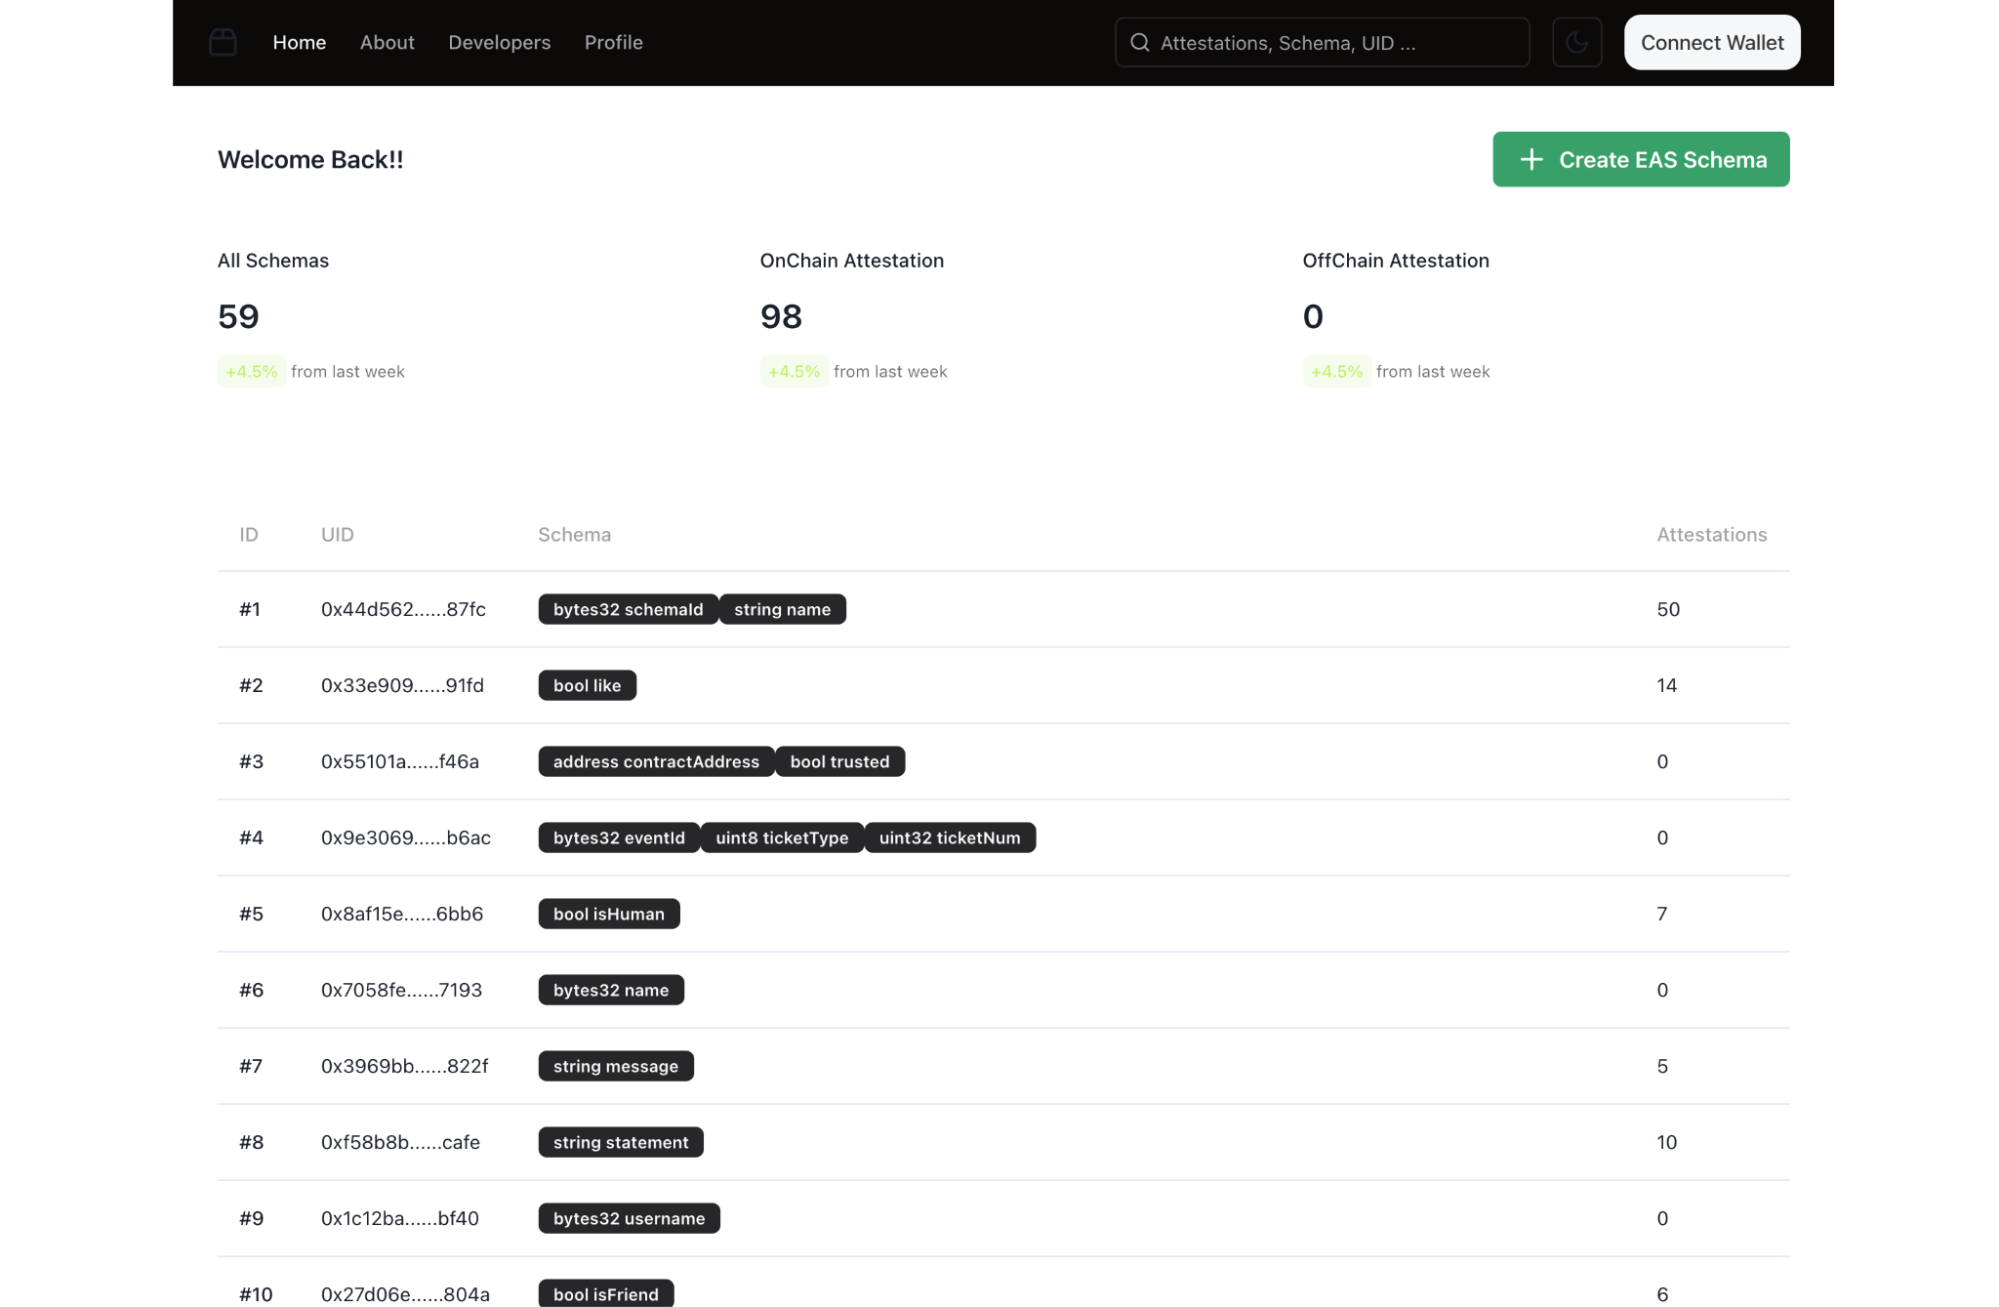
Exploring the Schema List (fig 4.)
1. **Schema Overview**
* **All Schemas**: Displays the total number of schemas created.
* **OnChain Attestation**: Number of attestations linked to schemas stored on-chain.
* **OffChain Attestation**: Number of attestations stored off-chain.
2. **Schema Details**:
* Each row displays:
* **ID**: Unique identifier for the schema.
* **UID**: A unique on-chain reference for the schema.
* **Schema Fields**: Data structure of the schema (e.g., `bytes32 schemaId, string name`).
* **Attestations**: The number of attestations linked to this schema.
3. **Clicking on a Schema**:
* Clicking on a schema opens detailed information about its attestations.
Viewing Attestation Details (fig 5.)
:::info[When you select a schema:]
1. **Header Details**:
* **Schema ID**: The unique identifier for the schema.
* **Total Attestations**: Total attestations associated with the schema (on-chain and off-chain).
* Includes growth percentage over the past week.
* **OnChain/OffChain Attestation Counts**: Breakdowns of attestations.
2. **Schema Metadata**:
* **Created On**: The date the schema was created.
* **Creator**: Wallet address of the schema creator.
* **Transaction ID**: Blockchain transaction ID for the schema creation (clickable for blockchain explorer verification).
* **Resolver Contract**: Address of the custom resolver contract (if any).
* **Revocable Attestations**: Indicates whether attestations can be revoked.
3. **Schema Structure**:
* Displays the fields defined in the schema (e.g., `bytes32 schemaId, string name`).
4. **Attest Button**:
* **Attest this Schema**: Allows creating a new attestation under this schema.
:::
Attest To Schema (fig 6.)
### **Completing the Attestation**
1. **Fill in the Details**:
* Enter the **Recipient Address** and all required values for the schema fields.
* Double-check that the data aligns with the schema's structure.
2. **Submit or Close**:
* **Attest Button**:
* Click the **Attest** button to finalize and submit the attestation.
* **Close Button**:
* If you wish to cancel the process, click the **Close** button to exit the modal without submitting.
### **Processing the Attestation**
1. **On Submission**:
* After clicking **Attest**, the attestation will be sent to the blockchain for processing.
* A transaction approval modal may appear via your connected wallet. Approve the transaction to proceed.
2. **Confirmation**:
* After a few minutes, the attestation will be confirmed on the blockchain.
### **Viewing the Completed Attestation**
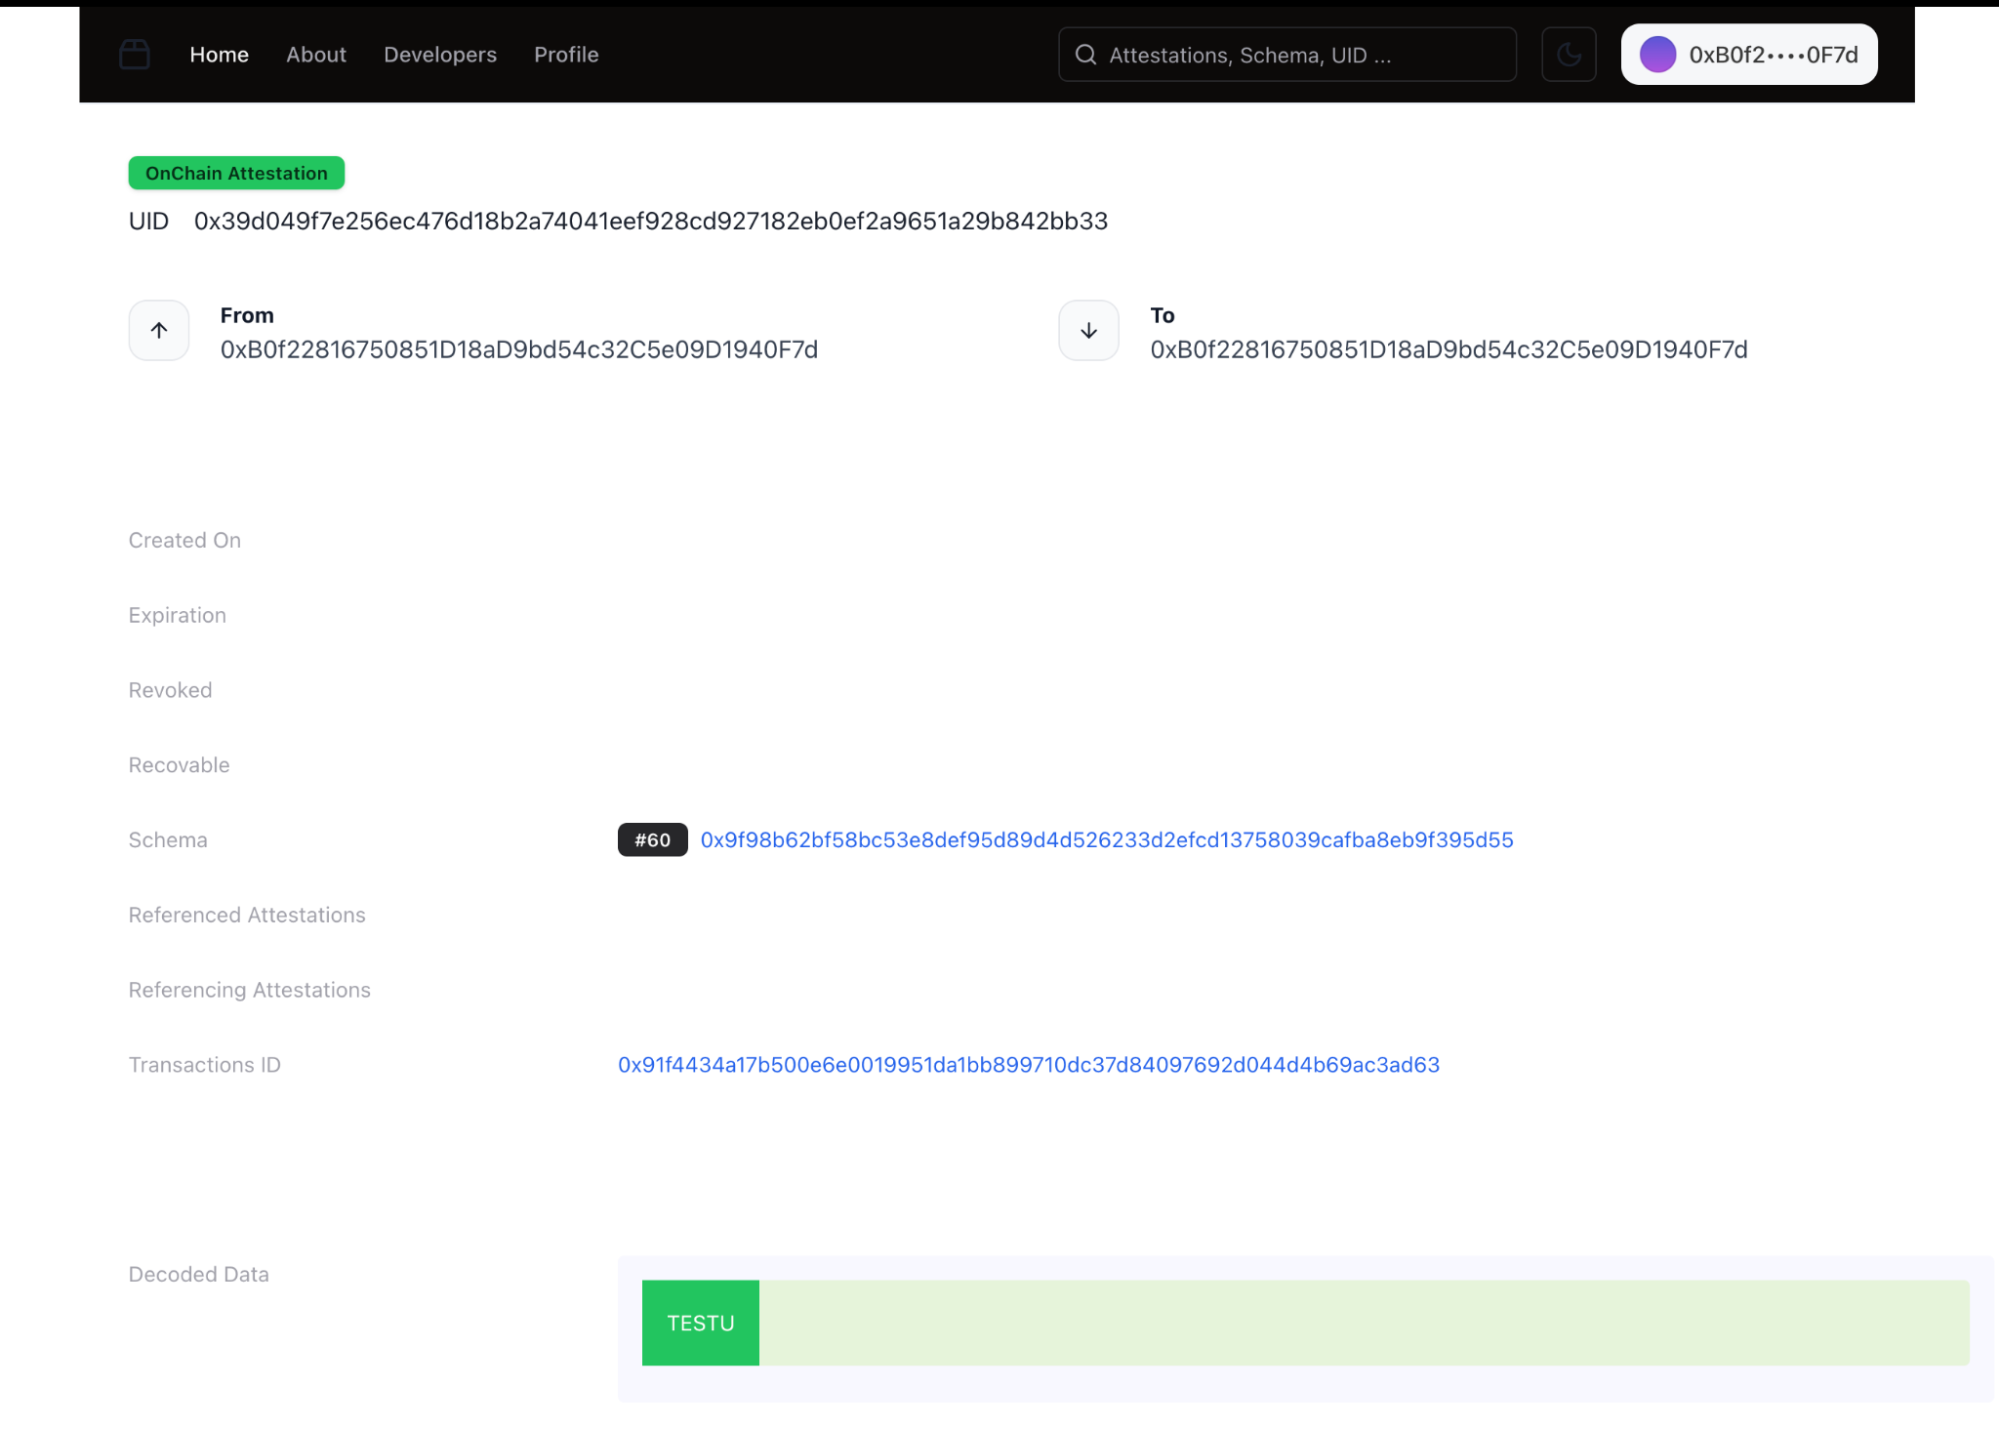
Viewing the Completed Attestation (fig 7.)
**Post-Attestation View**:
* Once confirmed, the attestation details will appear in the schema details page under its **Attestations** count.
* The attestation data can now be viewed as part of the schema's record.
````