> For the complete documentation index, see [llms.txt](/llms.txt).
The Rootstock Reown-Wagmi starter kit provides a foundation for building decentralized applications (dApps) on the Rootstock blockchain.
It leverages the security of Bitcoin and the flexibility of Ethereum.
The kit uses [Reown](https://reown.com/) (previously WalletConnect) to handle wallet management, [Wagmi](https://wagmi.sh/), a React Hooks library, to simplify smart contracts and blockchain network interactions, and [Shadcn libraries](https://ui.shadcn.com/), a set of customizable and accessible UI components for React, designed to streamline frontend development.
> This starter kit is designed to help developers jump-start their dApp development journey on Rootstock.
## What you'll achieve
- Configure Reown AppKit and connect wallets to Rootstock
- Read contract state and send transactions from a React frontend
- Customize the UI with Shadcn components for your dApp
## Prerequisites
- **Node.js and Git:** Ensure that Node.js and Git are installed on your system.
- See the [Prerequisites](/developers/requirements/#installing-nodejs-and-npm) section for how to download Node.js using NVM.
- **Package Manager:** You can use either Yarn or npm to manage your project dependencies:
- **Yarn:** Install Yarn, a package manager for Node.js projects. You can do this by running the following command in your terminal:
```bash
npm install -g yarn
```
- **npm:** npm comes bundled with the Node.js installation. To verify your npm installation, run:
```bash
npm -v
```
If you need to update npm to the latest version, you can run:
```bash
npm install -g npm@latest
```
- **Basic Knowledge:**
- [React](https://react.dev/) (a JavaScript library for building user interfaces)
- [Solidity](https://soliditylang.org/) (a programming language for Ethereum smart contracts).
:::tip[Rootstock Blockchain Developer Course]
Learn how to write, test, secure, deploy, and verify smart contracts on the Rootstock blockchain network. Enroll in the [Rootstock Blockchain Developer Course](/resources/courses/).
:::
## Setup
### 1. Clone the Repository
First, you’ll need to clone the Rootstock Reown Starter Kit repository. Open your terminal and run the following commands:
```bash
git clone https://github.com/rsksmart/rsk-reown-starter-kit
cd rsk-reown-starter-kit
```
### 2. Get Project ID
Every dApp that relies on Reown (previously WalletConnect) now needs to obtain a project ID from [Reown Cloud](https://cloud.reown.com). This is free and only takes a few minutes.
To get the key:
1. Go to [Reown](https://cloud.reown.com/sign-in) and sign up.
2. Create a new project by clicking on **Create Project**.
3. Add a name and link to your project, on the product selection screen, select **WalletKit** and continue.
4. Your project ID is shown in the left menu under your project name. Click to copy it
### 3. Environment Setup
To set up your environment, follow these steps:
- Create a `.env` file and add environment variables.
```text
VITE_WC_PROJECT_ID=Your project ID from Reown Cloud
VITE_BUNDLER_API_KEY='etherspot_public_key'
VITE_CUSTOM_BUNDLER_URL=https://rootstocktestnet-bundler.etherspot.io/
```
- Enter your project ID. For testnet purposes, you can keep the Etherspot Bundler API key and Bundler URL. If you need a production environment, please go to [Etherspot](https://etherspot.io/), create an account, and obtain your API key.
### 4. Install Dependencies
Before running the project, make sure to have the necessary dependencies installed. You can use NPM or Yarn. Run the following command to install dependencies:
```bash
yarn
```
### 5. Run the Project
Now that you’ve cloned the repository and installed dependencies, it’s time to run the project. Execute the following command:
```bash
yarn dev
```
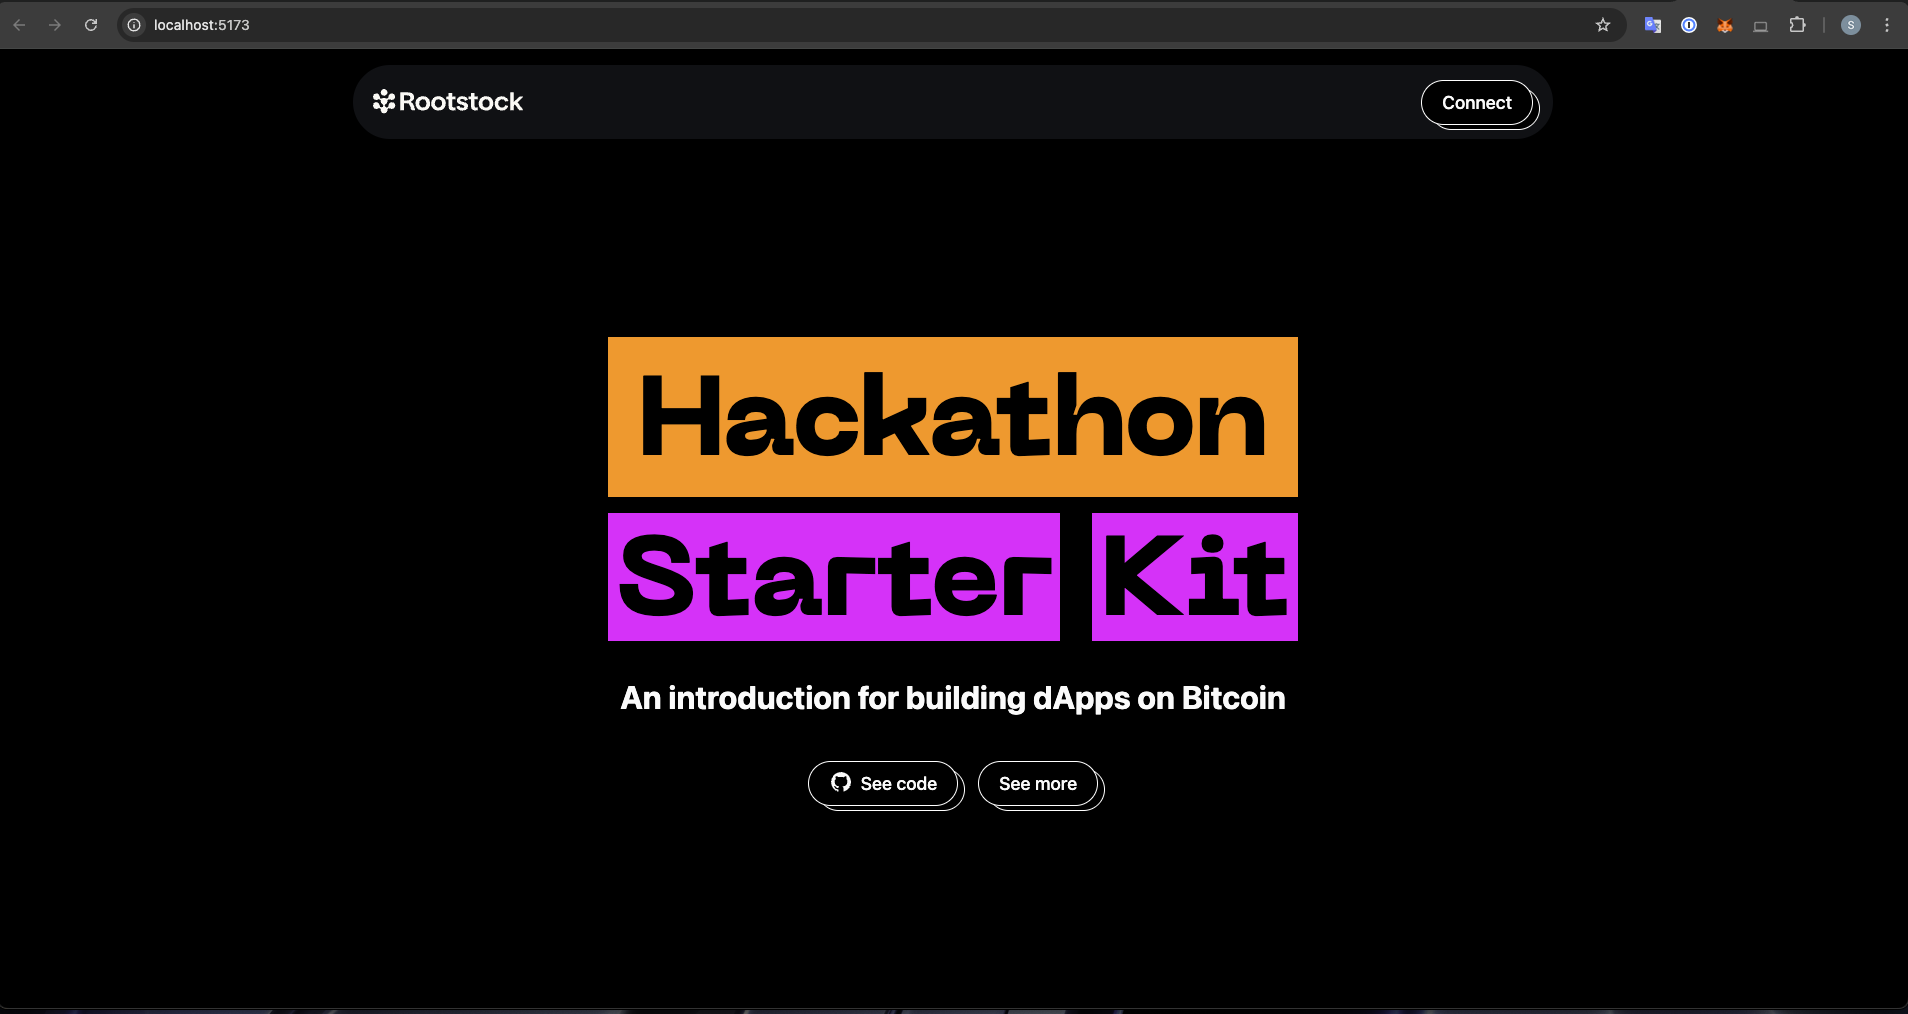
This will start the Rootstock Reown Starter dApp locally, allowing you to develop and test your smart contracts. You can access the Vite server at [http://localhost:5173](http://localhost:5173).
## Result
 :::info[Info]
After successfully running your project using the command above, do the following:
- Click the “Connect” button to log in. Once connected, you can:
- **Switch Networks:** Easily switch between Mainnet and Testnet.
- **View and Copy Your Address:** Access your wallet address.
- **Check Your tRBTC Balance:** See your tRBTC balance.
- **Disconnect:** Log out from the project.
:::
## Test Project
To test the project, follow these simple steps:
1. **Connect Your Wallet:** Click the “Connect” button.
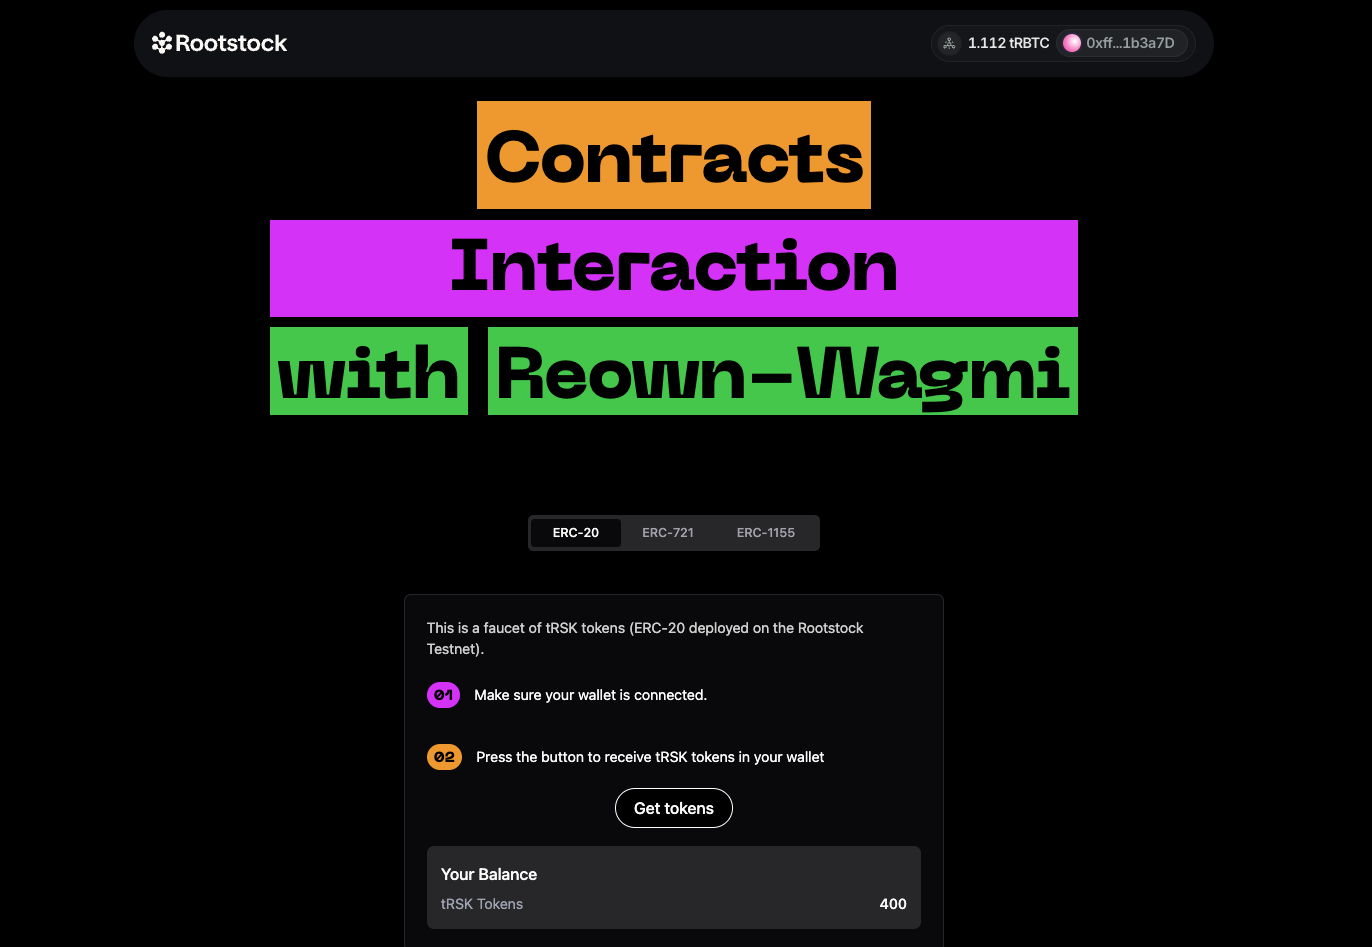
2. **Navigate to the Reown-Wagmi Section:** Scroll down and find the card labeled “Contract Interaction with Reown Starter Kit.” Click it.
3. **Explore the Tabs:** In the Wagmi section, you’ll see three tabs: ERC-20, ERC-721, and ERC-1155. Click on any of these tabs to explore further.
:::info[Info]
After successfully running your project using the command above, do the following:
- Click the “Connect” button to log in. Once connected, you can:
- **Switch Networks:** Easily switch between Mainnet and Testnet.
- **View and Copy Your Address:** Access your wallet address.
- **Check Your tRBTC Balance:** See your tRBTC balance.
- **Disconnect:** Log out from the project.
:::
## Test Project
To test the project, follow these simple steps:
1. **Connect Your Wallet:** Click the “Connect” button.
2. **Navigate to the Reown-Wagmi Section:** Scroll down and find the card labeled “Contract Interaction with Reown Starter Kit.” Click it.
3. **Explore the Tabs:** In the Wagmi section, you’ll see three tabs: ERC-20, ERC-721, and ERC-1155. Click on any of these tabs to explore further.
 ## Understanding the Codebase
### Folder Structure
```
public
src
Src
.env
.env.example
```
The `src` folder is organized to streamline the development process and facilitate locating specific code or assets. Here's a detailed breakdown:
#### `.src` Folder Structure
- **Assets:** Contains the ABIs (Application Binary Interfaces) for ERC20, ERC721, and ERC1155.
- **Components:**
- **AccountAbstraction:** Contains code related to account abstraction.
- **Home:** Holds components specific to the homepage.
- **Icons:** Contains various icon components.
- **Tokens:** Includes components for different token types.
- **UI:** General UI components used across the application.
- **Footers.tsx:** Footer component.
- **Navbar.tsx:** Navbar component.
- **Config:**
- **config.ts:** Holds the Wagmi configuration for Reown (WalletConnect) implementation.
- **provider.tsx:** Configuration for web3 providers.
- **wagmiProviderConfig.ts:** Configuration for Wagmi providers.
- **Lib:** Contains various utility folders for easy organization:
- **Constants:** Application constants.
- **Functions:** General functions used across the app.
- **Types:** Type definitions.
- **Utils:** Utility functions.
- **Pages:**
- **index.ts:** Main entry point.
- **Etherspot.tsx:** Page component for Etherspot.
- **Home.tsx:** Homepage component.
- **Wagmi.tsx:** Wagmi-related page component.
### Code for ERC20, ERC721, and ERC1155 Tabs
The code responsible for the tabs corresponding to ERC20, ERC721, and ERC1155 can be found within the components folder:
- **ERC20:** Located in the `components/tokens/ERC20` directory.
- **ERC721:** Located in the `components/tokens/ERC721` directory.
- **ERC1155:** Located in the `components/tokens/ERC1155` directory.
This structured approach ensures that code and assets are logically grouped, facilitating ease of navigation and maintainability.
#### Understanding the ERC20 Tab Code
The code interacts with a smart contract to mint tRSK tokens. Here's a detailed breakdown of how this is achieved:
1. **Smart Contract Reference:**
- **Address:** The smart contract's address is specified by the `ERC20_ADDRESS` constant.
- **ABI:** The contract's ABI (Application Binary Interface), which defines the contract functions and their parameters, is provided by the `abi` constant.
2. **Reading Contract Data:**
```javascript
const { data, isLoading, isError, refetch } = useReadContract({
abi,
address: ERC20_ADDRESS,
functionName: "balanceOf",
args: [address],
});
```
3. **Writing to the Contract:**
The `useWriteContract` hook from the wagmi library is used to interact with the contract's write functions (functions that modify the state).
4. **Minting Tokens:**
The `mintTokens` function calls `writeContractAsync` to mint tRSK tokens.
- Arguments:
- abi: Defines the contract functions and their parameters.
- address: The address of the deployed ERC-20 contract.
- functionName: The name of the function to call, which is "mint" in this case.
- args: An array containing the user's wallet address and the amount to mint (100 in this case).
```javascript
const mintTokens = async () => {
setLoading(true);
try {
const txHash = await writeContractAsync({
abi,
address: ERC20_ADDRESS,
functionName: "mint",
args: [address, 100],
});
await waitForTransactionReceipt(config, {
confirmations: 1,
hash: txHash,
});
setLoading(false);
toast({
title: "Successfully minted tRSK tokens",
description: "Refresh the page to see changes",
});
refetch();
} catch (e) {
toast({
title: "Error",
description: "Failed to mint tRSK tokens",
variant: "destructive",
});
setLoading(false);
console.error(e);
}
};
```
This sends a transaction to the blockchain to execute the "mint" function on the smart contract, thereby minting tRSK tokens and depositing them into the user's wallet.
## Understanding the ERC721 Tab Code
This code defines a React component named `ERC721Tab`, which provides a user interface for interacting with an ERC-721 smart contract.
The Key Functions Within This Component:
1. `useReadContract`:
This hook is used to read data from the ERC-721 contract. It fetches the balance of NFTs held by the connected user's address.
- **Parameters**:
- `abi`: The ABI (Application Binary Interface) of the ERC-721 contract.
- `address`: The address of the ERC-721 contract.
- `functionName`: The name of the function to call on the contract (balanceOf).
- `args`: The arguments to pass to the contract function ([address]).
2. `useWriteContract`:
This hook is used to write data to the ERC-721 contract, specifically to mint a new NFT.
**Function**:
- `writeContractAsync`: Asynchronously writes to the contract by calling the `safeMint` function of the ERC-721 contract.
3. `mintNFT`:
This is an asynchronous function that handles the minting process of a new NFT.
- **Steps**:
- Sets the loading state to true.
- Attempts to call the `safeMint` function on the ERC-721 contract using `writeContractAsync`.
- Waits for the transaction to be confirmed using `waitForTransactionReceipt`.
- Displays a success toast message if the minting is successful.
- Refetches the user's NFT balance by calling `refetch`.
- Catches any errors, logs them, and displays an error toast message.
- Sets the loading state to false.
4. `refetch`:
This function is part of the `useReadContract` hook and is used to refresh the balance of NFTs after a successful minting operation.
5. `toast`:
This function is used to display toast notifications for success or error messages.
The rest of the component contains JSX to render the UI elements, including a button to mint the NFT, a balance display, and a link to view the minted NFTs on a block explorer.
## Understanding the ERC1155 Tab Code
The code provided is a React component that interacts with a smart contract using the ERC-1155 standard. It allows users to mint tokens and check their balances.
The Key Functions Within This Component:
1. `ERC1155Tab` Component:
**State Variables**:
- `loading`: Boolean to manage the loading state during token minting.
- `value`: Number to store the selected token type for minting.
- `address`: The user's wallet address obtained from the `useAccount` hook.
2. `useReadContract` Hooks:
These hooks are used to read data from the smart contract.
- `useReadContract` for checking the balance of Type A tokens (with ID 1).
- `useReadContract` for checking the balance of Type B tokens (with ID 2).
3. `mintTokens` Function:
An asynchronous function that handles the minting of tokens.
- **Steps**:
- Calls `writeContractAsync` to interact with the smart contract and mint tokens.
- Waits for the transaction receipt using `waitForTransactionReceipt`.
- Displays success or error toasts based on the outcome.
- Refetches the balance data after minting.
## Join the Community
Building dApps can be challenging, but you’re not alone.
Join the [Rootstock Discord](http://discord.gg/rootstock) community for help, questions, and collaboration.
## Understanding the Codebase
### Folder Structure
```
public
src
Src
.env
.env.example
```
The `src` folder is organized to streamline the development process and facilitate locating specific code or assets. Here's a detailed breakdown:
#### `.src` Folder Structure
- **Assets:** Contains the ABIs (Application Binary Interfaces) for ERC20, ERC721, and ERC1155.
- **Components:**
- **AccountAbstraction:** Contains code related to account abstraction.
- **Home:** Holds components specific to the homepage.
- **Icons:** Contains various icon components.
- **Tokens:** Includes components for different token types.
- **UI:** General UI components used across the application.
- **Footers.tsx:** Footer component.
- **Navbar.tsx:** Navbar component.
- **Config:**
- **config.ts:** Holds the Wagmi configuration for Reown (WalletConnect) implementation.
- **provider.tsx:** Configuration for web3 providers.
- **wagmiProviderConfig.ts:** Configuration for Wagmi providers.
- **Lib:** Contains various utility folders for easy organization:
- **Constants:** Application constants.
- **Functions:** General functions used across the app.
- **Types:** Type definitions.
- **Utils:** Utility functions.
- **Pages:**
- **index.ts:** Main entry point.
- **Etherspot.tsx:** Page component for Etherspot.
- **Home.tsx:** Homepage component.
- **Wagmi.tsx:** Wagmi-related page component.
### Code for ERC20, ERC721, and ERC1155 Tabs
The code responsible for the tabs corresponding to ERC20, ERC721, and ERC1155 can be found within the components folder:
- **ERC20:** Located in the `components/tokens/ERC20` directory.
- **ERC721:** Located in the `components/tokens/ERC721` directory.
- **ERC1155:** Located in the `components/tokens/ERC1155` directory.
This structured approach ensures that code and assets are logically grouped, facilitating ease of navigation and maintainability.
#### Understanding the ERC20 Tab Code
The code interacts with a smart contract to mint tRSK tokens. Here's a detailed breakdown of how this is achieved:
1. **Smart Contract Reference:**
- **Address:** The smart contract's address is specified by the `ERC20_ADDRESS` constant.
- **ABI:** The contract's ABI (Application Binary Interface), which defines the contract functions and their parameters, is provided by the `abi` constant.
2. **Reading Contract Data:**
```javascript
const { data, isLoading, isError, refetch } = useReadContract({
abi,
address: ERC20_ADDRESS,
functionName: "balanceOf",
args: [address],
});
```
3. **Writing to the Contract:**
The `useWriteContract` hook from the wagmi library is used to interact with the contract's write functions (functions that modify the state).
4. **Minting Tokens:**
The `mintTokens` function calls `writeContractAsync` to mint tRSK tokens.
- Arguments:
- abi: Defines the contract functions and their parameters.
- address: The address of the deployed ERC-20 contract.
- functionName: The name of the function to call, which is "mint" in this case.
- args: An array containing the user's wallet address and the amount to mint (100 in this case).
```javascript
const mintTokens = async () => {
setLoading(true);
try {
const txHash = await writeContractAsync({
abi,
address: ERC20_ADDRESS,
functionName: "mint",
args: [address, 100],
});
await waitForTransactionReceipt(config, {
confirmations: 1,
hash: txHash,
});
setLoading(false);
toast({
title: "Successfully minted tRSK tokens",
description: "Refresh the page to see changes",
});
refetch();
} catch (e) {
toast({
title: "Error",
description: "Failed to mint tRSK tokens",
variant: "destructive",
});
setLoading(false);
console.error(e);
}
};
```
This sends a transaction to the blockchain to execute the "mint" function on the smart contract, thereby minting tRSK tokens and depositing them into the user's wallet.
## Understanding the ERC721 Tab Code
This code defines a React component named `ERC721Tab`, which provides a user interface for interacting with an ERC-721 smart contract.
The Key Functions Within This Component:
1. `useReadContract`:
This hook is used to read data from the ERC-721 contract. It fetches the balance of NFTs held by the connected user's address.
- **Parameters**:
- `abi`: The ABI (Application Binary Interface) of the ERC-721 contract.
- `address`: The address of the ERC-721 contract.
- `functionName`: The name of the function to call on the contract (balanceOf).
- `args`: The arguments to pass to the contract function ([address]).
2. `useWriteContract`:
This hook is used to write data to the ERC-721 contract, specifically to mint a new NFT.
**Function**:
- `writeContractAsync`: Asynchronously writes to the contract by calling the `safeMint` function of the ERC-721 contract.
3. `mintNFT`:
This is an asynchronous function that handles the minting process of a new NFT.
- **Steps**:
- Sets the loading state to true.
- Attempts to call the `safeMint` function on the ERC-721 contract using `writeContractAsync`.
- Waits for the transaction to be confirmed using `waitForTransactionReceipt`.
- Displays a success toast message if the minting is successful.
- Refetches the user's NFT balance by calling `refetch`.
- Catches any errors, logs them, and displays an error toast message.
- Sets the loading state to false.
4. `refetch`:
This function is part of the `useReadContract` hook and is used to refresh the balance of NFTs after a successful minting operation.
5. `toast`:
This function is used to display toast notifications for success or error messages.
The rest of the component contains JSX to render the UI elements, including a button to mint the NFT, a balance display, and a link to view the minted NFTs on a block explorer.
## Understanding the ERC1155 Tab Code
The code provided is a React component that interacts with a smart contract using the ERC-1155 standard. It allows users to mint tokens and check their balances.
The Key Functions Within This Component:
1. `ERC1155Tab` Component:
**State Variables**:
- `loading`: Boolean to manage the loading state during token minting.
- `value`: Number to store the selected token type for minting.
- `address`: The user's wallet address obtained from the `useAccount` hook.
2. `useReadContract` Hooks:
These hooks are used to read data from the smart contract.
- `useReadContract` for checking the balance of Type A tokens (with ID 1).
- `useReadContract` for checking the balance of Type B tokens (with ID 2).
3. `mintTokens` Function:
An asynchronous function that handles the minting of tokens.
- **Steps**:
- Calls `writeContractAsync` to interact with the smart contract and mint tokens.
- Waits for the transaction receipt using `waitForTransactionReceipt`.
- Displays success or error toasts based on the outcome.
- Refetches the balance data after minting.
## Join the Community
Building dApps can be challenging, but you’re not alone.
Join the [Rootstock Discord](http://discord.gg/rootstock) community for help, questions, and collaboration.