Time to read: 1 min
Navigating the EAS Dashboard
This guide explains how to navigate the provided interface, connect your wallet, create an EAS Schema, and explore attestations in detail.
Getting Started
Connecting Your Wallet
- Locate the "Connect Wallet" Button:
- At the top-right corner of the page, you will see the Connect Wallet button.
- Click the "Connect Wallet" Button:
- A wallet connection modal will open, allowing you to choose your preferred cryptocurrency wallet (e.g., MetaMask, WalletConnect, etc.).
- Authenticate:
- Select your wallet and authorize the connection.
- Ensure your wallet is set to the correct blockchain network supported by the EAS platform.
- Verify the Connection:
- Once connected, your wallet address will replace the Connect Wallet button, confirming the link.
Adding your wallet only provides access to view your schema and attestations.
Creating an EAS Schema
- Click "Create EAS Schema":
- Located at the top-right corner of the interface.
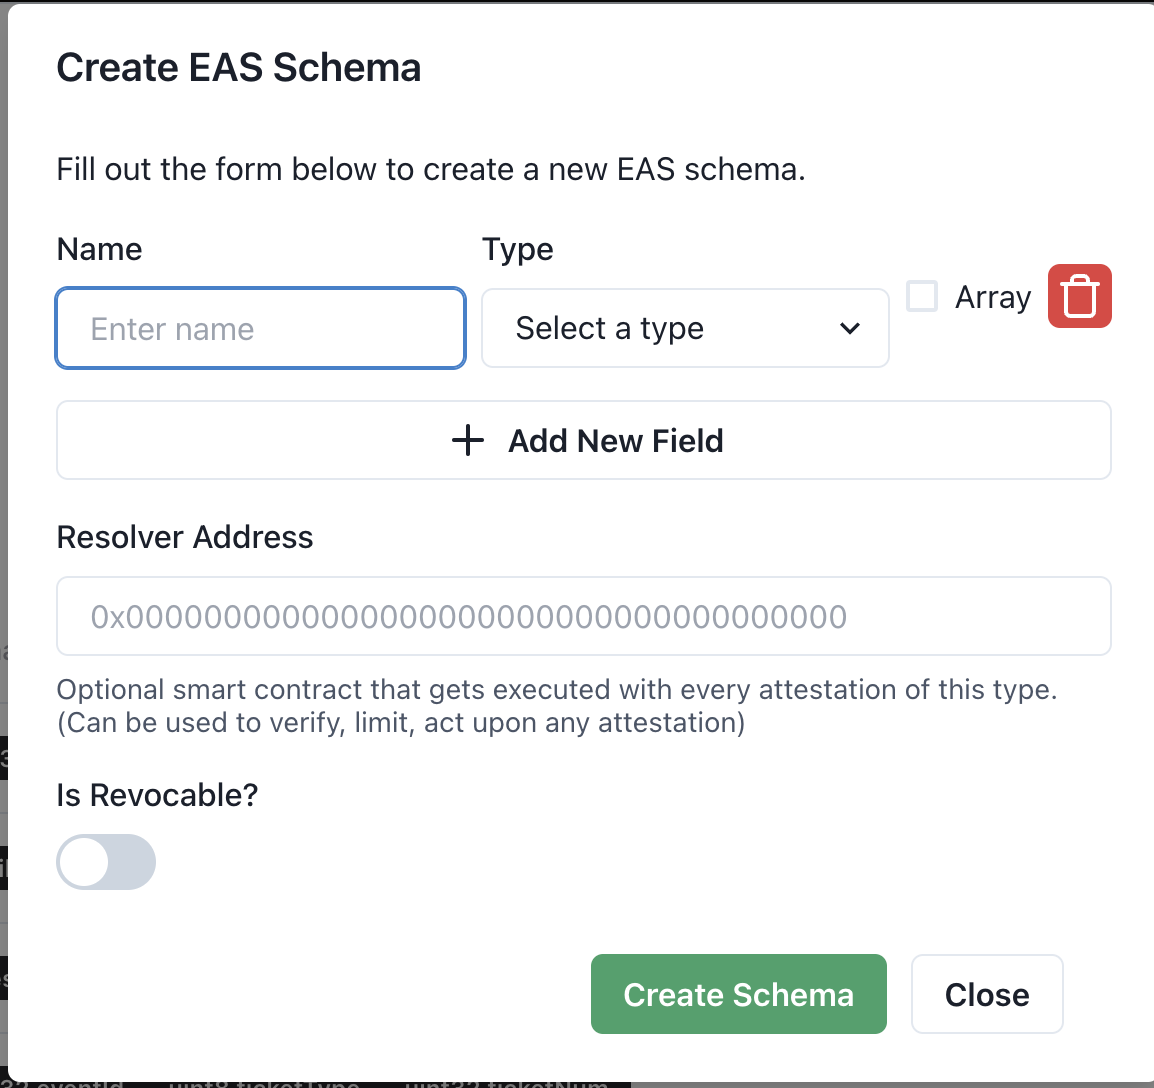
- Fill Out the Schema Details:
- Name: Enter a descriptive name for the schema.
- Type: Select the type of data (e.g.,
Address,string,bool,uint8, etc.).- If multiple fields are required, click Add New Field to define additional data points.
- Resolver Address (optional):
- Add a resolver smart contract address if you need custom verification or actions associated with this schema.
- Is Revocable?:
- Enable this option if attestations under this schema can be revoked later.
- Submit the Schema:
- Click the Create Schema button to deploy the schema on-chain.
- Confirmation:
- Upon successful submission, the schema appears in the list with a unique ID
Exploring the Schema List

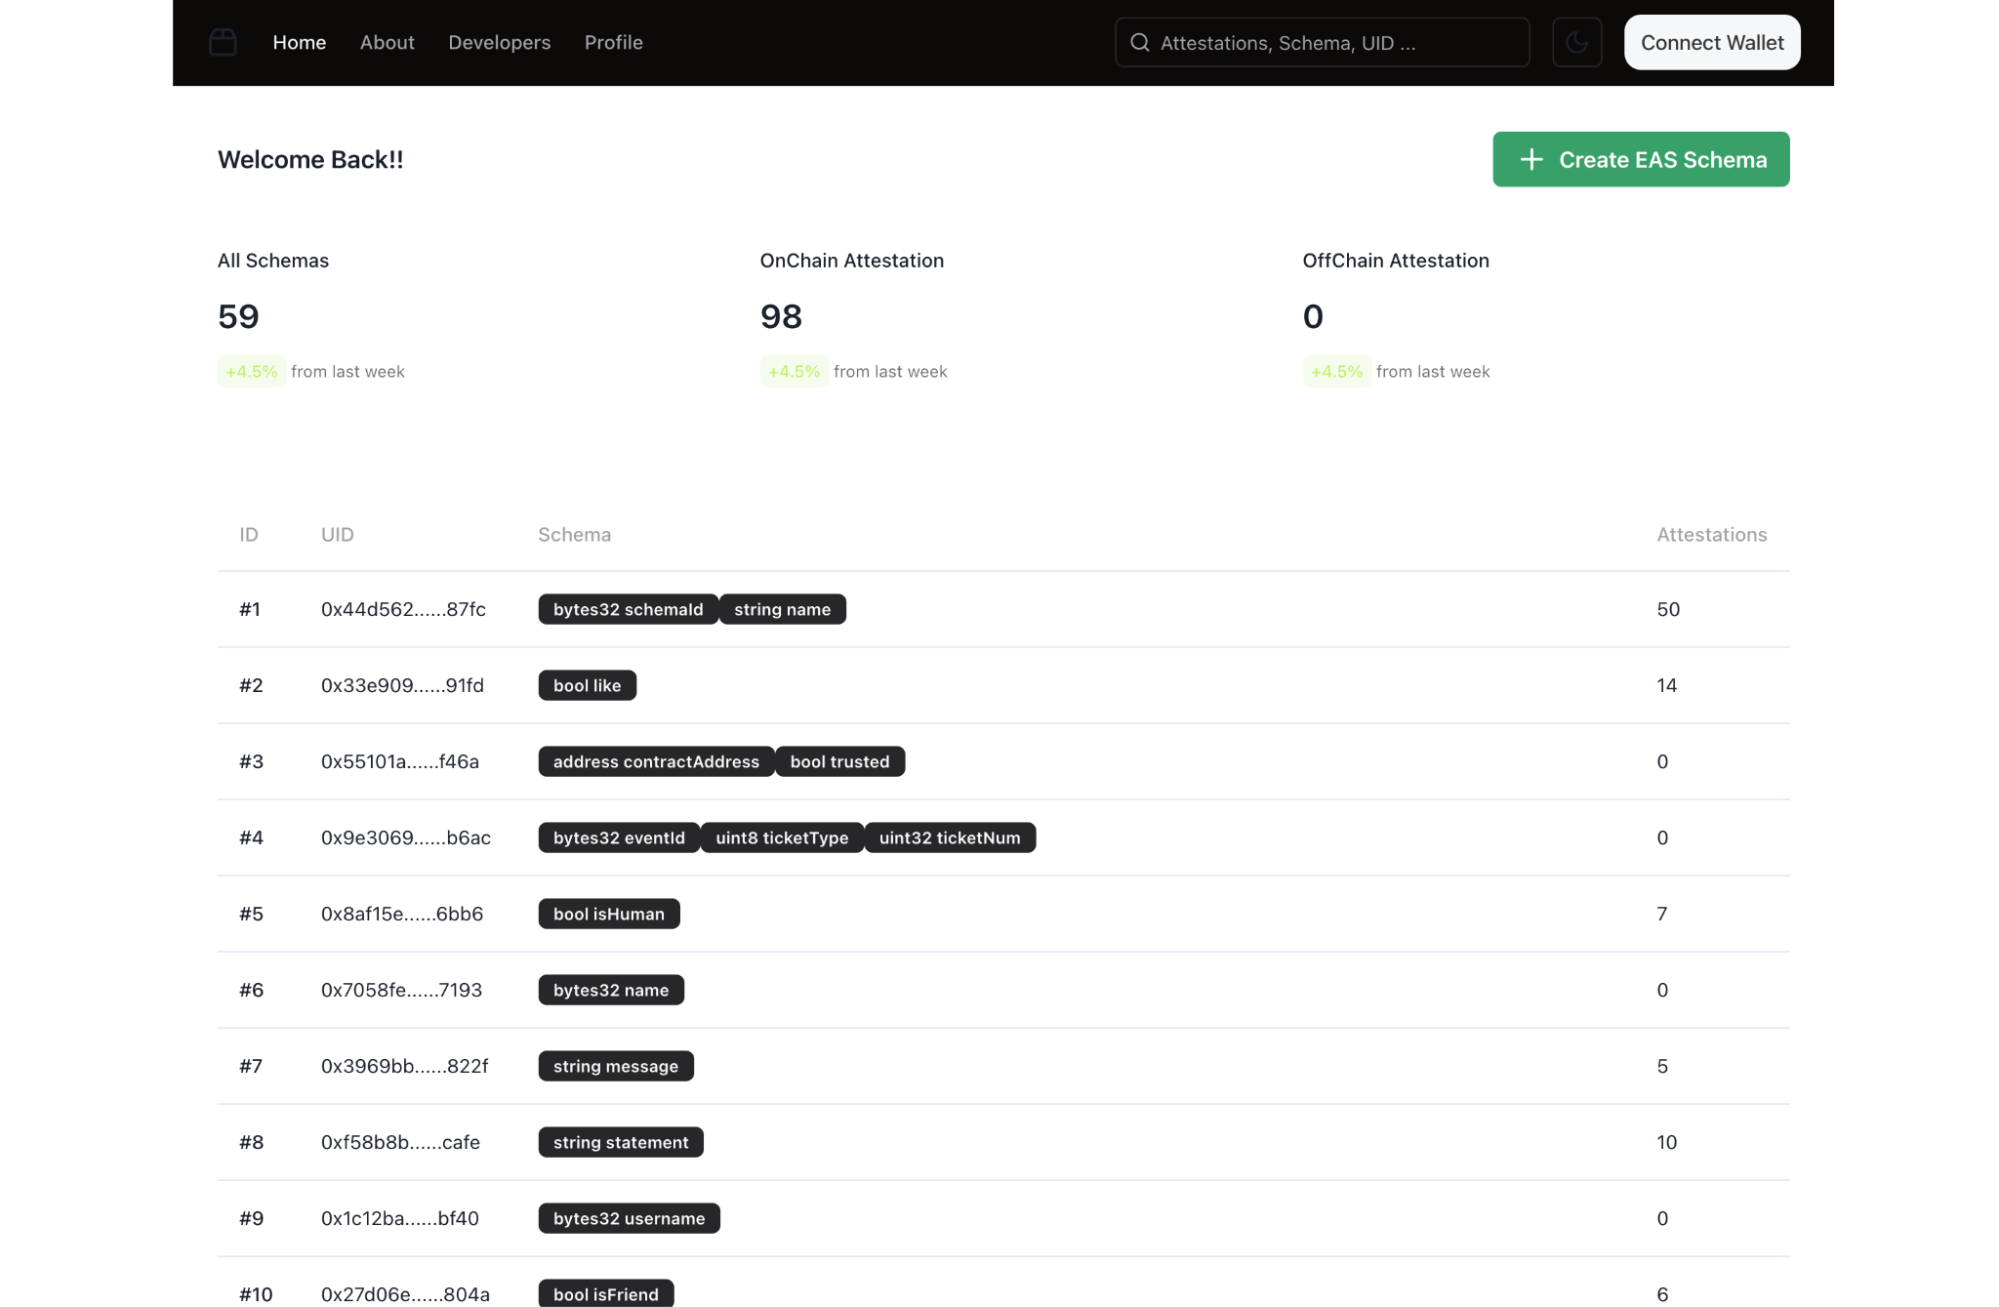
- Schema Overview
- All Schemas: Displays the total number of schemas created.
- OnChain Attestation: Number of attestations linked to schemas stored on-chain.
- OffChain Attestation: Number of attestations stored off-chain.
- Schema Details:
- Each row displays:
- ID: Unique identifier for the schema.
- UID: A unique on-chain reference for the schema.
- Schema Fields: Data structure of the schema (e.g.,
bytes32 schemaId, string name). - Attestations: The number of attestations linked to this schema.
- Each row displays:
- Clicking on a Schema:
- Clicking on a schema opens detailed information about its attestations.
Viewing Attestation Details
When you select a schema:
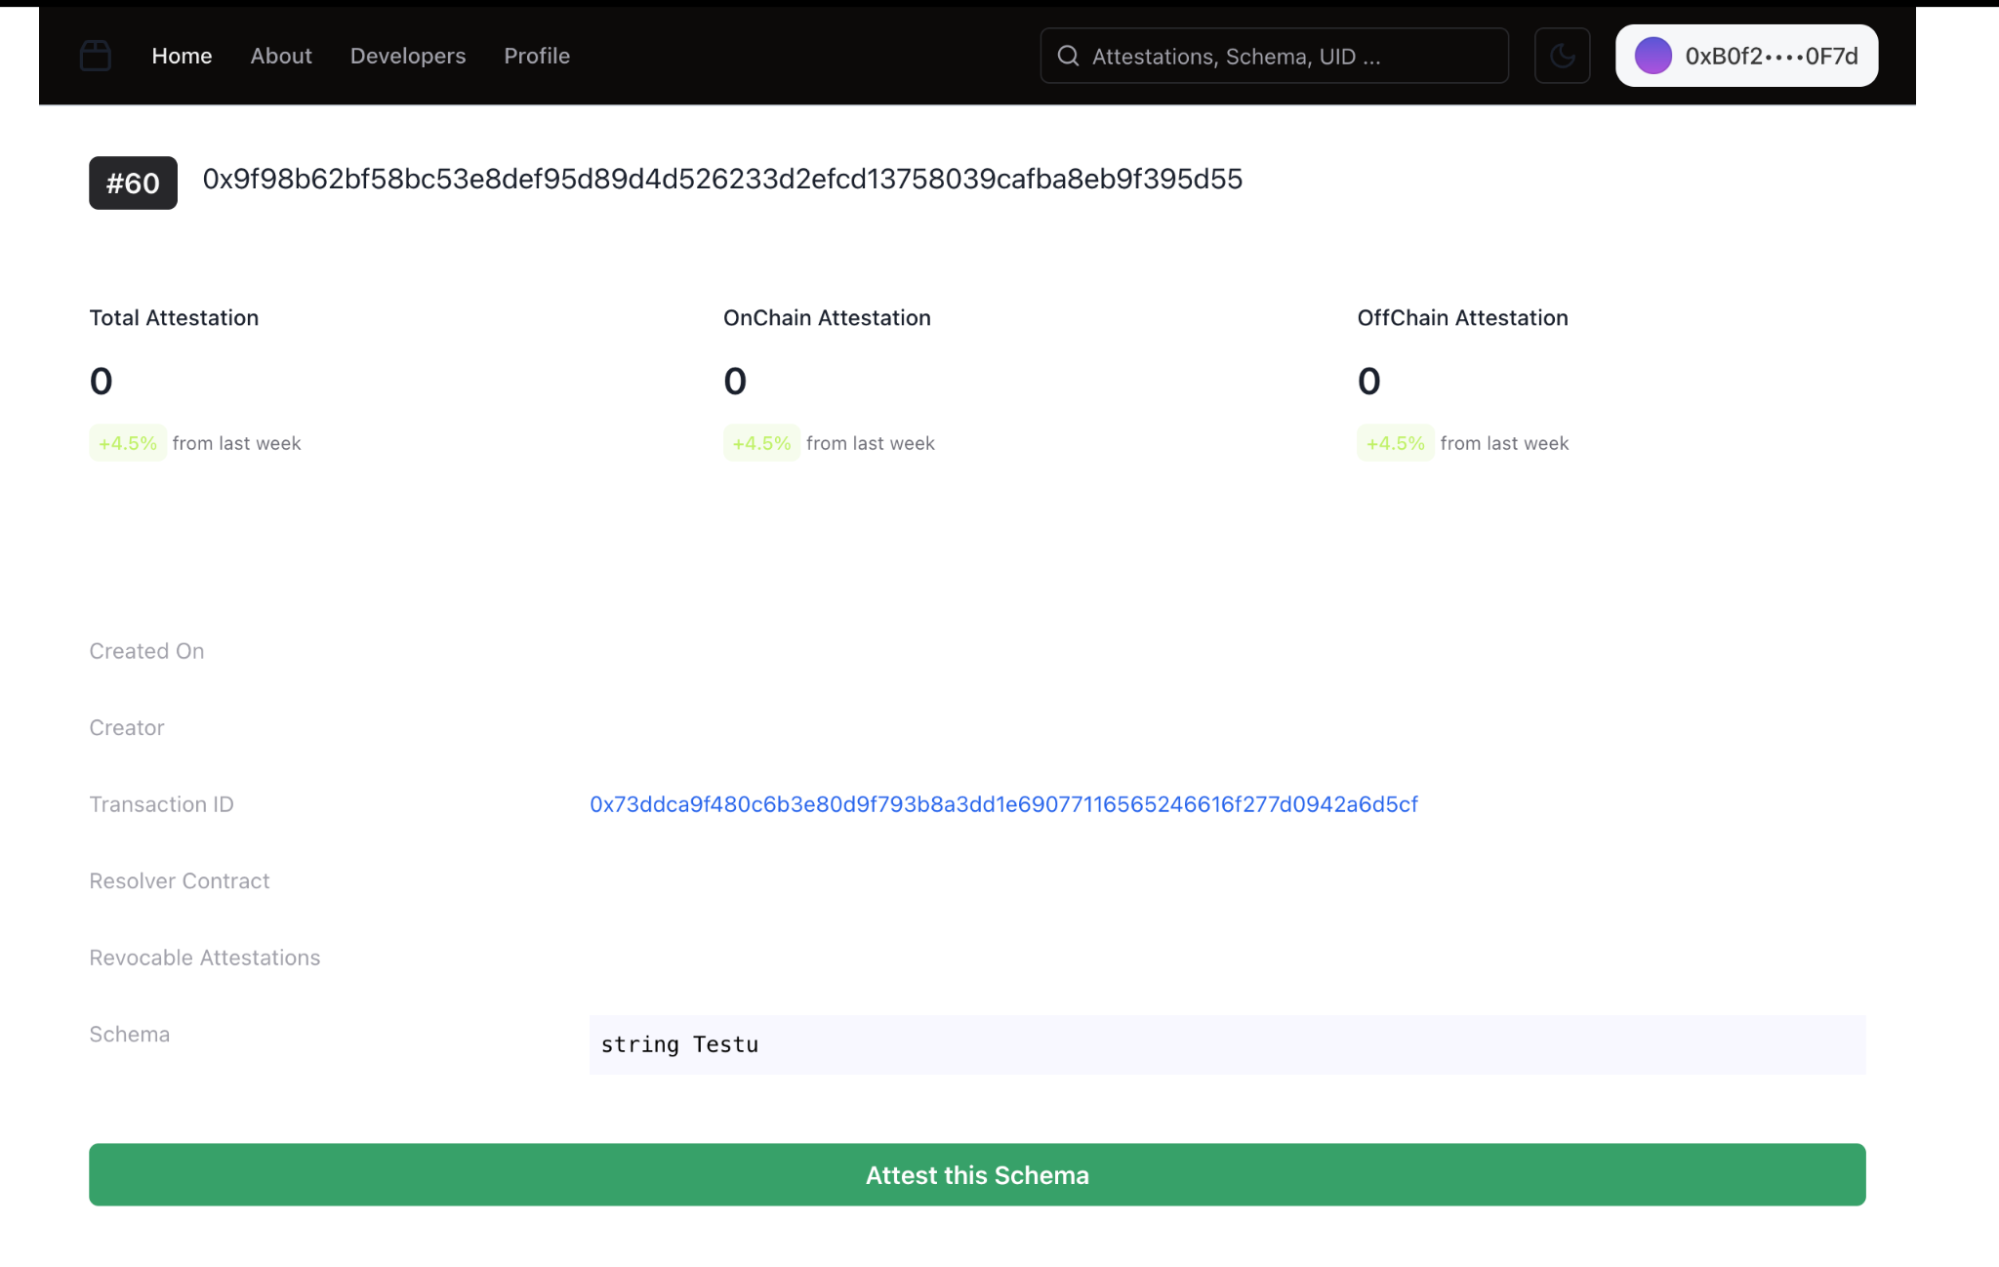
- Header Details:
- Schema ID: The unique identifier for the schema.
- Total Attestations: Total attestations associated with the schema (on-chain and off-chain).
- Includes growth percentage over the past week.
- OnChain/OffChain Attestation Counts: Breakdowns of attestations.
- Schema Metadata:
- Created On: The date the schema was created.
- Creator: Wallet address of the schema creator.
- Transaction ID: Blockchain transaction ID for the schema creation (clickable for blockchain explorer verification).
- Resolver Contract: Address of the custom resolver contract (if any).
- Revocable Attestations: Indicates whether attestations can be revoked.
- Schema Structure:
- Displays the fields defined in the schema (e.g.,
bytes32 schemaId, string name).
- Displays the fields defined in the schema (e.g.,
- Attest Button:
- Attest this Schema: Allows creating a new attestation under this schema.
Attesting to a Schema
Attesting to a schema allows you to associate specific data with an address based on the schema's structure.
Initiating the Attestation
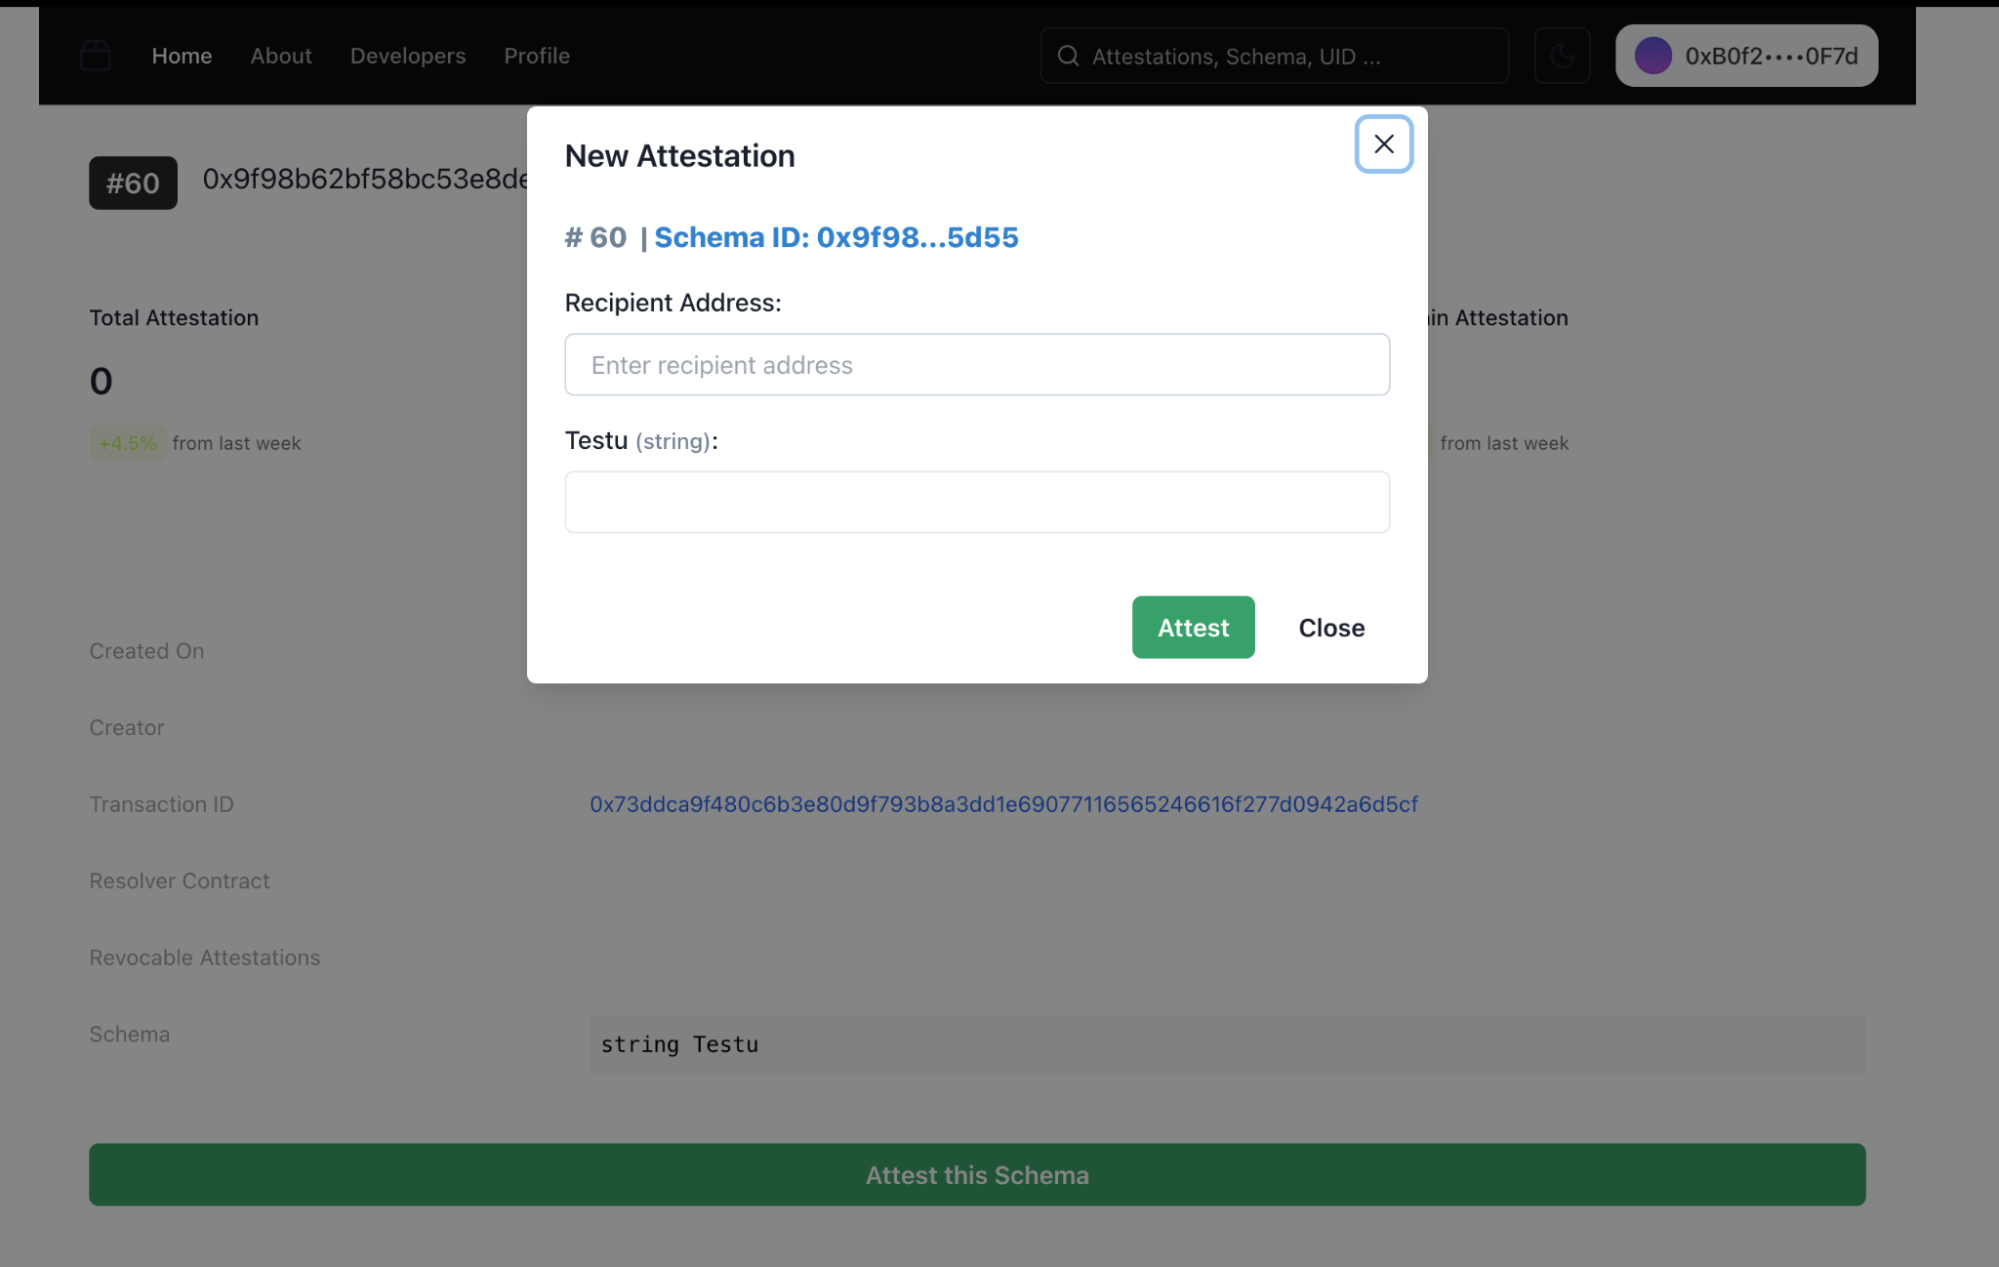
- Click "Attest this Schema":
- Located at the bottom of the schema details page (visible in the first screenshot).
- Modal Pop-Up:
- A modal will appear with the following fields:
- Recipient Address:
- Enter the wallet address of the person or entity to whom the attestation is being made.
- Schema Fields:
- Each field defined in the schema is displayed with an appropriate input box.
- For example, if the schema has a
stringfield labeled "Testu," you will see:Testu (string):followed by an input field to provide the corresponding value.
- Recipient Address:
- A modal will appear with the following fields:
Completing the Attestation
- Fill in the Details:
- Enter the Recipient Address and all required values for the schema fields.
- Double-check that the data aligns with the schema's structure.
- Submit or Close:
- Attest Button:
- Click the Attest button to finalize and submit the attestation.
- Close Button:
- If you wish to cancel the process, click the Close button to exit the modal without submitting.
- Attest Button:
Processing the Attestation
- On Submission:
- After clicking Attest, the attestation will be sent to the blockchain for processing.
- A transaction approval modal may appear via your connected wallet. Approve the transaction to proceed.
- Confirmation:
- After a few minutes, the attestation will be confirmed on the blockchain.
Viewing the Completed Attestation
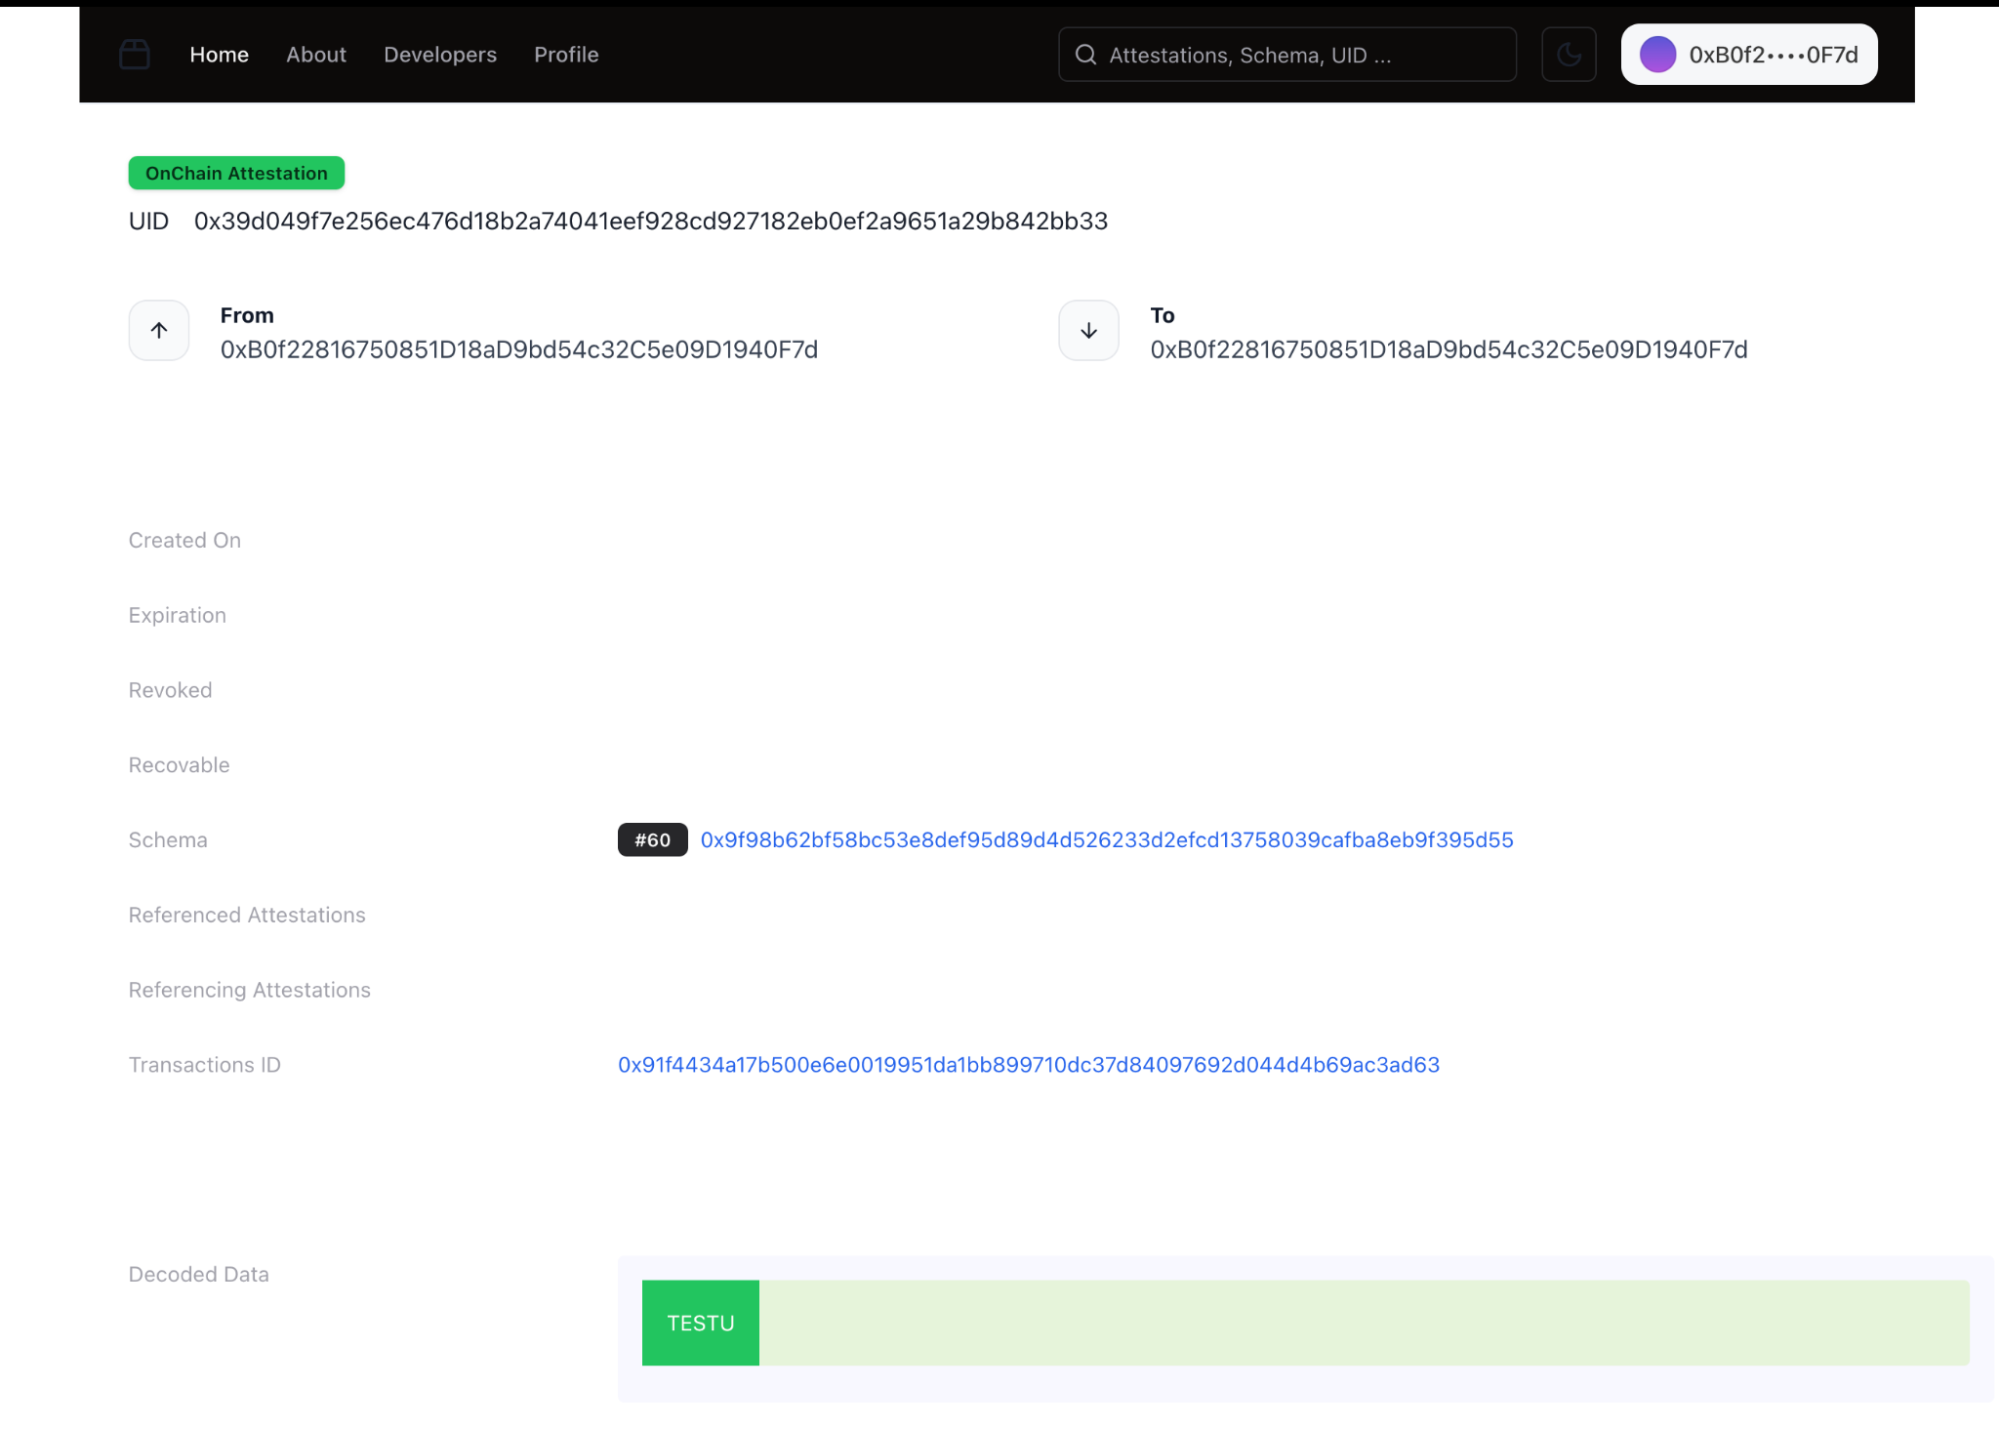
Post-Attestation View:
- Once confirmed, the attestation details will appear in the schema details page under its Attestations count.
- The attestation data can now be viewed as part of the schema's record.