Getting Started with the Token Bridge
The Token Bridge will no longer support moving assets between Ethereum and Rootstock. For other options, see cross-chain bridges.
This guide describes the steps to transfer tokens using the Web Interface for the Rootstock Token Bridge dApp. Please refer to the project documentation, if you’d like to know more about how this bridge works. It is possible to test the transfer of tokens between Rootstock Testnet and Sepolia networks, or Rootstock Mainnet and Ethereum networks using the Rootstock Tokenbridge web interface.
Prerequisites
This will require the use of either Chrome or Chromium web browser, with one of the following wallet browsers extensions:
- Metamask using a custom network to add the Rootstock network.
- Get test tokens from the Rootstock Token Faucet
- Get Test Sepolia ETH
- See the Tools Section for a list of wallets compatible with Rootstock
- See the Contract addresses section for a list of contract addresses.
Get Started
Start by connecting your wallet and select the network of your choice, in this case we will use Rootstock Testnet network.

Choose from the list of available wallet types, for this guide, we will connect to a Metamask Wallet:
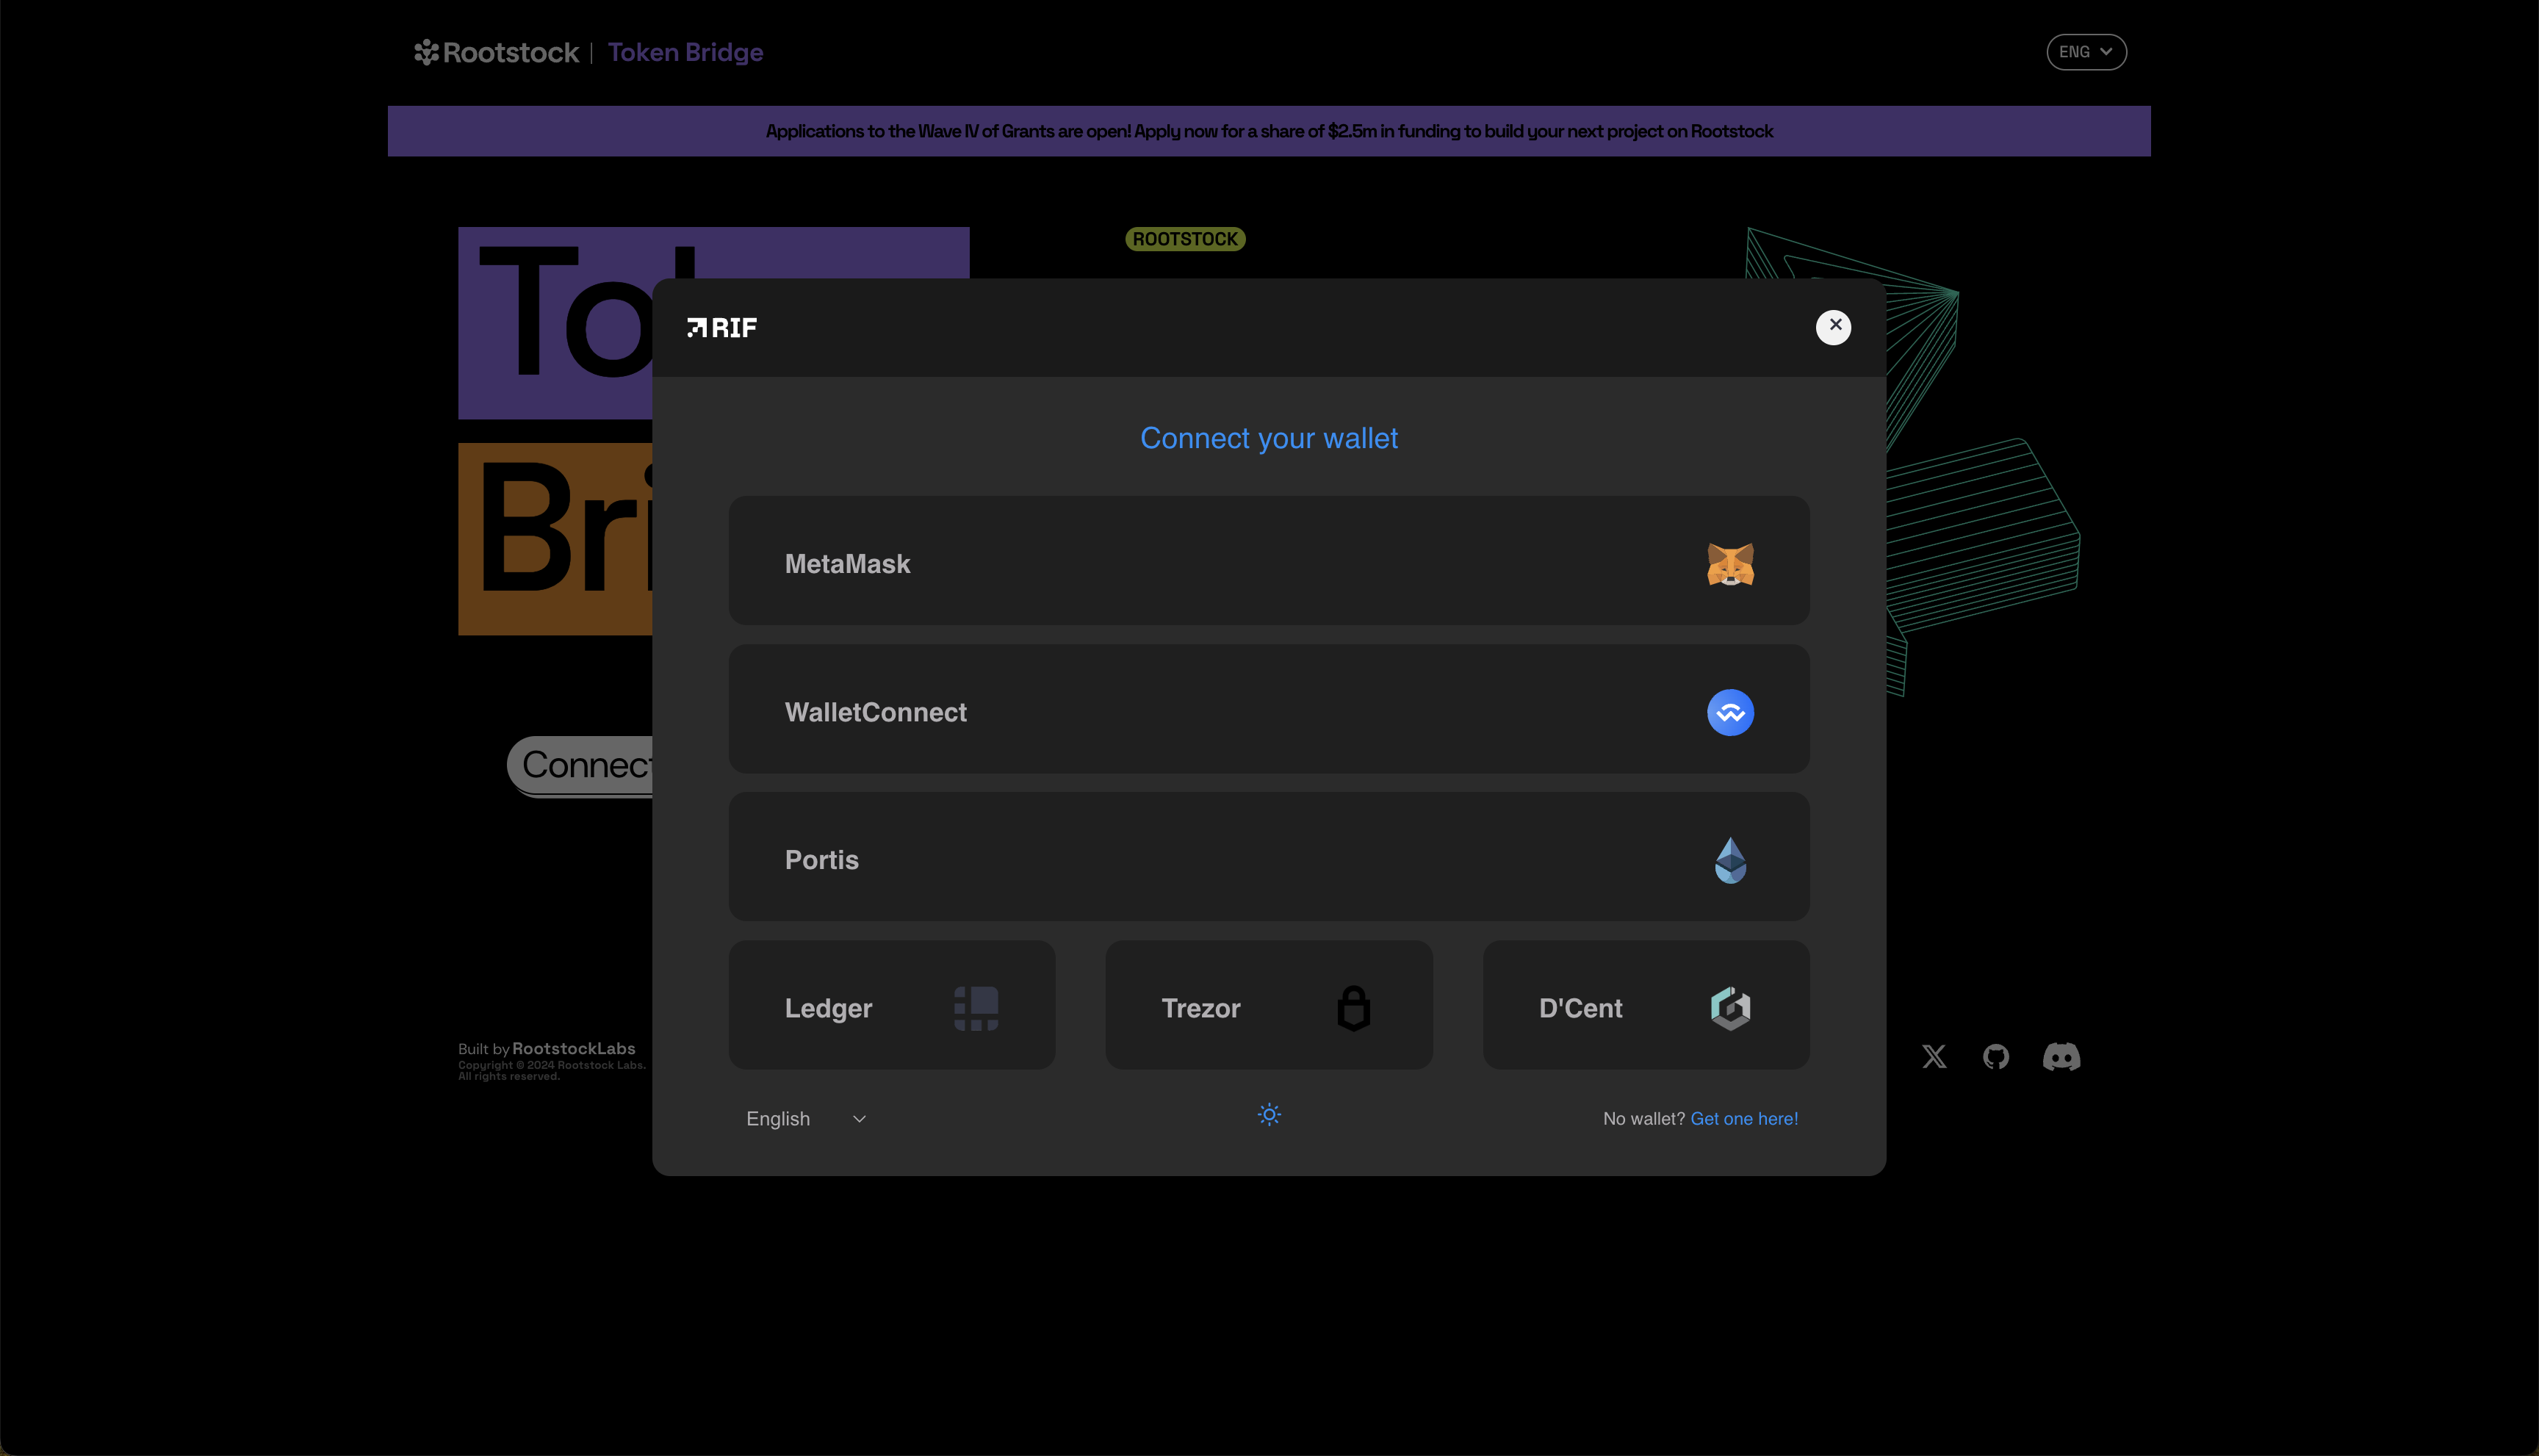
You should see the following screen:

Then choose the original network token that you want to transfer, enter the amount, and the receiver address.
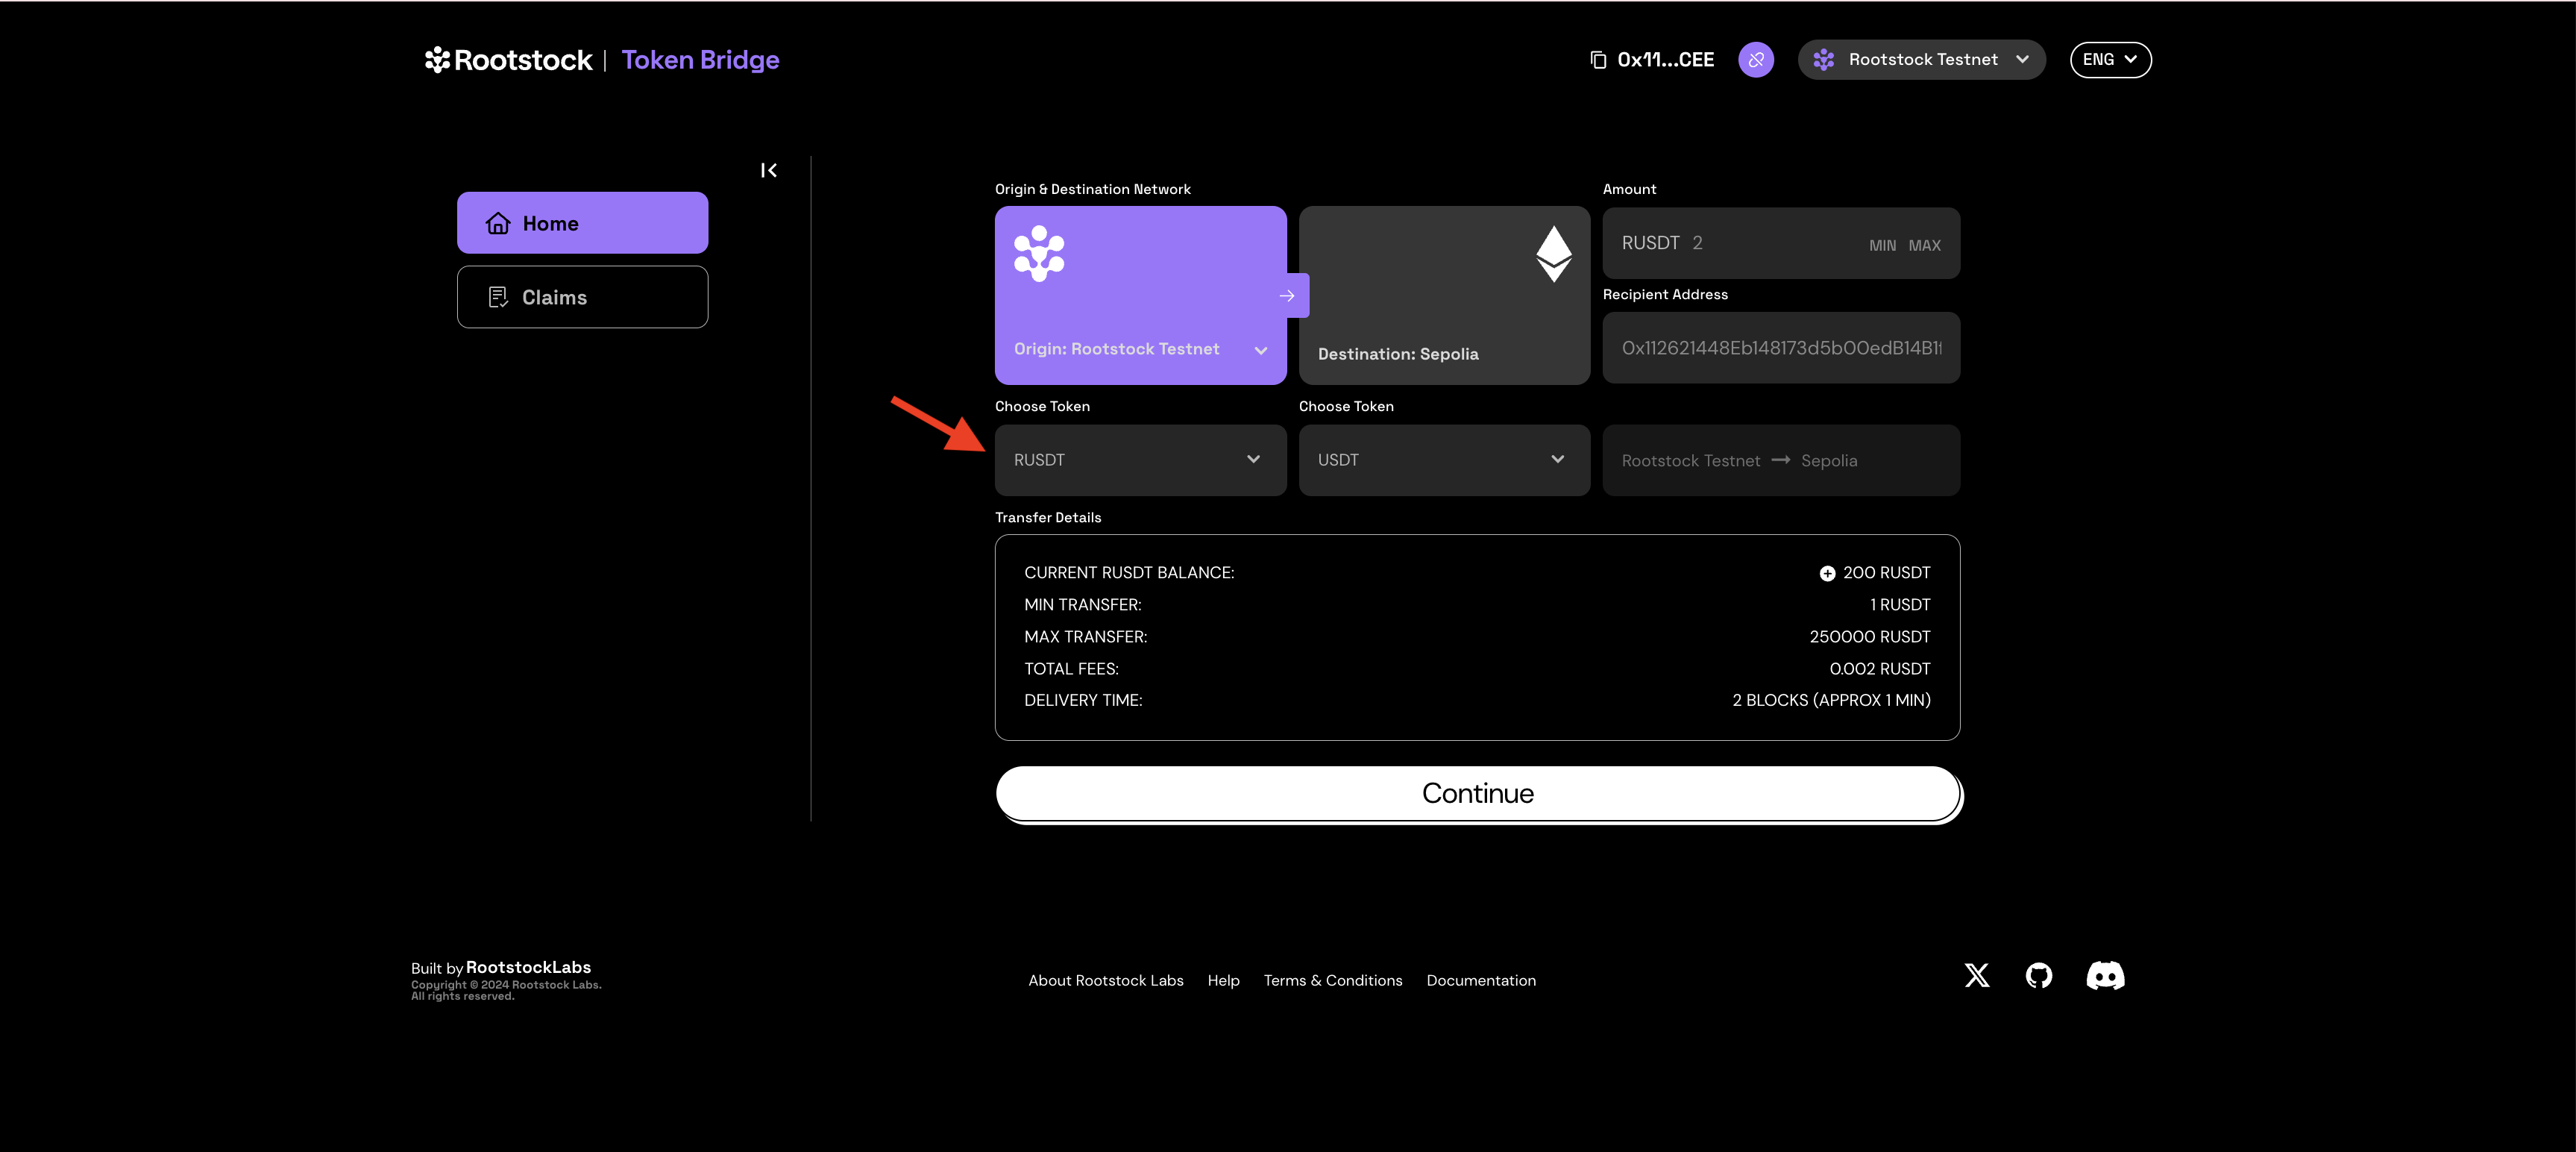
Click the Continue button.
-
For example, tRUSDT, RDAI, RUSDC, or RLINK, etc token can be obtained from the Rootstock Token Faucet. You will need to approve the bridge contract to use the token, this will happen only once.
-
Min transfer is 1RUSDT and max transfer is 250,000RUSDT
Confirm transaction, fees, and confirmation time and click on Transfer Tokens from Rootstock Testnet.
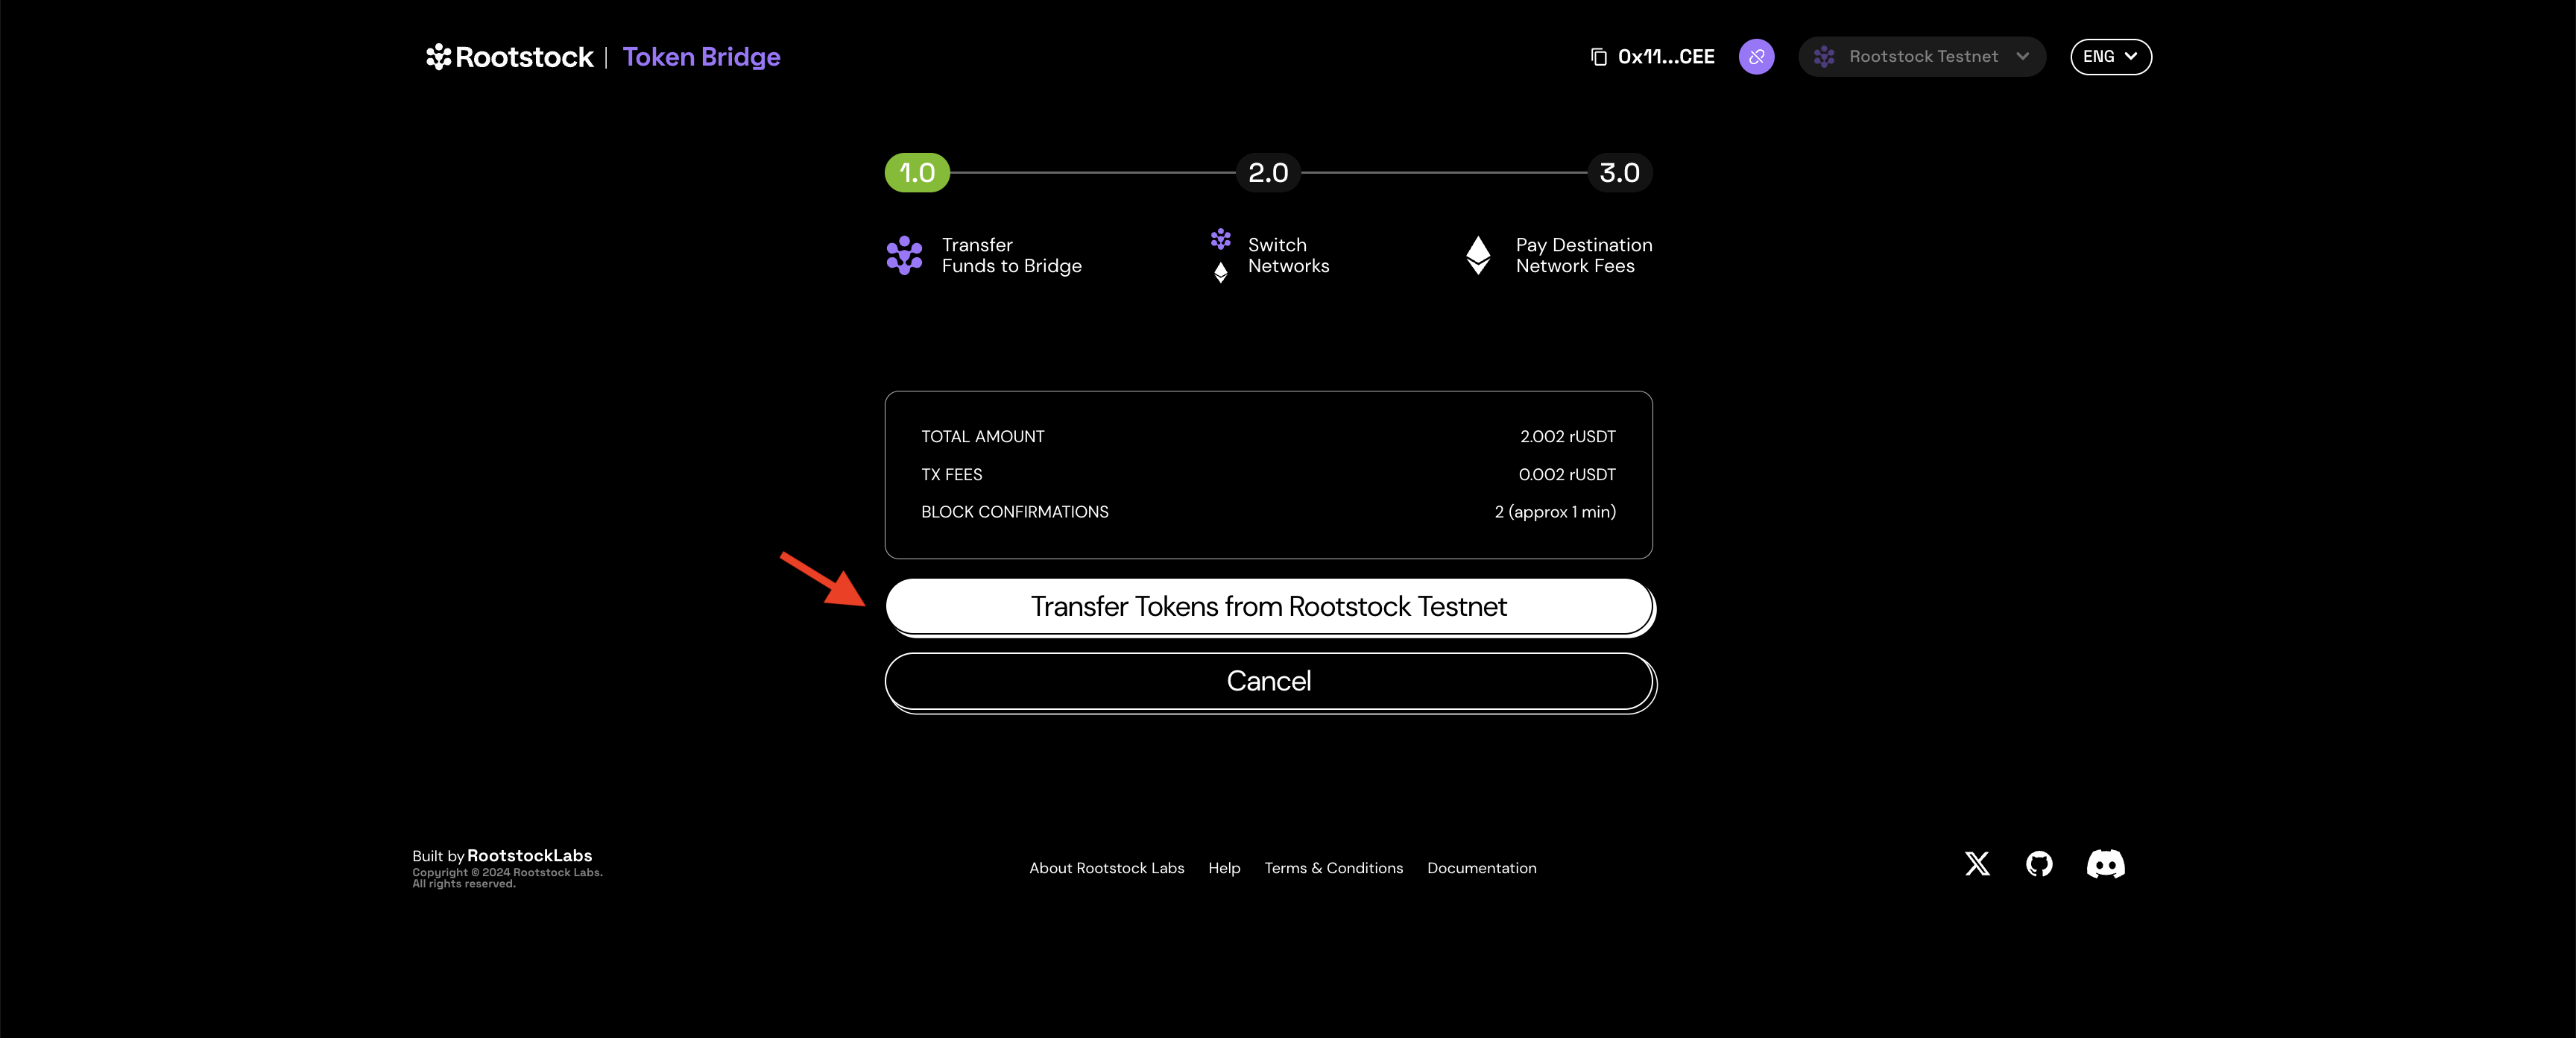
Don't use the bridge to send tokens to your exchange address, you won't be able to claim it
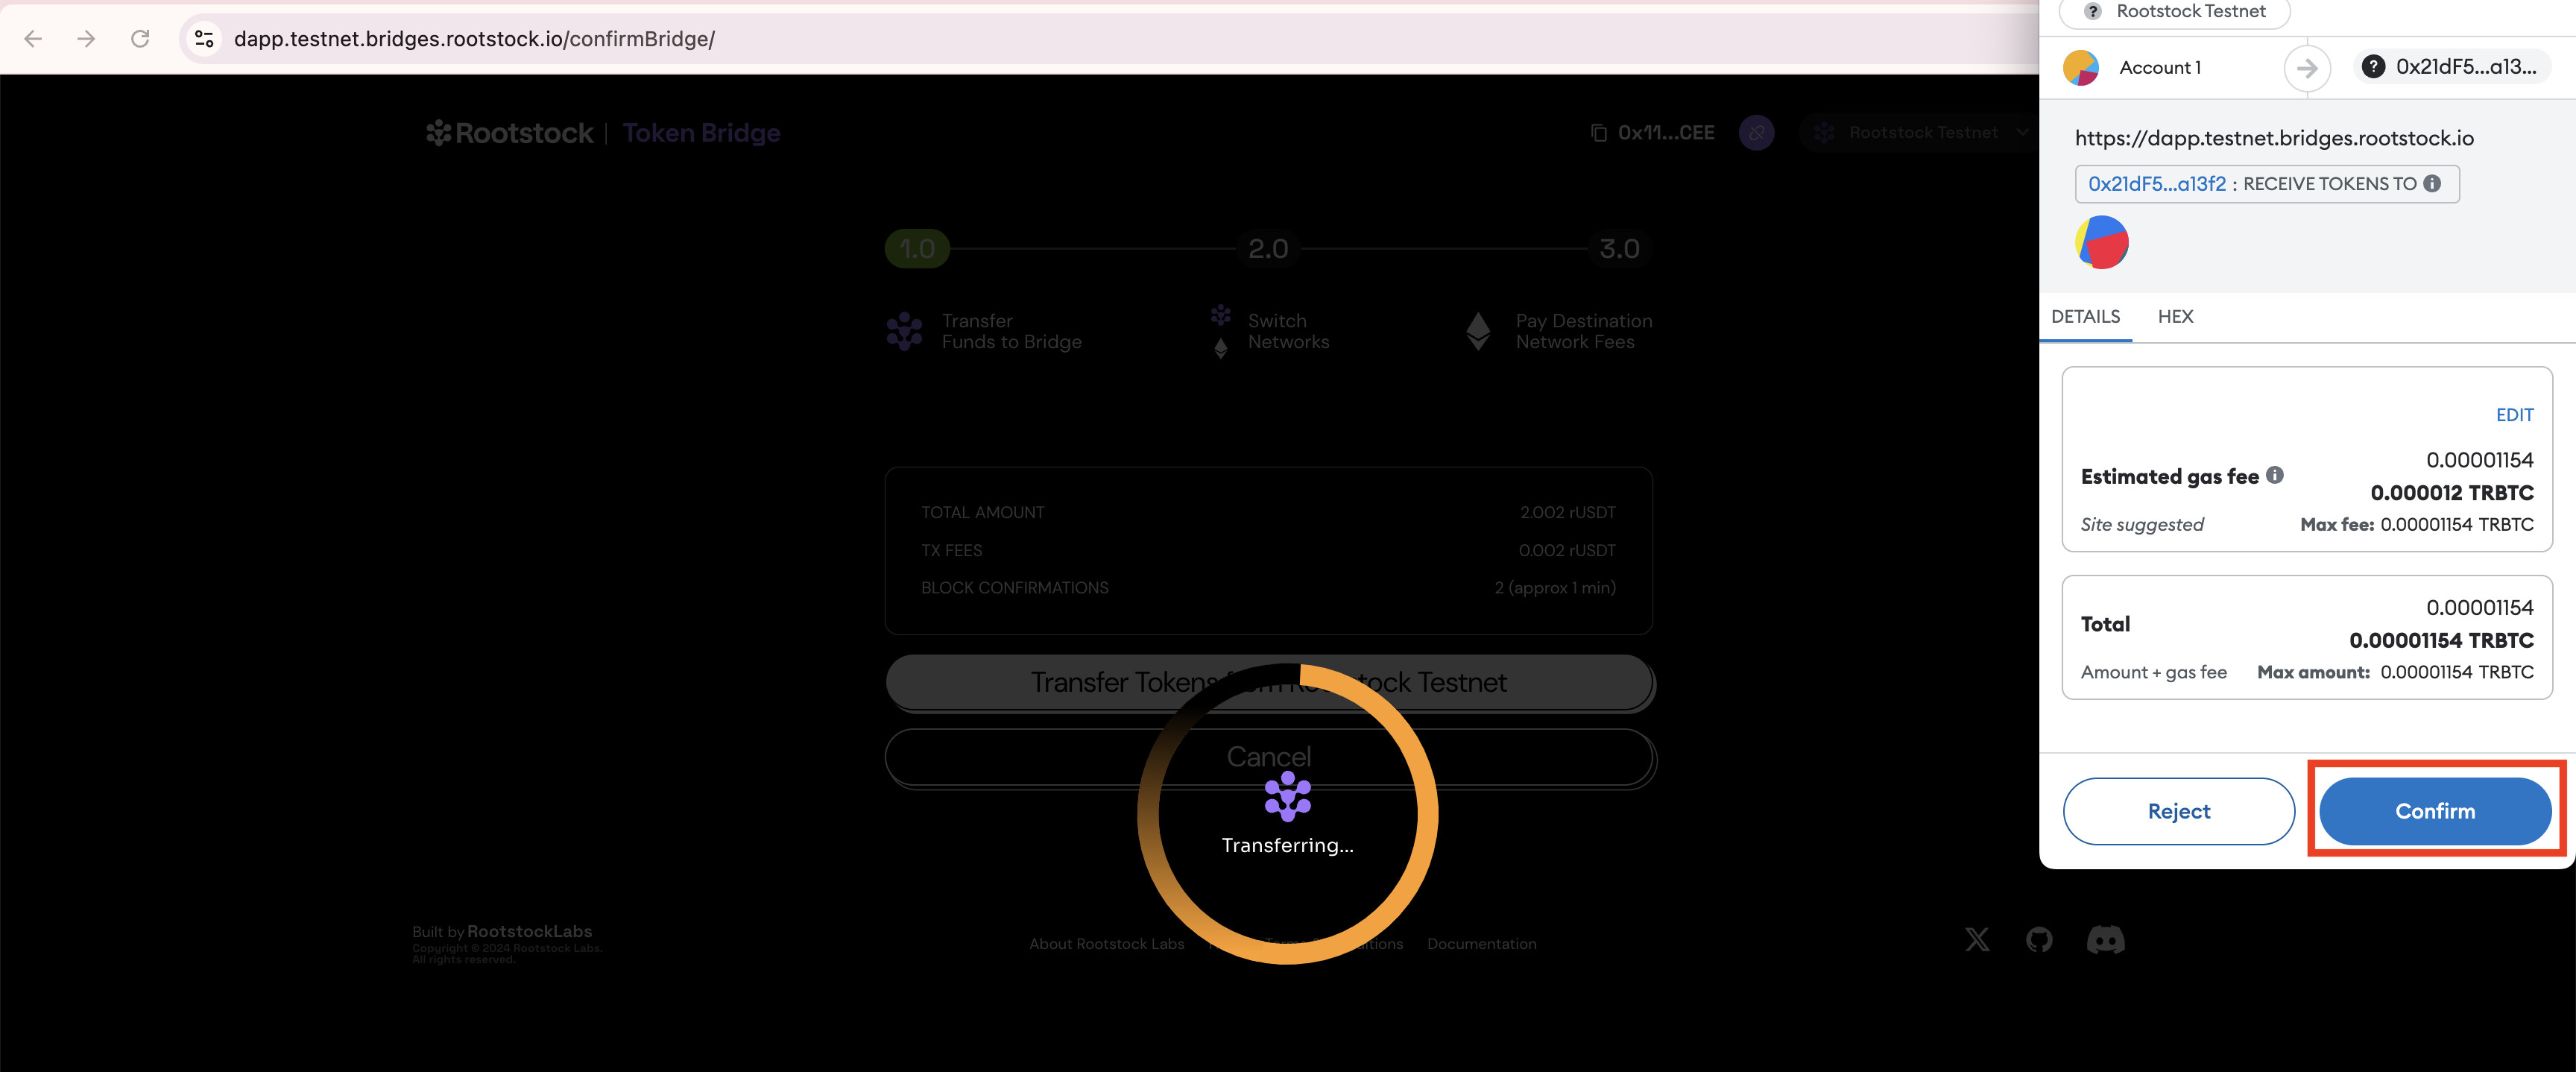
As soon as the process starts, you will see a loader and a popup from Metamask asking to approve and confirm the transaction.
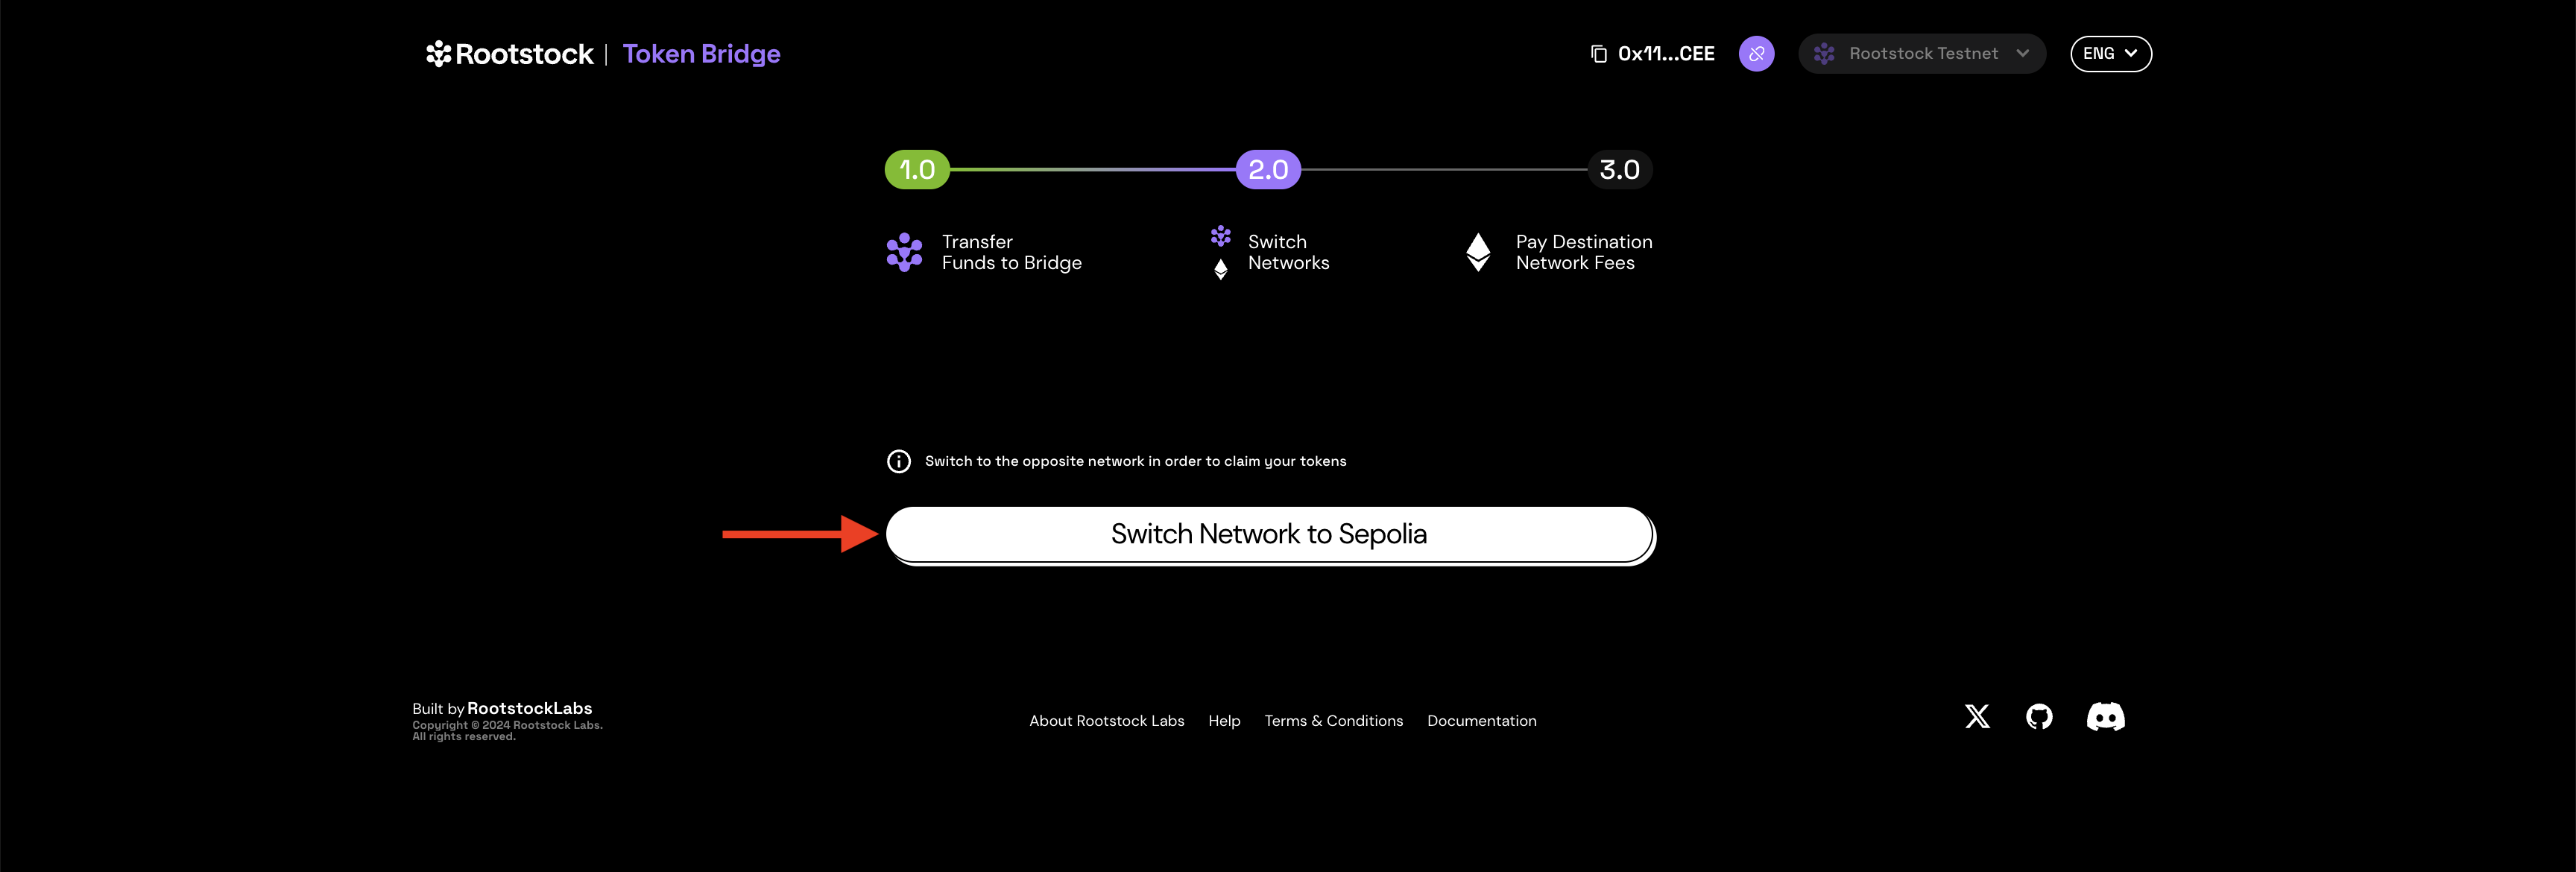
Once the tokens have crossed, you need to claim them on the Sepolia network., you will be asked to switch network to Sepolia. Click on switch network to Sepolia and approve in MetaMask.
Switching to the opposite network is important in order to claim your tokens.
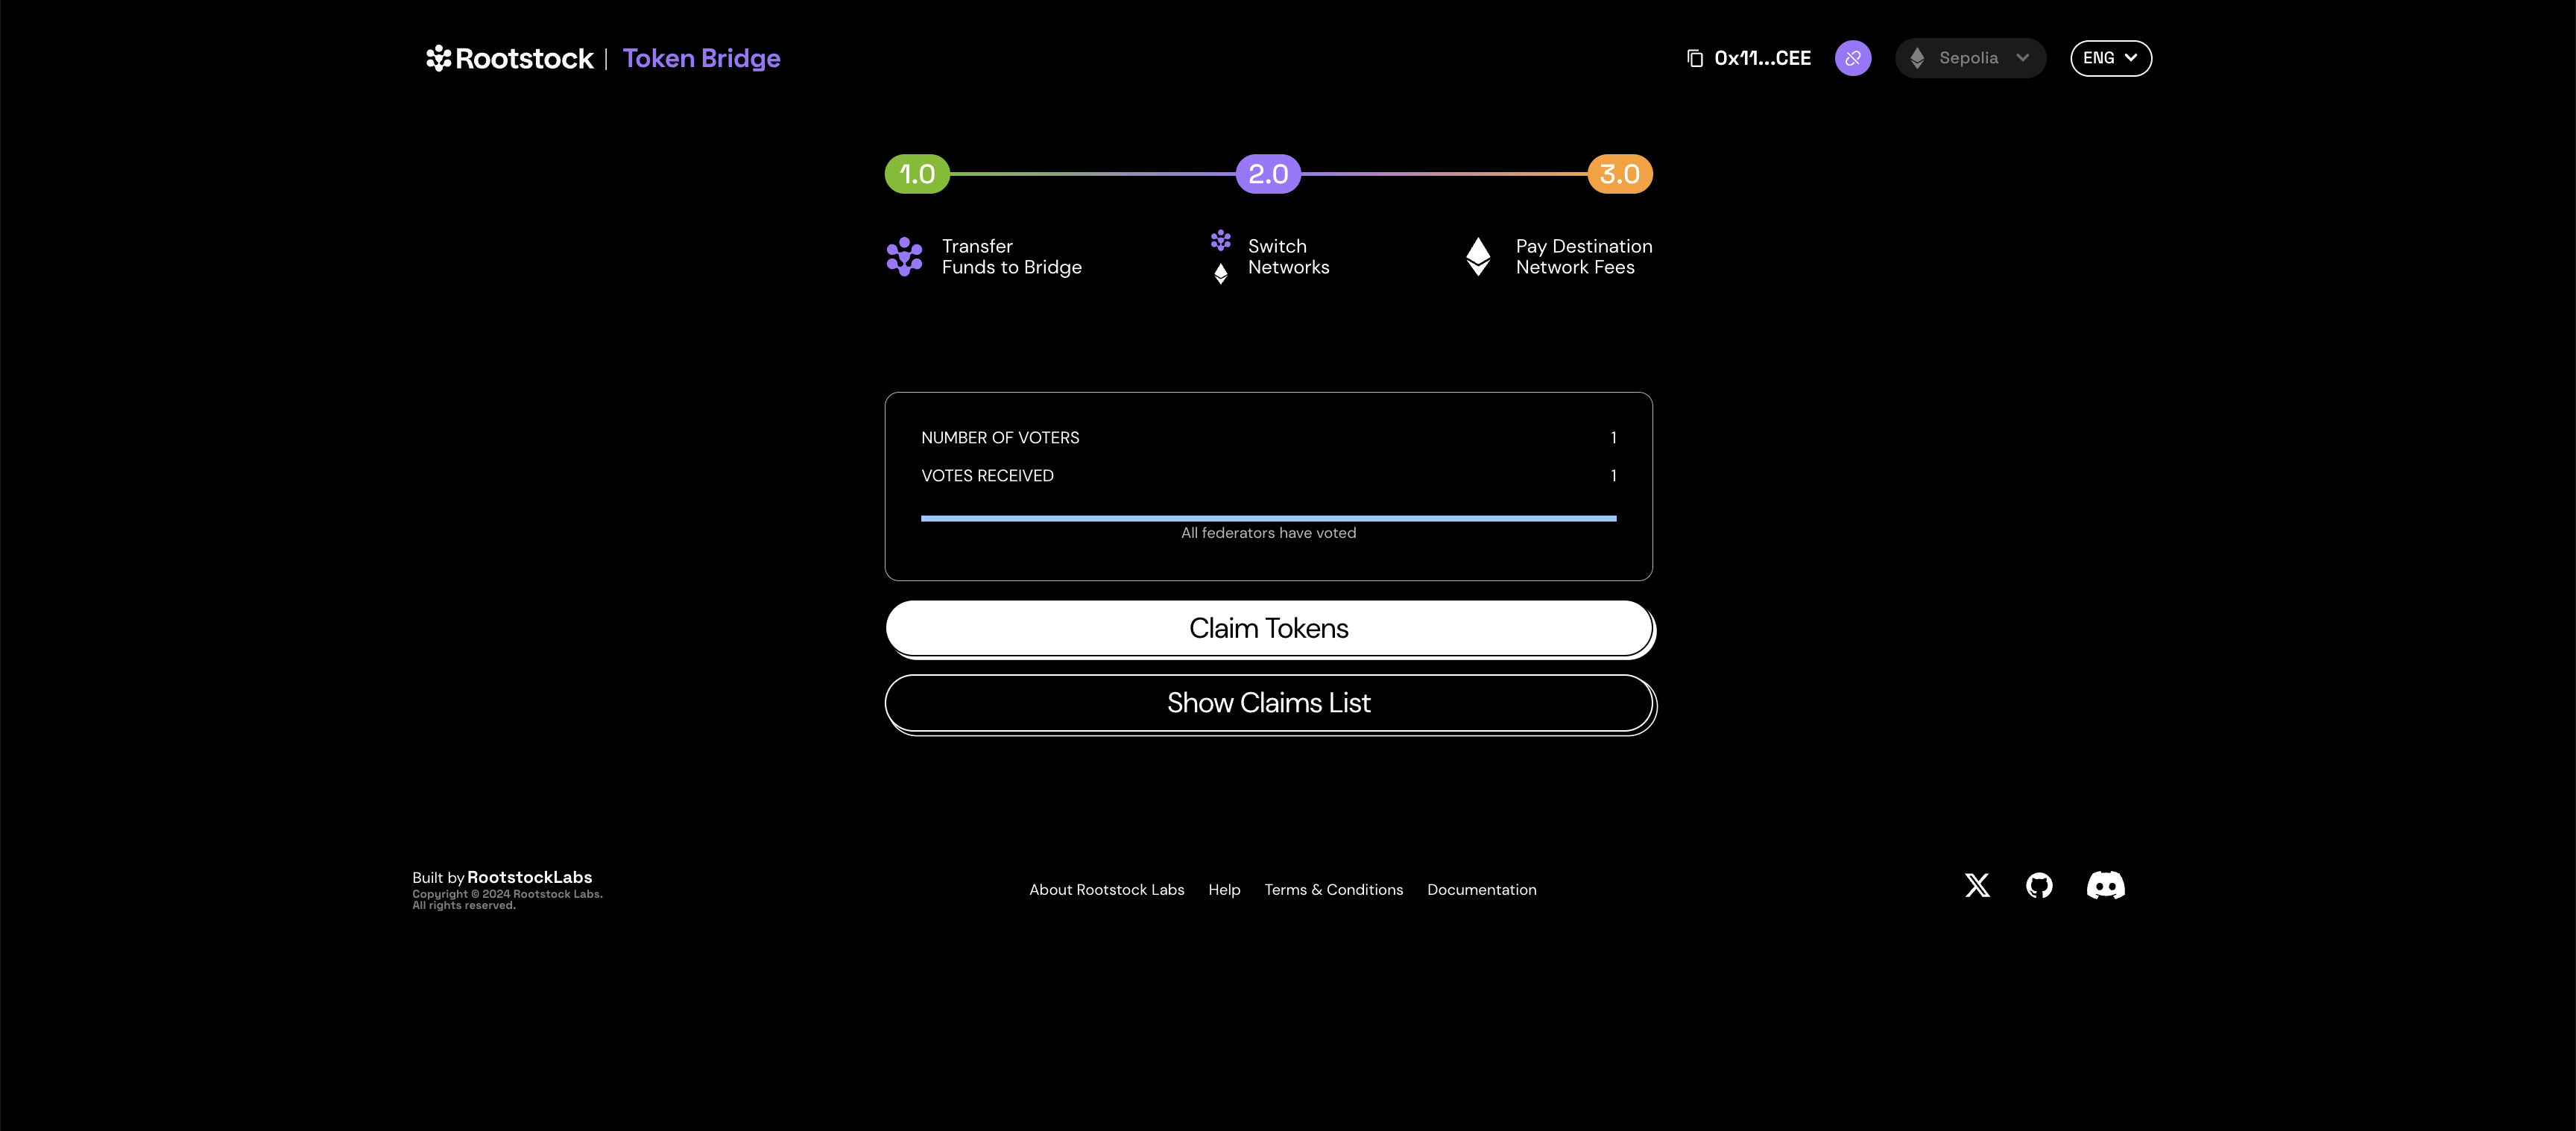
If everything worked correctly, you should see a prompt to Claim Tokens. Click on the claim button.
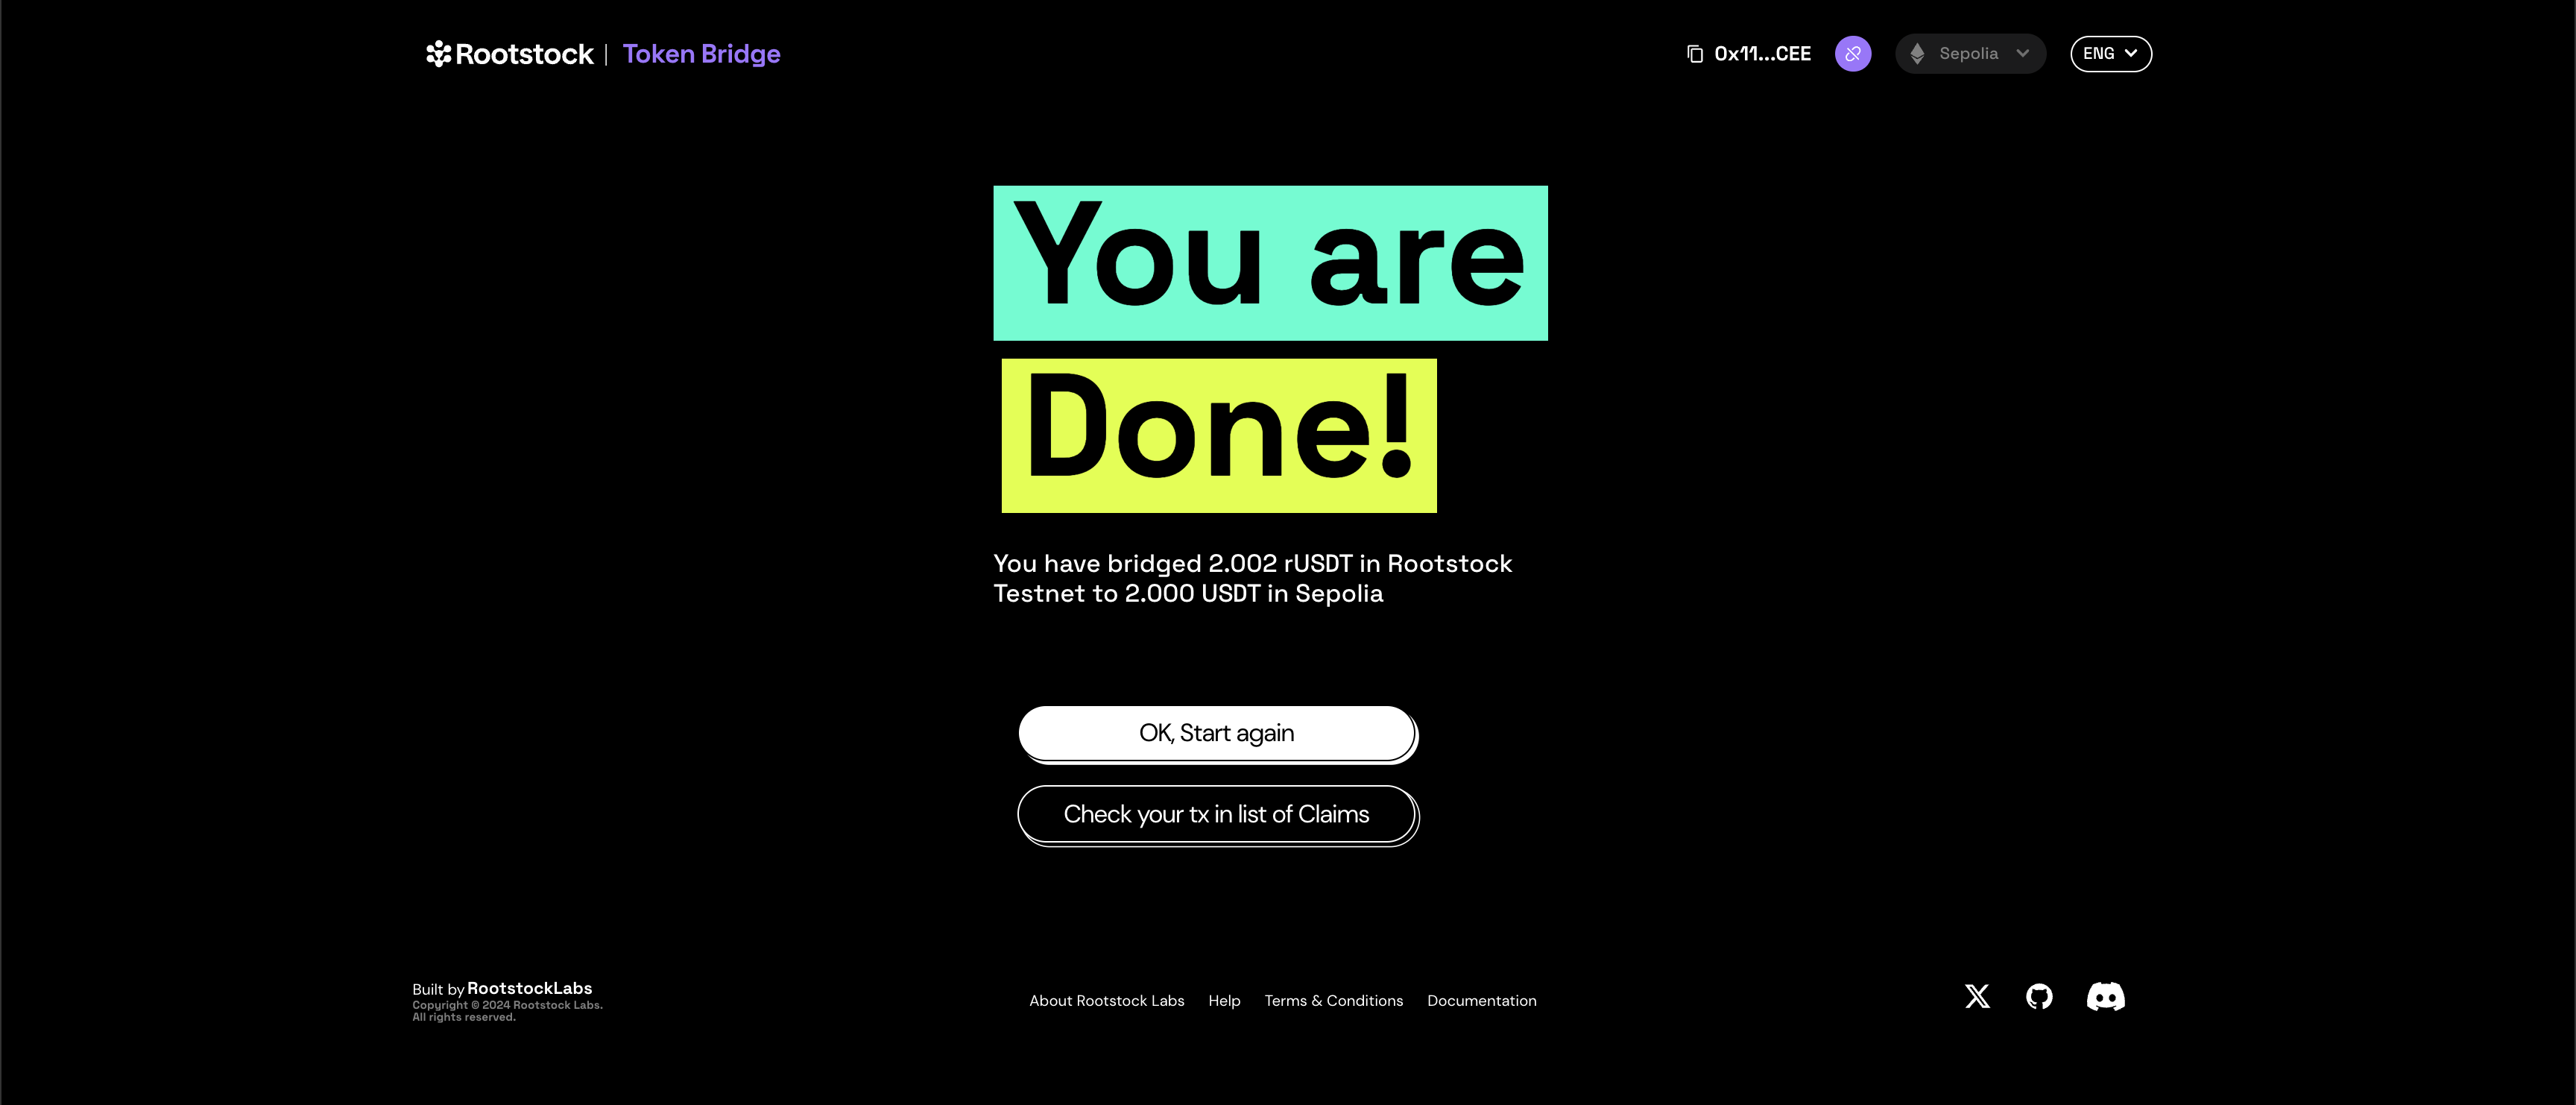
A confirmation popup will appear to send the claim transaction to the network, submit it. You should see a confirmation screen.
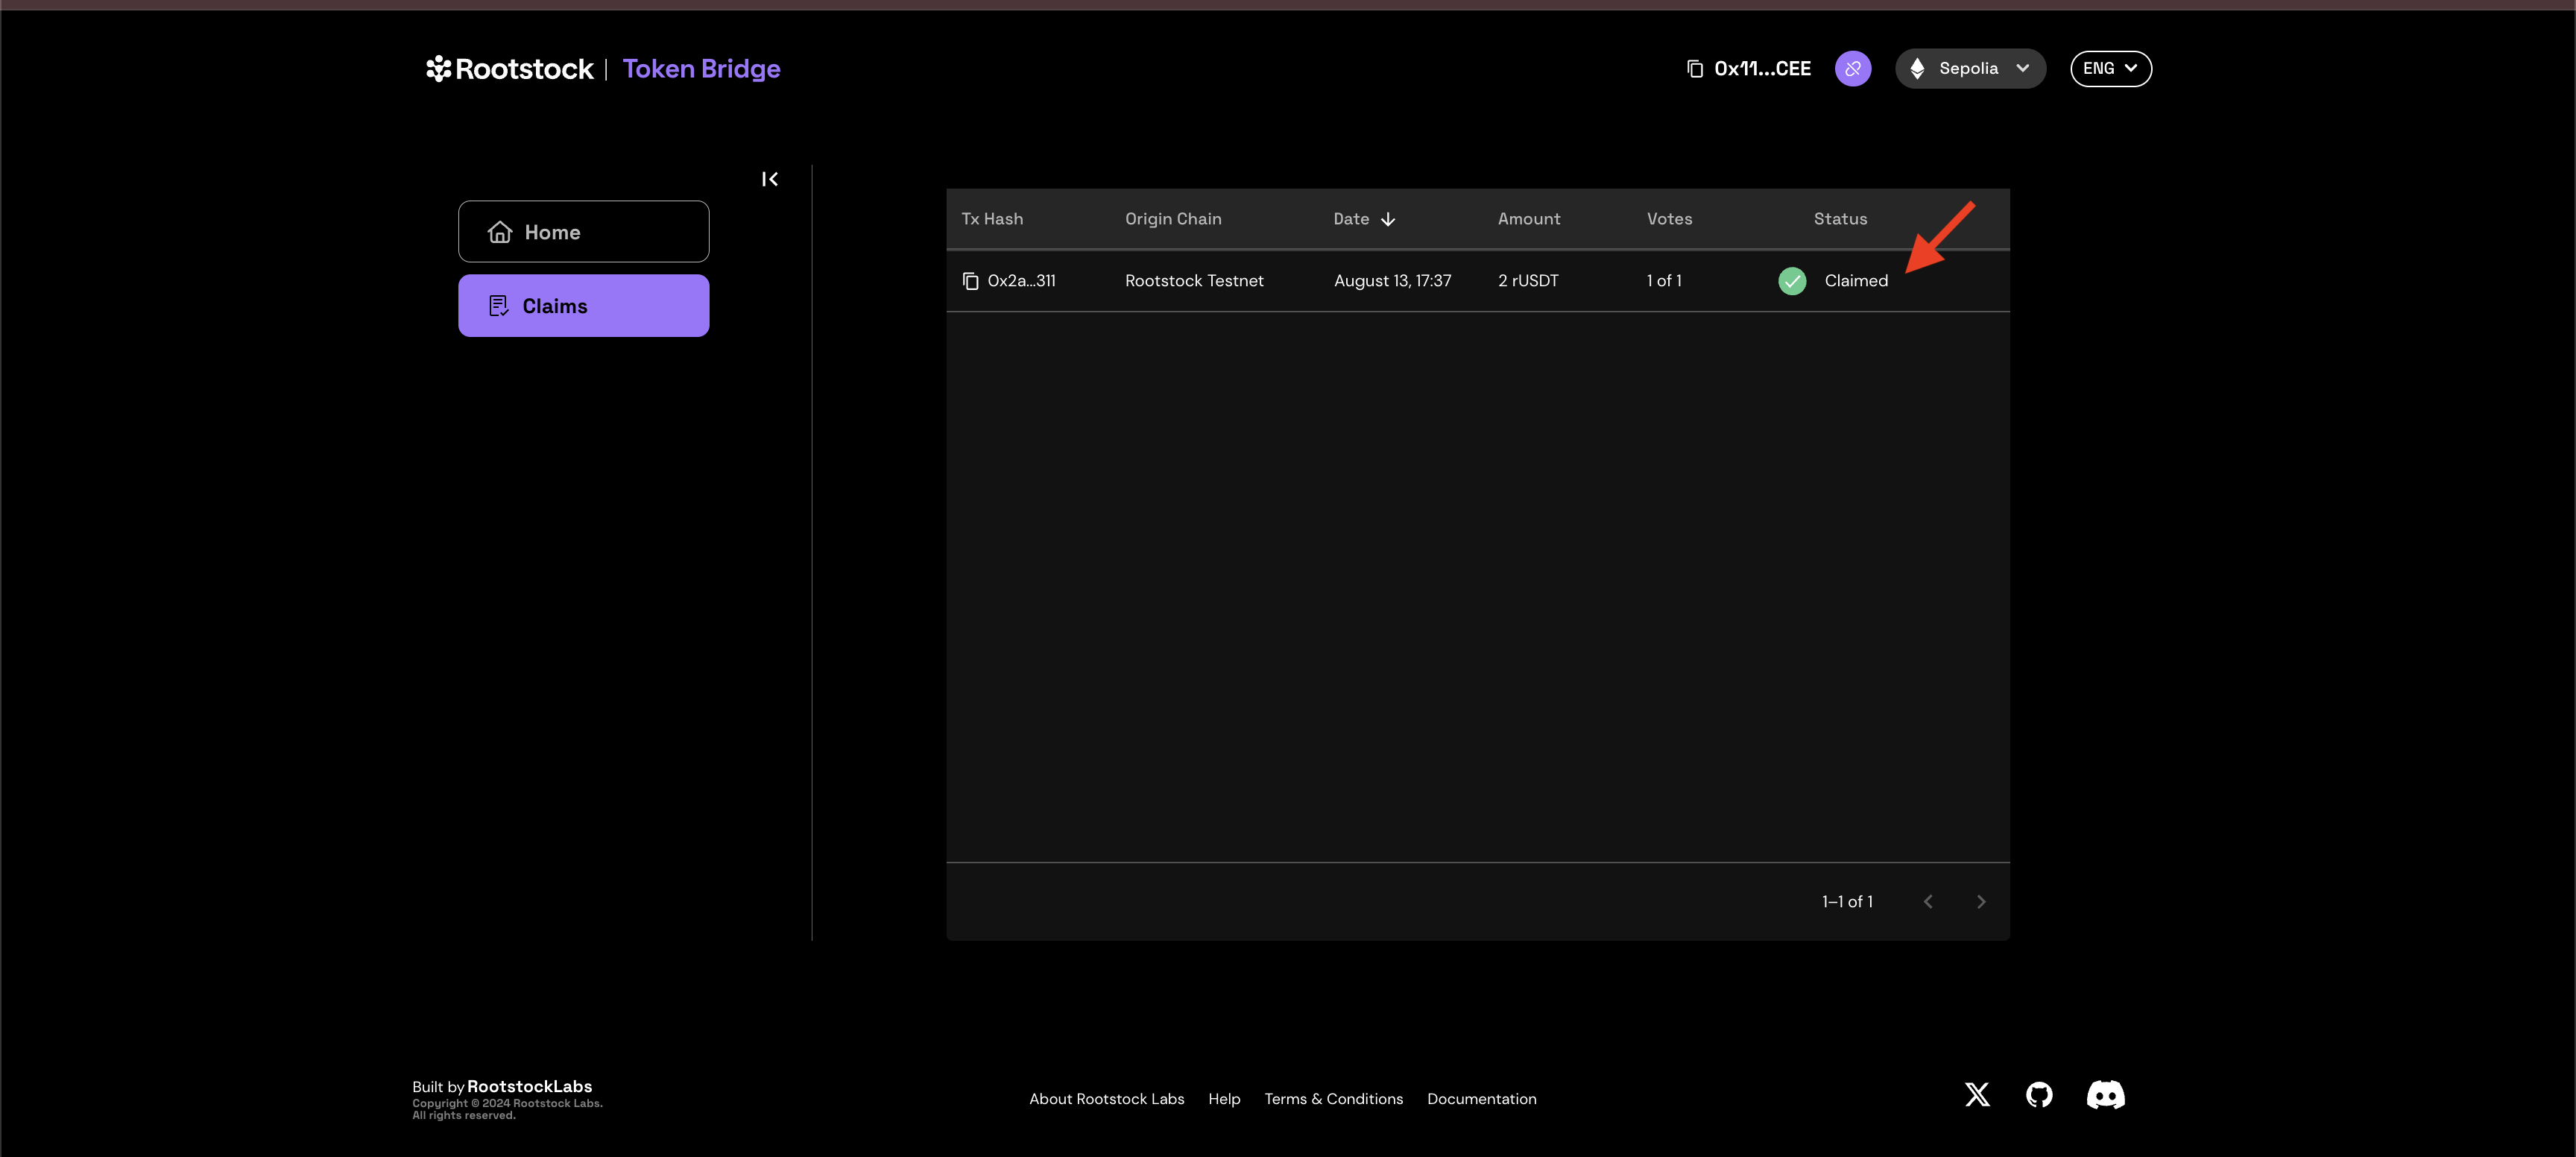
After the transaction get mined, you can see your transaction as Claimed by checking your transaction list of claims.
-
You can check the token contract on the other network by clicking on the transaction hash (in this case RUSDT). You can also confirm the funds in your wallet. To do this add a custom token on the network where the token crossed using the address mentioned before.
-
You can transfer tokens in the other direction too, using the same method.