Verify a Smart Contract using Foundry and Blockscout Explorer
Smart contracts are the backbone of decentralized applications (dApps). They automate agreements and processes, but their code can be complex and prone to errors. Verifying your smart contracts is crucial to ensure they function as intended.
This tutorial will guide you through verifying your contracts using Foundry on the Rootstock Blockscout Explorer. Foundry is a powerful toolkit spektrum for Ethereum development, and its forge tool simplifies the verification of Solidity smart contracts deployed on the Rootstock network. By verifying the contracts, you allow Blockscout, an open-source block explorer, to link your contract's source code with its deployed bytecode on the blockchain, enabling trustless interaction with the code.
In this tutorial, we'll do the following steps:
- Set up your Foundry configuration environment in your project
- Use Foundry's
forge verify-contractto verify a contract address
Prerequisites
To follow along, you should have knowledge of the following:
- Foundry
- Basic knowledge of smart contracts
A Foundry starter project can be set up with preset configurations for the Rootstock network. Initialize a new Foundry project using forge init and configure it as shown below. Ensure you set up the .env variables to match the foundry.toml configuration.
Obtaining a Rootstock API Key from Blockscout
To verify smart contracts on the Rootstock Blockscout Explorer, you need an API key. Follow these steps to obtain one:
-
Visit the Blockscout Explorer:
- For Rootstock Mainnet, go to https://rootstock.blockscout.com/.
- For Rootstock Testnet, go to https://rootstock-testnet.blockscout.com/.
-
Sign In or Register:
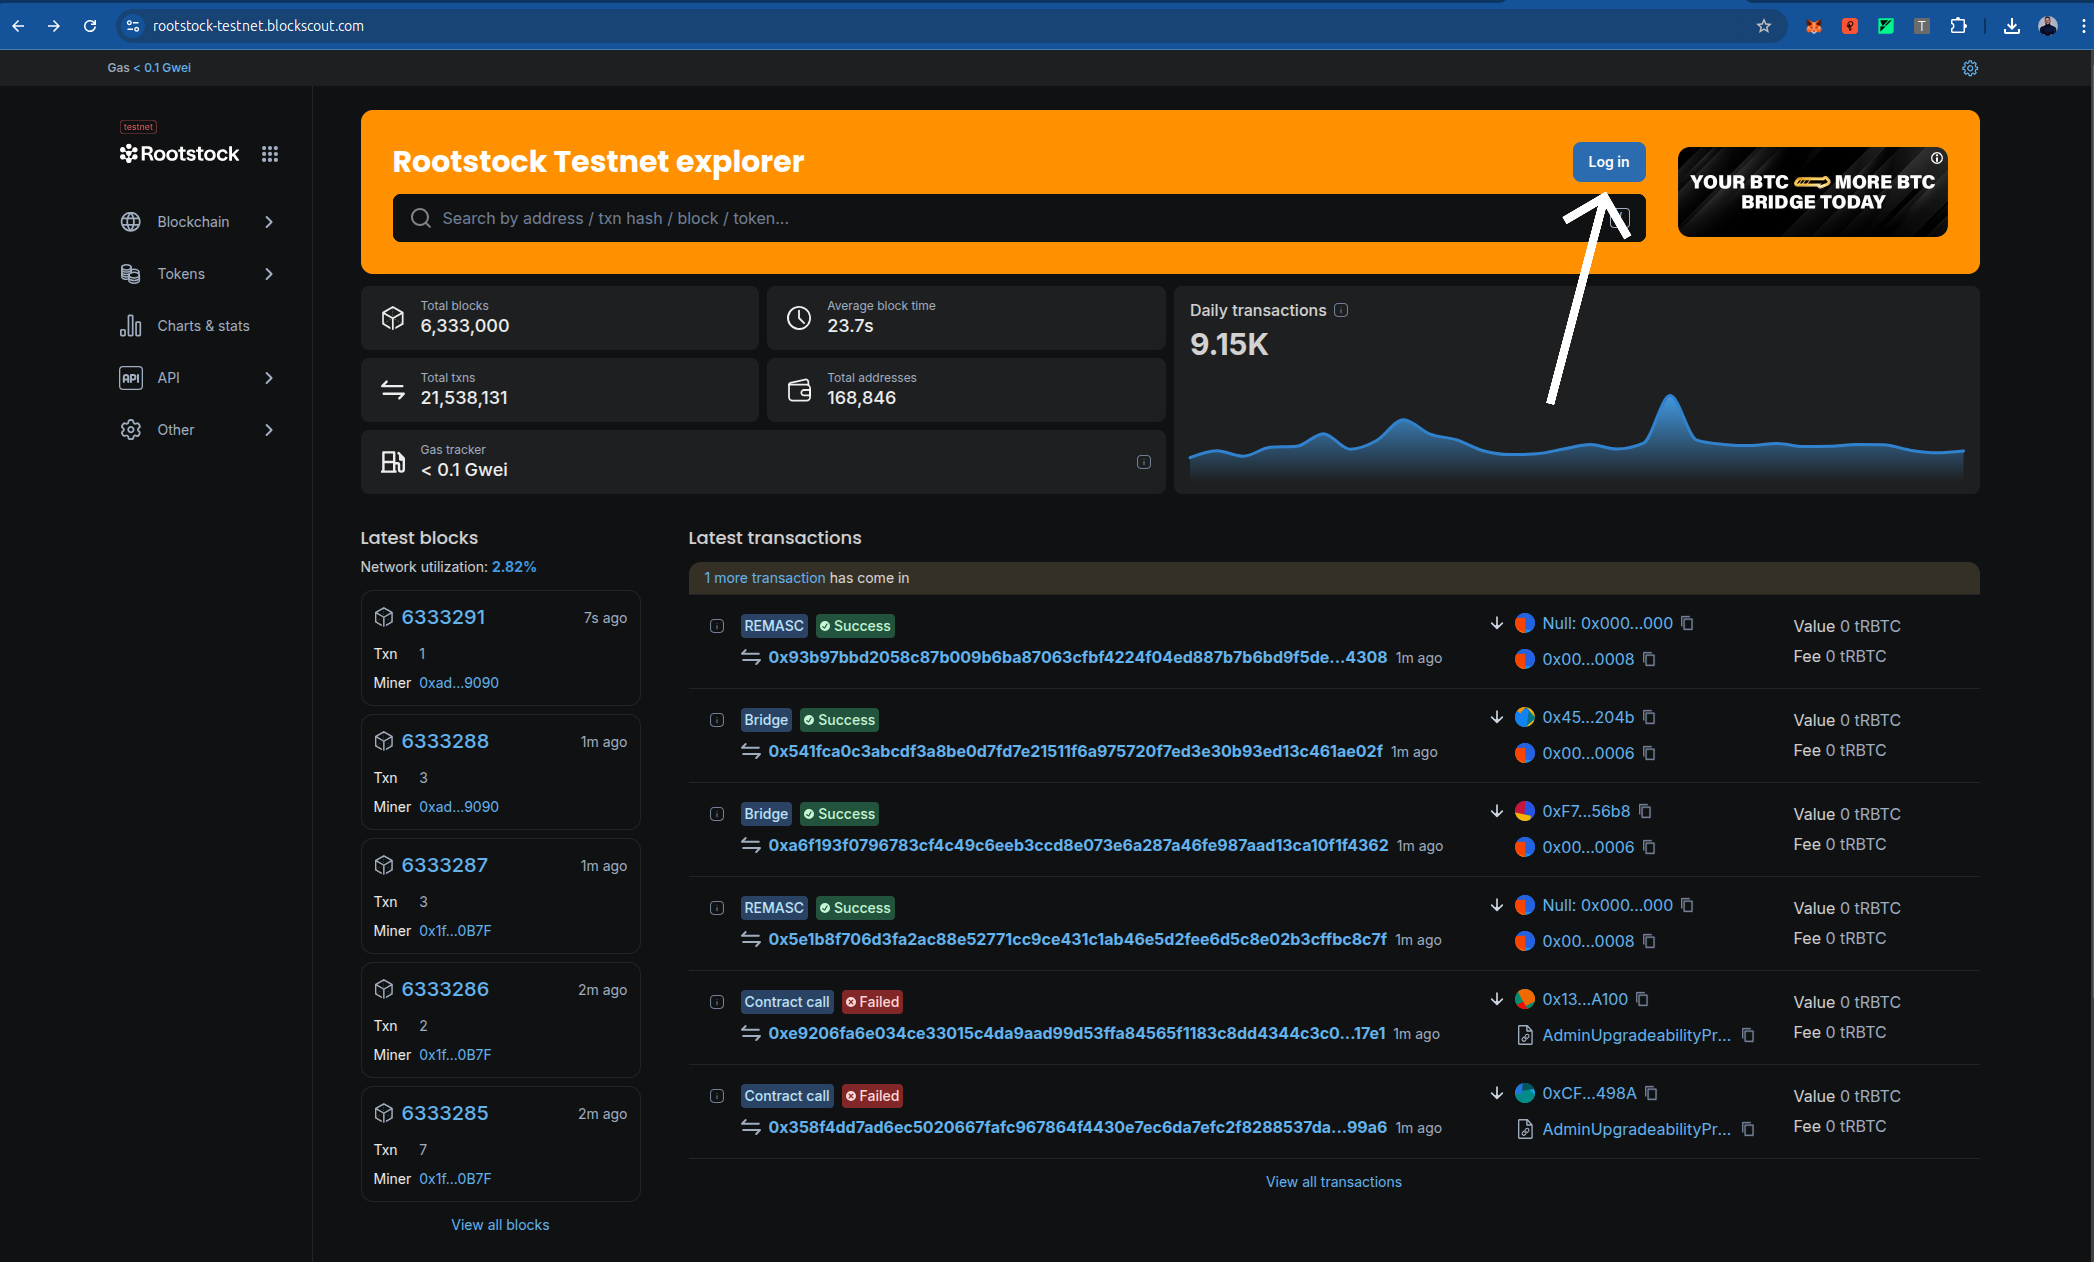
- Click on the "Sign In" or "Register" button, usually located in the top-right corner of the Blockscout website.
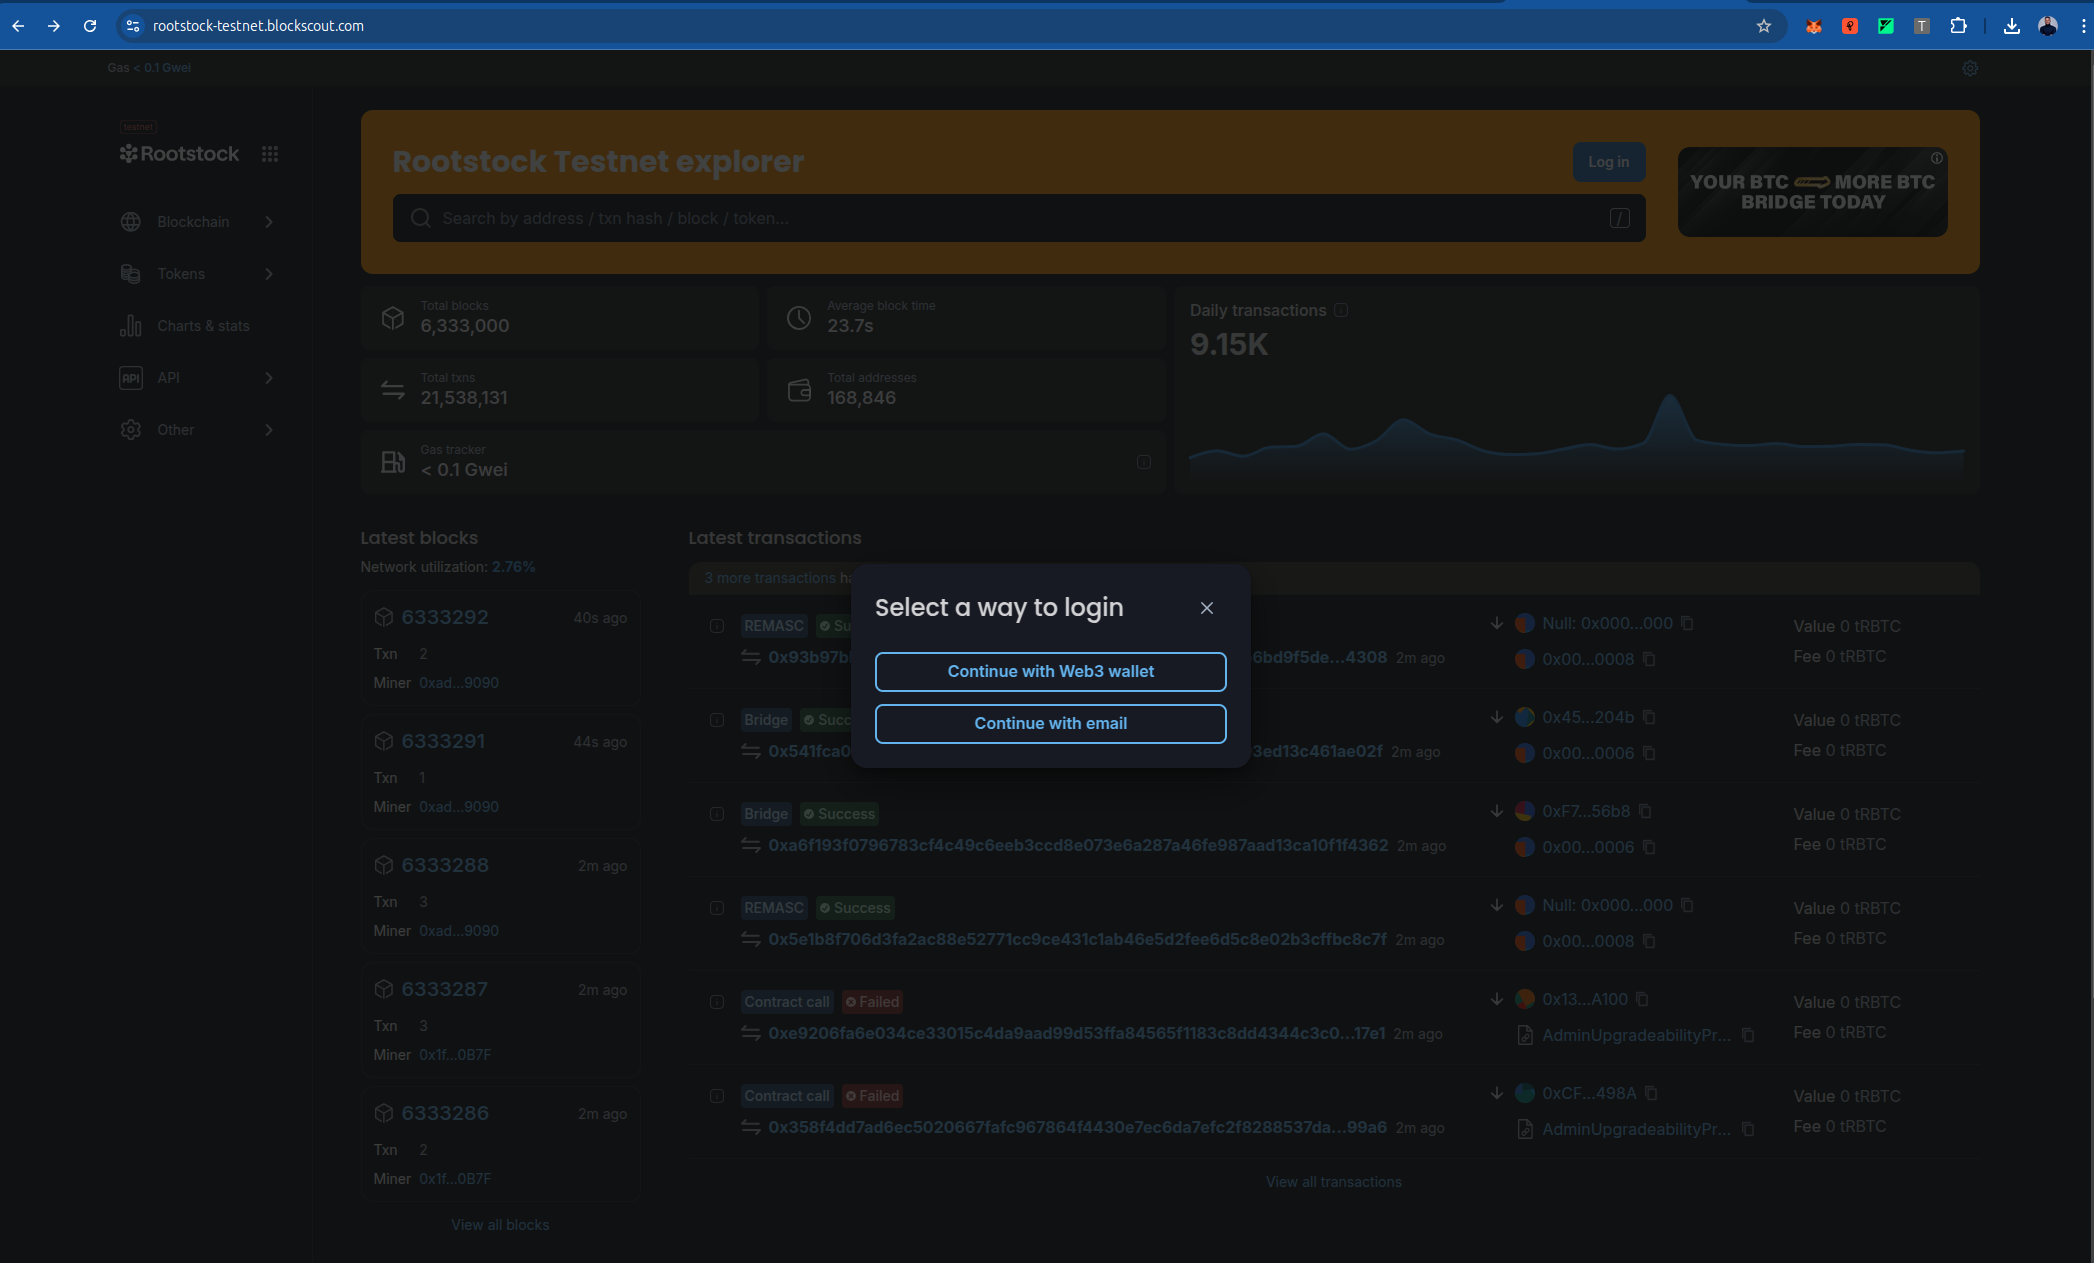
- If you don’t have an account, create one by providing an email address or choose web3 wallet. Verify your email if prompted.
-
Access Your Account Settings:
- Once logged in, click on your profile (often represented by your wallet address or a user icon) and select "Account" or "API Keys" from the dropdown menu.
-
Generate an API Key:
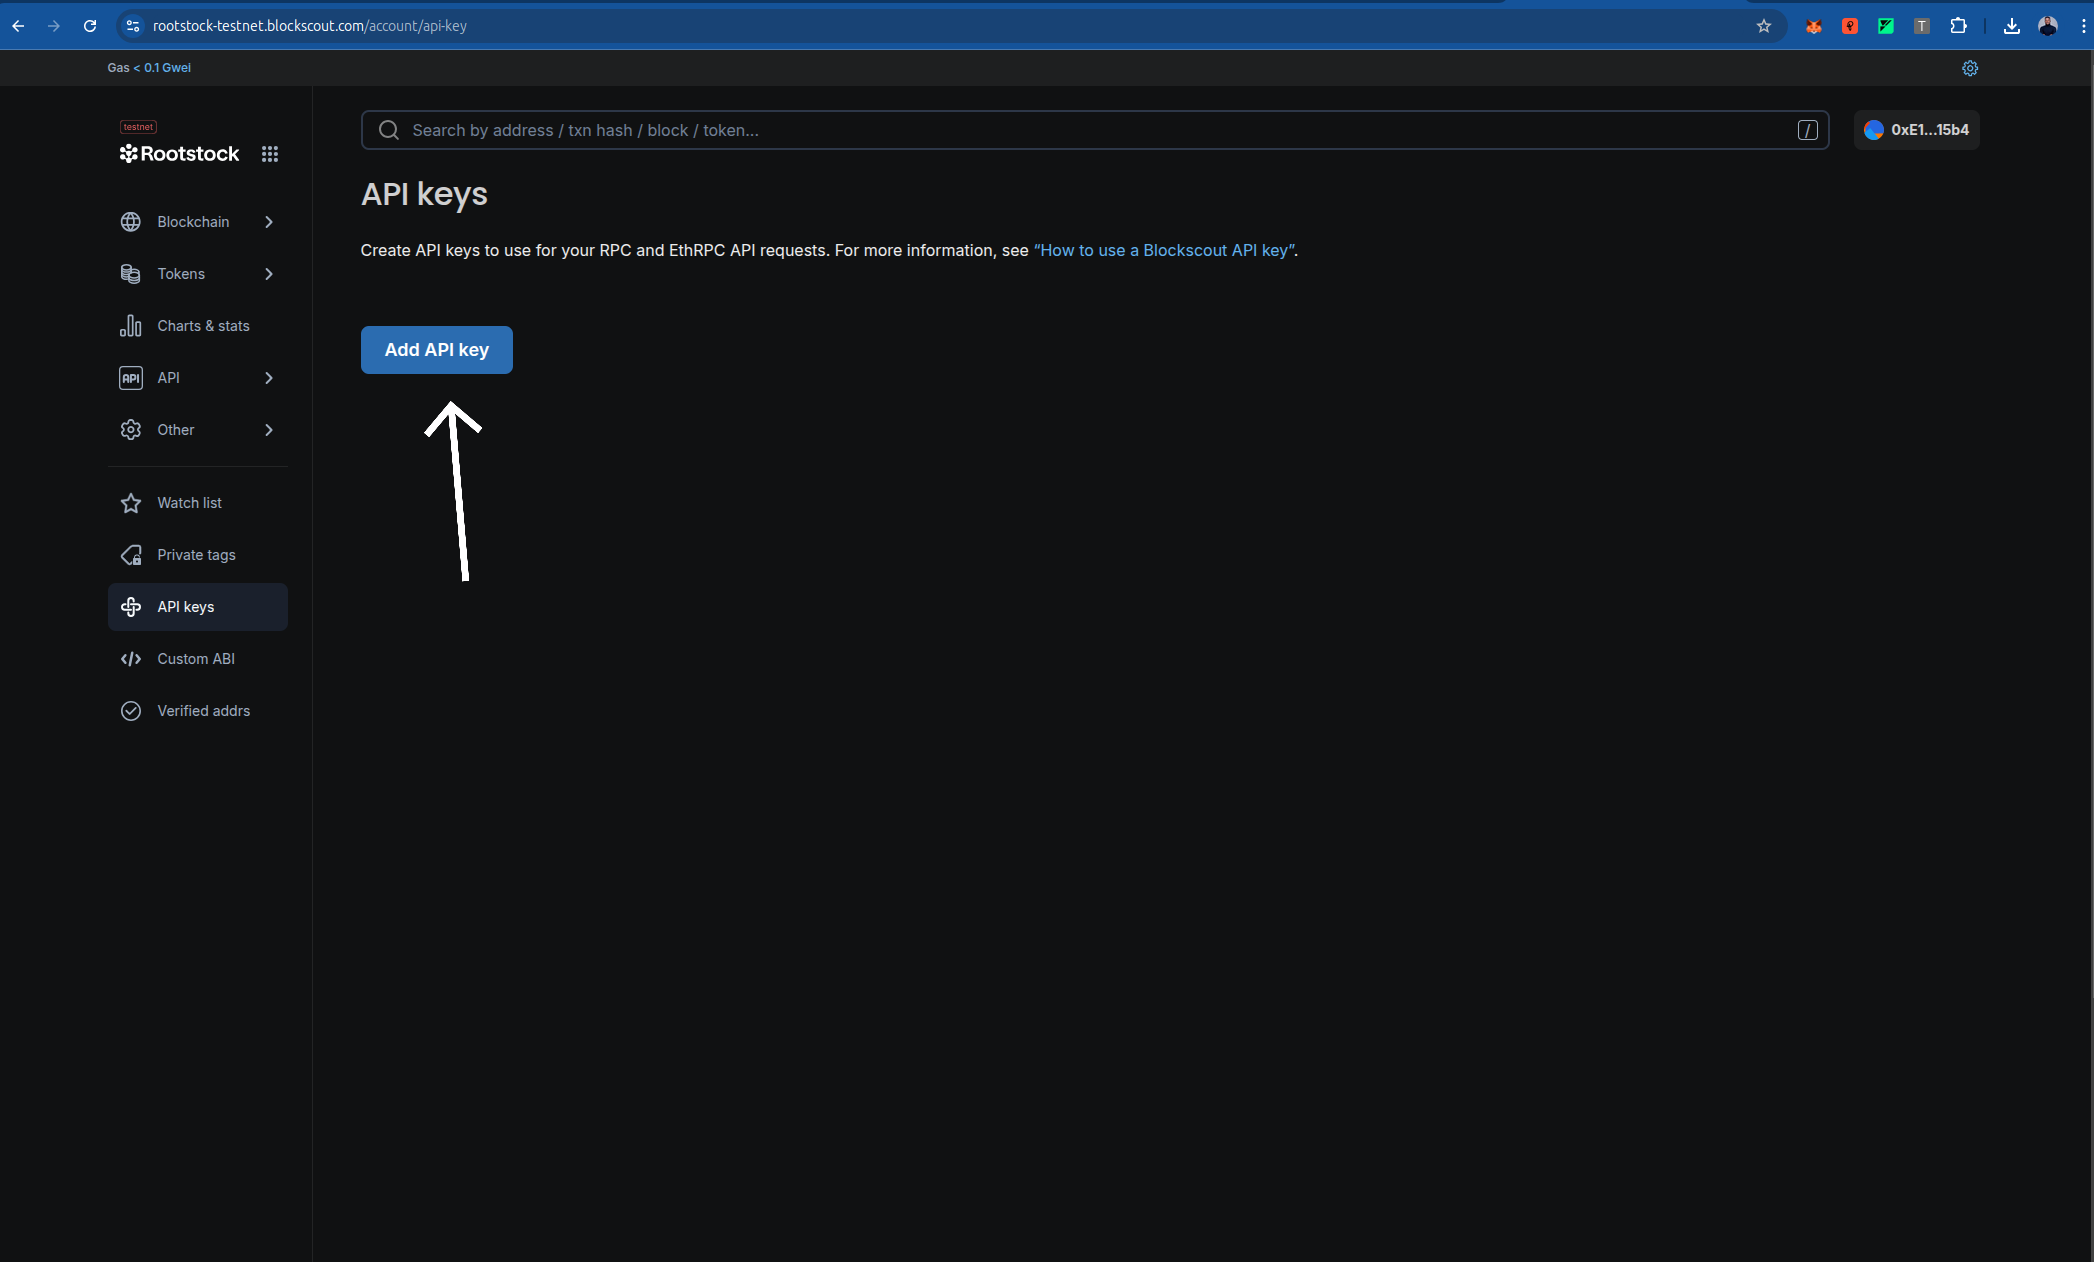
- In the API Keys section, click "Create New API Key" or a similar button.
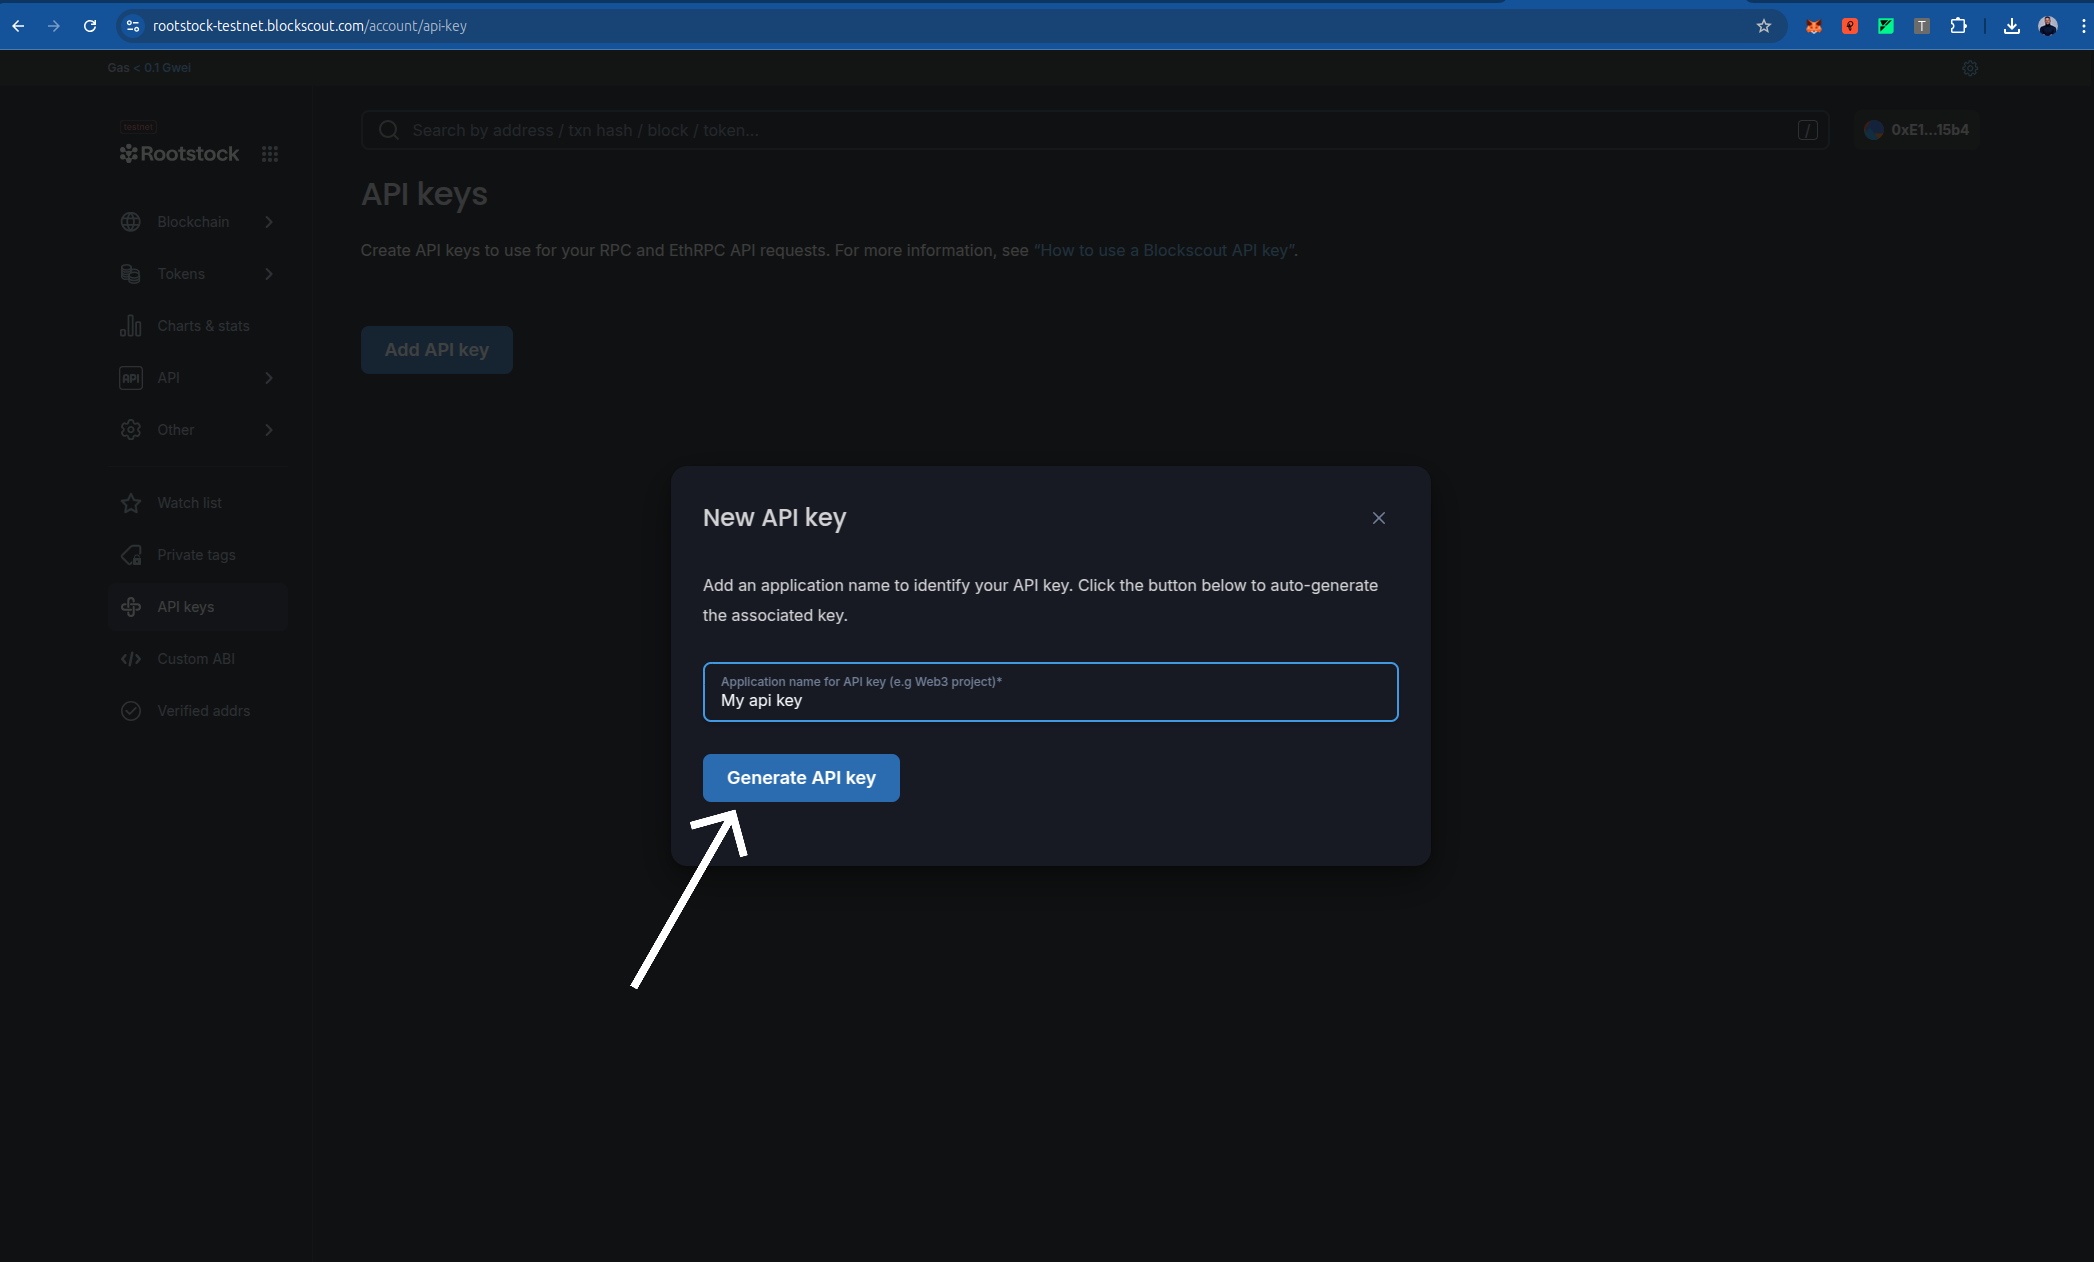
- Provide a name for the API key (e.g., "Foundry Verification") to help you identify its purpose.
- Copy the generated API key and store it securely. You will not be able to view it again after leaving the page.
-
Use the API Key in Foundry:
- Add the API key to your
foundry.tomlconfiguration file under the[etherscan]section, as shown in the Configuration section below. Replace"your api key"with the key you obtained.
- Add the API key to your
Keep your API key confidential and avoid sharing it publicly. If you suspect it has been compromised, regenerate a new key from your Blockscout account.
Integration into the Tutorial
To integrate this section, place it after the Prerequisites section and update the Configuration section to reference it. For example, modify the Configuration section to start with:
Configure Foundry
Before proceeding, ensure you have obtained a Rootstock API key from Blockscout as described in the Obtaining a Rootstock API Key from Blockscout section. Create or update the foundry.toml file in your project root to include Rootstock network configurations. Add the following:
[profile.default]
src = "src"
out = "out"
libs = ["lib"]
solc_version = "0.8.24"
optimizer = true
optimizer_runs = 200
evm_version = "london"

[rpc_endpoints]
rskTestnet = "${RSK_TESTNET_RPC_URL}"
rskMainnet = "${RSK_MAINNET_RPC_URL}"
anvil = "http://127.0.0.1:8545"

[etherscan]
rskTestnet = { key = "your api key", url = "https://rootstock-testnet.blockscout.com/api" }
rskMainnet = { key = "your api key", url = "https://rootstock-blockscout.com/api" }
Deploy the Contract
After configuring Foundry, you can deploy a smart contract to the Rootstock network using the Foundry Starter Kit or your own project. Follow these steps:
-
Clone the Foundry Starter Kit:
git clone https://github.com/rsksmart/rootstock-foundry-starterkit
cd rootstock-foundry-starterkit
#do well to edit with your smartcontract.
you should see something like this:
$ git clone https://github.com/rsksmart/rootstock-foundry-starterkit

cd rootstock-foundry-starterkit

Cloning into 'rootstock-foundry-starterkit'...
remote: Enumerating objects: 374, done.
remote: Counting objects: 100% (53/53), done.
remote: Compressing objects: 100% (21/21), done.
remote: Total 374 (delta 41), reused 32 (delta 32), pack-reused 321 (from 1)
Receiving objects: 100% (374/374), 259.07 KiB | 154.00 KiB/s, done.
Resolving deltas: 100% (129/129), done.
forge install$ forge install
Updating dependencies in /home/cyberhackb/Downloads/rootstock-foundry-starterkit/lib
Submodule 'lib/openzeppelin-contracts' (https://github.com/OpenZeppelin/openzeppelin-contracts) registered for path 'lib/openzeppelin-contracts'
Cloning into '/home/cyberhackb/Downloads/rootstock-foundry-starterkit/lib/openzeppelin-contracts'...
remote: Enumerating objects: 50354, done.
remote: Counting objects: 100% (100/100), done.
remote: Compressing objects: 100% (74/74), done.
remote: Total 50354 (delta 54), reused 26 (delta 26), pack-reused 50254 (from 3) ....
........................................................................................
......remote: Compressing objects: 100% (79/79), done.
remote: Total 313 (delta 91), reused 132 (delta 83), pack-reused 142 (from 1)
Receiving objects: 100% (313/313), 71.35 KiB | 312.00 KiB/s, done. -
Compile your smart contract to ensure there are no errors:
forge build$ forge build
[⠊] Compiling...
[⠊] Compiling 38 files with Solc 0.8.17
[⠒] Solc 0.8.17 finished in 1.90s
Compiler run successful! -
Set Up Environment Variables: Create a .env file in the project root and add your private
echo "PRIVATE_KEY=your_private_key" >> .env
echo "RSK_TESTNET_RPC_URL=https://public-node.testnet.rsk.co" >> .env
echo "RSK_MAINNET_RPC_URL=https://public-node.rsk.co" >> .env -
Load the environment variables:
source .env -
Deploy the Contract: Use a Foundry script to deploy the contract.:
forge script script/deploy.s.sol --rpc-url $RSK_TESTNET_RPC_URL --broadcast --legacy --evm-version london$ forge script script/deploy.s.sol --rpc-url $RSK_TESTNET_RPC_URL --broadcast --legacy --evm-version london
# The response should look like this:
[⠊] Compiling...
[⠘] Compiling 2 files with Solc 0.8.17
[⠊] Solc 0.8.17 finished in 1.72s
Compiler run successful!
Script ran successfully.
== Logs ==
Deploying with account: 0xE122199bB9617d8B0e814aC903042990155015b4
Deployer balance: 0 RBTC/ETH
MockV3Aggregator deployed at: 0xD48bB9503C5Caba9D0Cbbac8B6Ea4F0613C37Bd1
Deployment Summary:
MockV3Aggregator: 0xD48bB9503C5Caba9D0Cbbac8B6Ea4F0613C37Bd1
## Setting up 1 EVM.
==========================
Chain 31
Estimated gas price: 0.004724958 gwei
Estimated total gas used for script: 11072149
Estimated amount required: 0.000052315438994742 ETH
==========================
##### 31
✅ [Success]Hash: 0x0b1f512835a75b63a6be18f82cf0b631563d6c76b944c3f33bc22f0d2ed239a5
Contract Address: 0xD48bB9503C5Caba9D0Cbbac8B6Ea4F0613C37Bd1
Block: 6416881
Paid: 0.000000648103589028 ETH (137166 gas * 0.004724958 gwei)
✅ Sequence #1 on 31 | Total Paid: 0.00003991405908021 ETH (8447495 gas * avg 0.004724958 gwei)
==========================
ONCHAIN EXECUTION COMPLETE & SUCCESSFUL.
Transactions saved to: /home/cyberhackb/Downloads/rootstock-foundry-starterkit$/broadcast/deploy.s.sol/31/run-latest.json
Sensitive values saved to: /home/cyberhackb/Downloads/rootstock-foundry-starterkit$/cache/deploy.s.sol/31/run-latest.json
Usage
To verify a deployed contract, use the forge verify-contract command. You need the contract address and the contract name (as defined in your Solidity file). Run the following command:
For Rootstock Testnet:
forge verify-contract --chain-id 31 --verifier blockscout --verifier-url https://rootstock-testnet.blockscout.com/api "0xD48bB9503C5Caba9D0Cbbac8B6Ea4F0613C37Bd1" src/mockAggregator.sol:MockAggregator
# Remember to edit to your contract address and contract name
The response should look like this:
Submitting verification for [src/mockAggregator.sol:MockAggregator] 0xD48bB9503C5Caba9D0Cbbac8B6Ea4F0613C37Bd1.
Submitted contract for verification:
      Response: `OK`
      GUID: `b390a97b95e4878626a6dbe5ef836ca1d1a0463a6806239d`
      URL: https://rootstock-testnet.blockscout.com/address/0xD48bB9503C5Caba9D0Cbbac8B6Ea4F0613C37Bd1
Contract verification status:
Response: `OK`
Details: `Pending in queue`
Contract verification status:
Response: `OK`
Details: `Pass - Verified`
Contract successfully verified
All (6) contracts were verified!
For Rootstock Mainnet:
-
To verify a contract on Rootstock Mainnet, use the following command with the appropriate contract address and name
forge verify-contract --chain-id 30 --verifier blockscout --verifier-url https://rootstock.blockscout.com/api <your_contract_address> <contract_file:contract_name>
Resources
- Deploy, Interact and Verify Smart Contracts using Remix and Rootstock Explorer
- Visit hardhat-verify
- Visit blockscout
- Hardhat Starter Kit for Rootstock
This content was contributed by @jerydam as part of the Rootstock Hacktivator. For full details, please review the Hacktivator Terms and Conditions.