Time to read: 1 min
For the complete documentation index, see llms.txt
How to use Atlas Bridge
Tip
You need enough balance to cover transfer amount and fees. Check Minimum Transaction Amounts before starting.
Getting Started
- Open Atlas Bridge App
- Go to https://atlas.rootstock.io (or testnet if applicable).
- You do not need to connect a wallet to start.

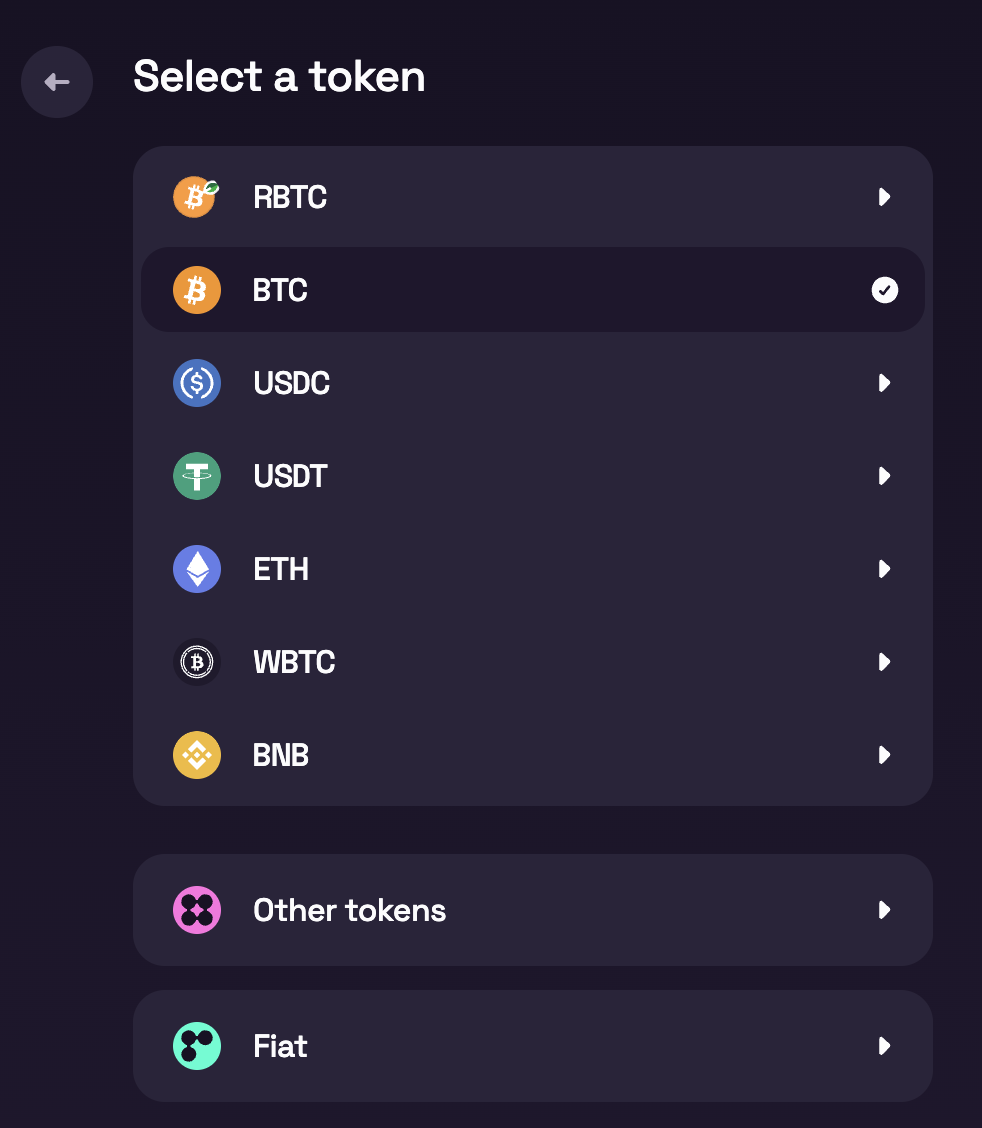
- Select the desired pair
- Choose source and destination assets. One side must always be a Rootstock token (e.g. rBTC, trBTC). The other is the asset on the other chain (e.g. BTC, ETH, USDT).
- See Mainnet and Testnet available swaps in the User Guide for supported pairs.
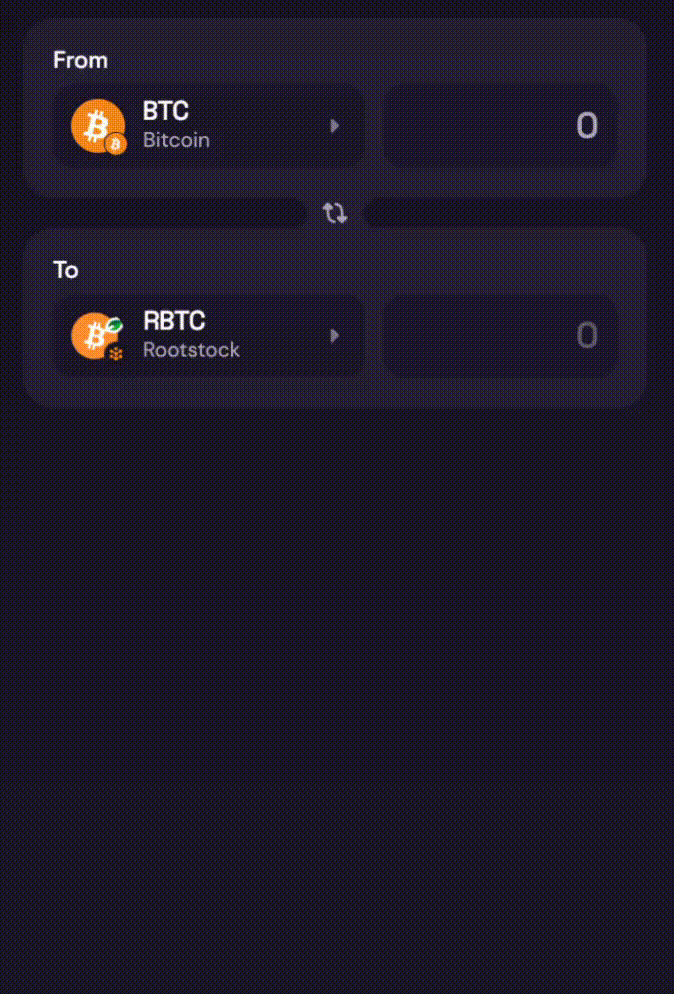
- Enter the amount
- Type the amount you want to bridge.
- If no providers appear, your amount may be below the minimum, confirm Minimum Transaction Amounts and adjust.
- Choose a provider
- The bridge lists all available providers for your pair and amount.
- Compare rates, fees, and conditions.
- Select a provider, then click Review transaction.
- Review provider details and add destination address
- Review fees, minimums, and estimated time for the selected provider.
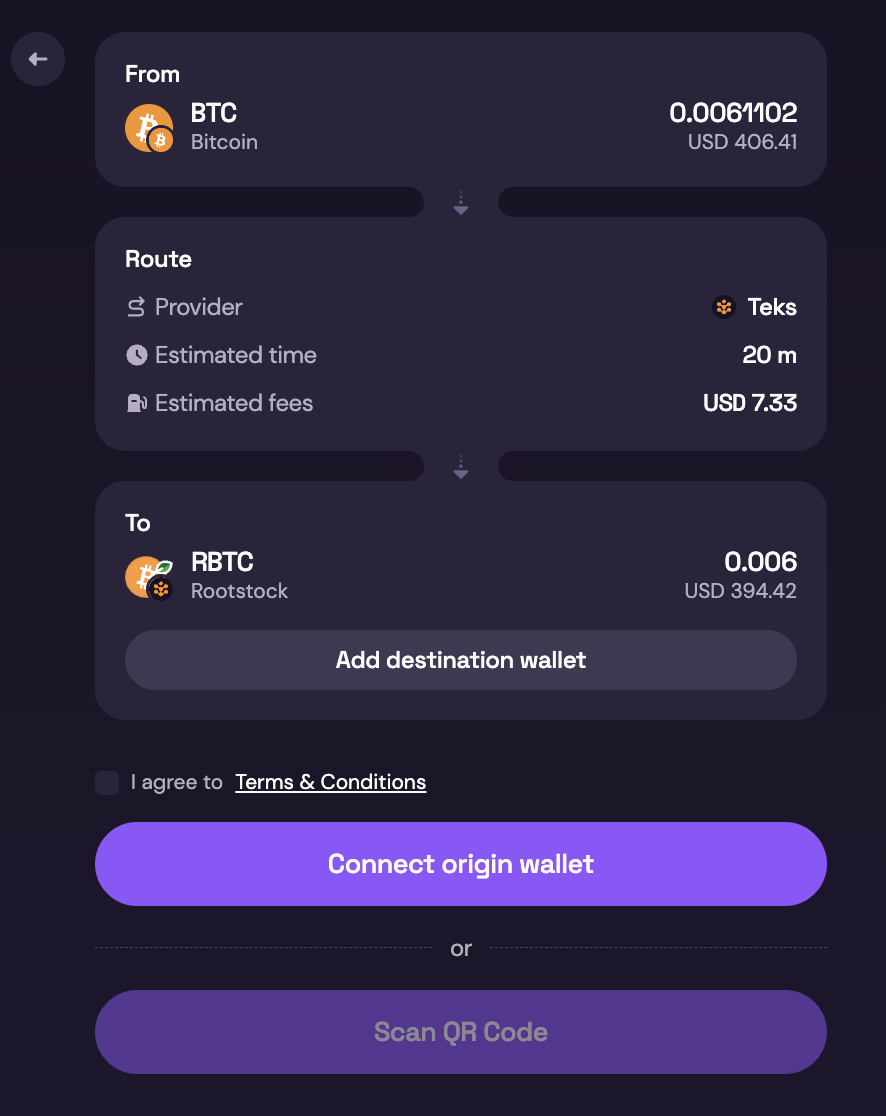
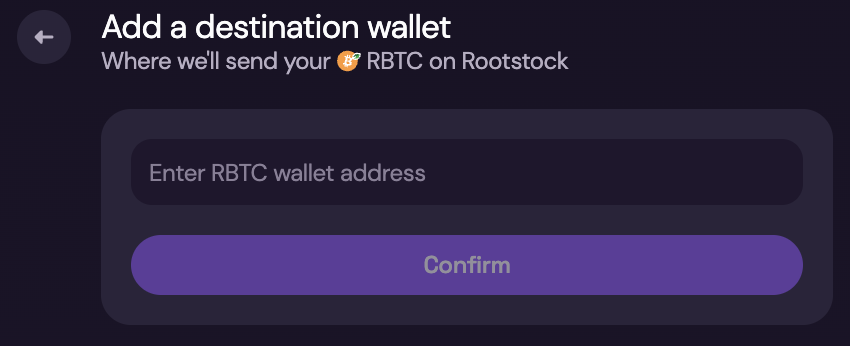
- Click Add Destination Wallet and paste the destination address where you want to receive funds.
- Confirm the destination chain matches the address type.
- Complete the transaction After selecting a provider and accepting terms, finish in one of two ways:
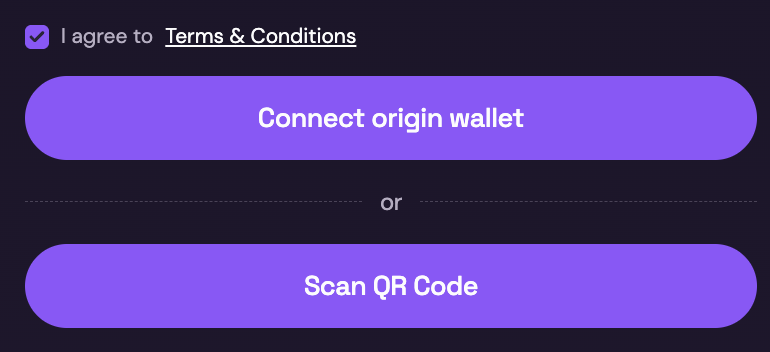
- With a wallet: Connect a compatible wallet (for example MetaMask for Rootstock) and authorize the transaction.
- Without a wallet: Complete with QR code and follow provider instructions.
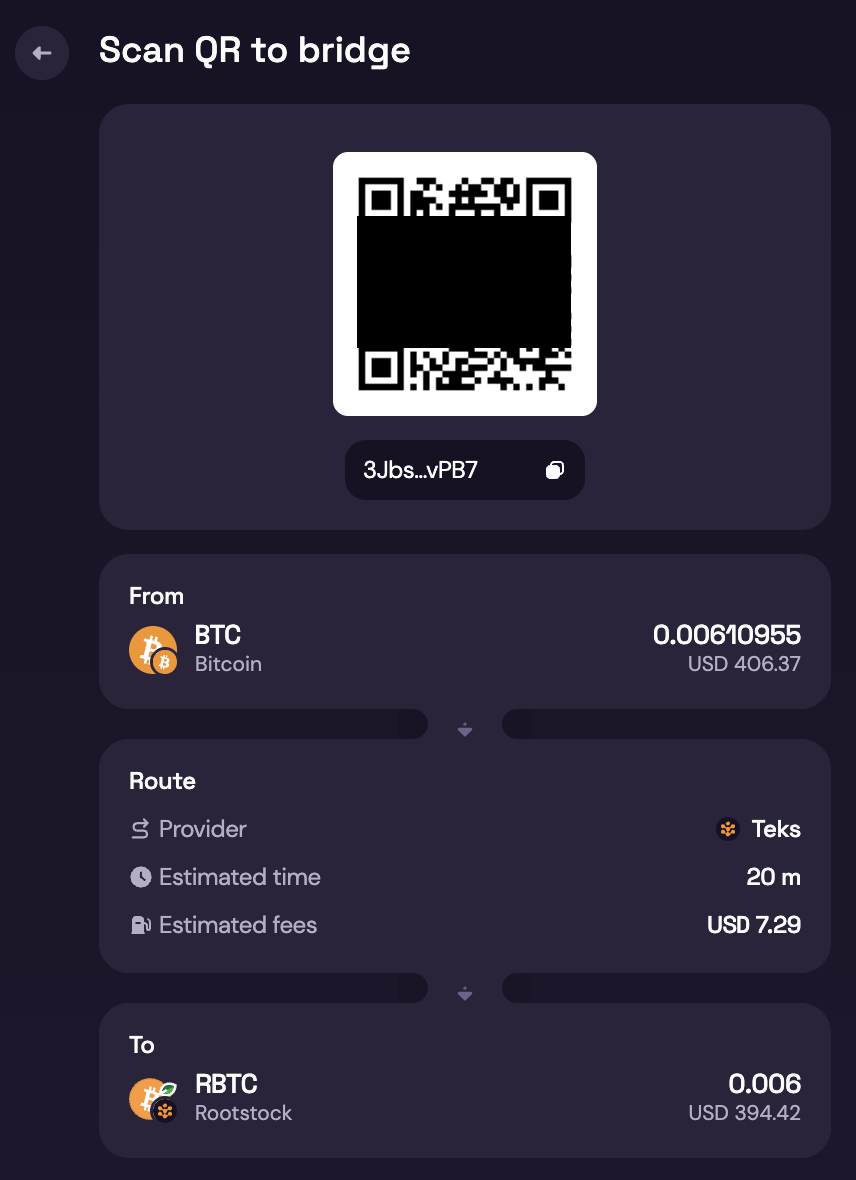
- Review and confirm
- Check fees, destination address, and final received amount.
- Wait for confirmations. See Expected Time & Confirmations.
- Track progress in the bridge UI.
- Done
- You should receive the asset on the destination network.
- Keep the transaction hash until funds arrive.
Warning: Important Visual Warnings (UI Callouts)
⚠️ Do NOT send BTC from an exchange
⚠️ Only use wallets you control
⚠️ Always verify the destination address
⚠️ Bitcoin transactions are irreversible
If the transaction looks stuck
First wait for the estimated confirmation window. Then:
- Open the source-chain explorer with your transaction hash.
- Re-open Atlas and check provider status.
- Contact support with transaction hash, provider name, and time submitted.
Status Indicators Users Will See
- 🟡 Waiting for network confirmations
- 🟡 Processing bridge transaction
- 🟢 Completed successfully
- 🔴 Action required / error