How to compile and run an RSKj node on Linux
Here you have the steps to compile and run an Rootstock node on Linux.
Pre-requisites
First of all, you will need to install:
| Dependency | Details |
|---|---|
| Git for Linux | Download this Git command line tool |
| Java 17 JDK | Follow the steps to install Java. To check if installation went correctly, check the version with command: java-version. Then, as admin, modify /etc/enviroment adding the correct JAVA_HOME |
Recommended IDEs:
Starting with v6.4.0, the minimum supported Java LTS version is Java 17. Previous Java versions will no longer be supported.
Get the source code
Using the installed command-line tool Git, you need to retrieve (or clone) the RSKj Github source code from here.
Run these commands in the terminal:
git clone --recursive https://github.com/rsksmart/rskj.git
cd rskj
git checkout tags/LOVELL-7.0.0 -b LOVELL-7.0.0
Note: It is better to download the code into a short path.
Ensure the security chain
Ensure the security chain of the downloaded source code.
Get external dependencies
Before you can launch IntelliJ IDEA, there is an important step.
Browse in your RSKj cloned directory and then launch configure.sh with the following terminal command:
./configure.sh
This will download and set important components (e.g. Gradle Wrapper).
IntelliJ IDEA setup
Compiling the node
Now, you can launch IntelliJ IDEA:
In a terminal, and from the folder you extracted the tar.gz, go into idea/bin/.
Then, type the following command to load the script:
./idea/sh
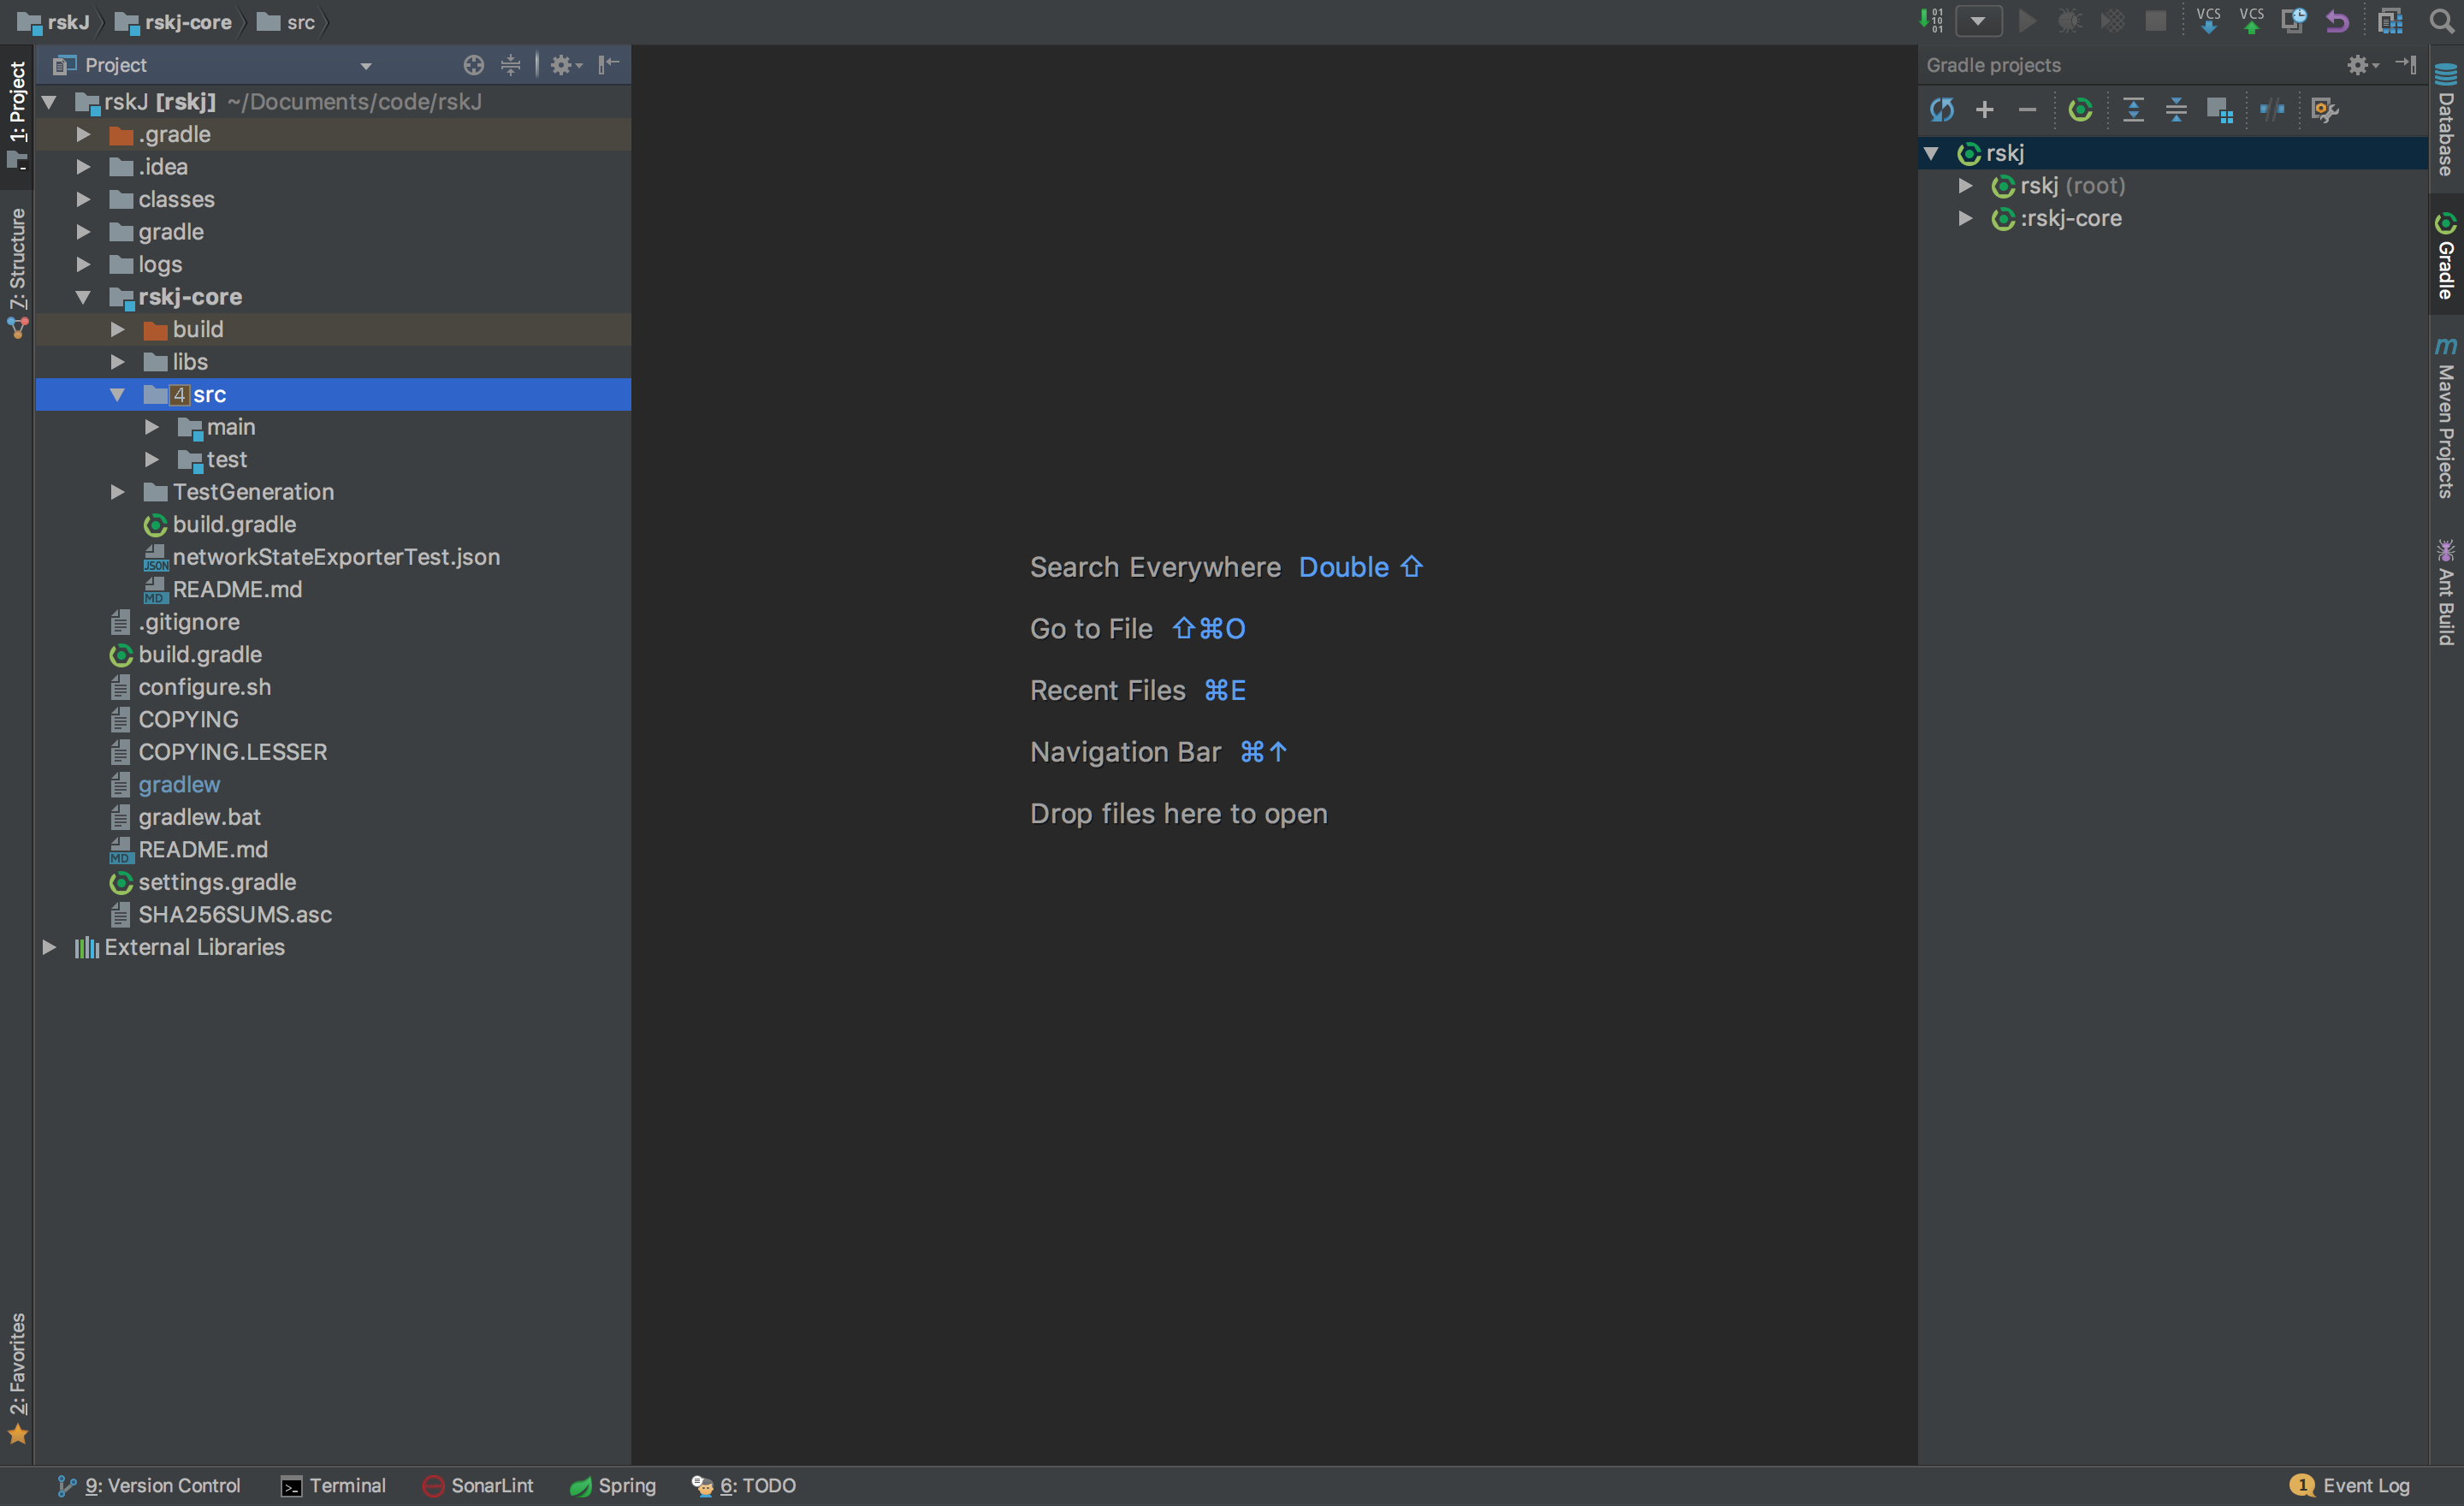
When IntelliJ IDEA is launched you should have a window with different choices.
- Choose Import project.
- Browse in the RskJ downloaded code the file
rskj\build.gradleand select it. Click NEXT. - Within the dialog select Use default gradle wrapper and then click Finish. Keep IntelliJ IDEA open.
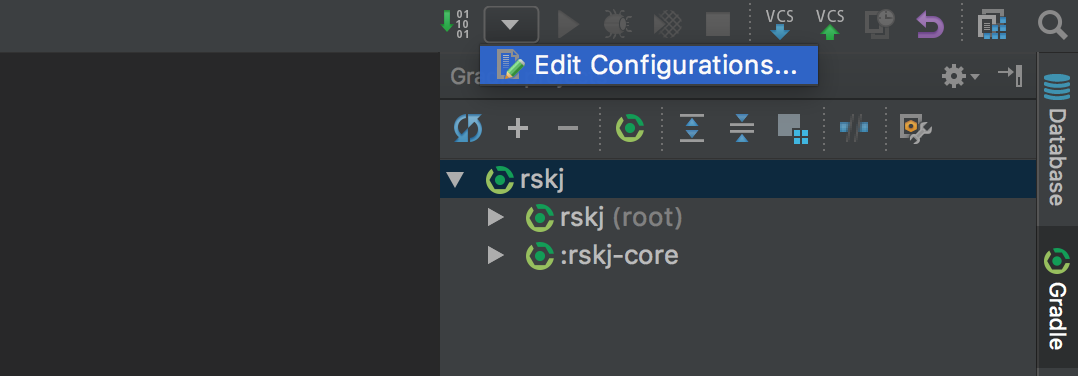
IDEA Build/Run configuration
We need to create a new configuration profile to run the node from IDEA. That can be done by clicking on Run -> Edit Configurations or as shown in the image below:
Then set the options as shown below:
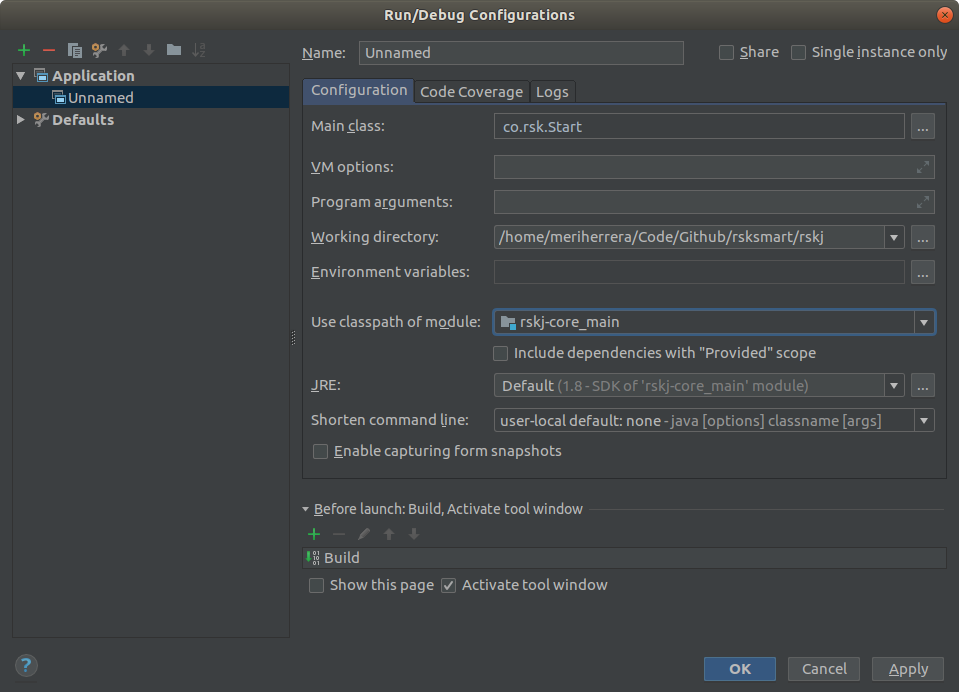
- Main Class:
co.rsk.Start - Working directory:
/path-to-code/rskJ - Use classpath of module:
rskj-core_main - JRE need to be set as:
Default (1.8 - SDK of 'rsk-core_main' module)
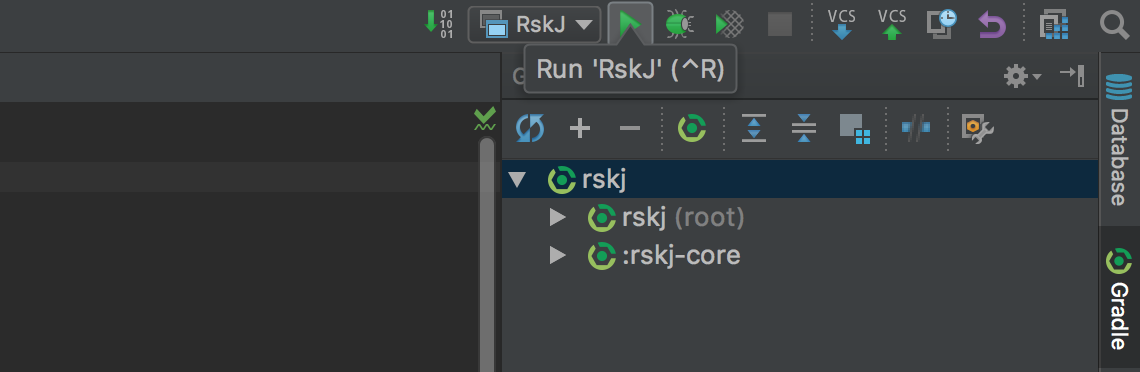
Running the node
We are ready to run the node using IDEA, just press the Start (green arrow) button at the right of the configuration just created.
If everything is OK you should see the debug information like that:

And yes! Congratulations! Now you're running a local RSK node :)
You're joined to Mainnet by default.
If you want to switch the network, add:
- For Testnet:
--testnet - For Regtest:
--regtest
Inside the field Program Arguments in your run configuration.
Visual Studio Code setup
Recommended Plugins
Visual Studio Configuration Files:
In order to setup JDK configuration, we use .vscode/settings.json. Here we can setup the latest JDK for Extension Pack for Java, then use the recommended version for RSKj, for instance:
.vscode/settings.json
{
   "java.jdt.ls.java.home": "/lib/jvm/java-17-openjdk",
   "java.configuration.runtimes": [
      {
        "name": "JavaSE-1.8",
        "path": "/lib/jvm/java-1.8-openjdk",
        "default": true
      },
      {
        "name": "JavaSE-17",
        "path": "/lib/jvm/java-17-openjdk",
      },
    ]
}
In this example, we have setup Java 17 for Extension Pack for Java to work as expected and the default java compiler is Java 1.8.
In order to list these paths you can run:
sudo update-alternatives --config java
or
whereis java
Be aware that the path may vary depending on how you installed it.
In order to build, run or debug RSKj, we use .vscode/launch.json. Here we can setup the commands that will be used to run our application, for instance:
.vscode/launch.json
{
    // Use IntelliSense to learn about possible attributes.
    // Hover to view descriptions of existing attributes.
    // For more information, visit: https://go.microsoft.com/fwlink/?linkid=830387
    "version": "0.2.0",
    "configurations": [
        {
            "type": "java",
            "name": "Run RSK Start",
            "request": "launch",
            "mainClass": "co.rsk.Start",
            "args" : "--testnet -Xkeyvalue.datasource=leveldb"
        }
    ]
}
In this example, we are going to run the application with the following arguments: --testnet -Xkeyvalue.datasource=leveldb.
Running the project
We are ready to run the node using Visual Studio Code, select your configuration from launch.json within Run and Debug.

Click on start (green play icon at the left of your configuration name).
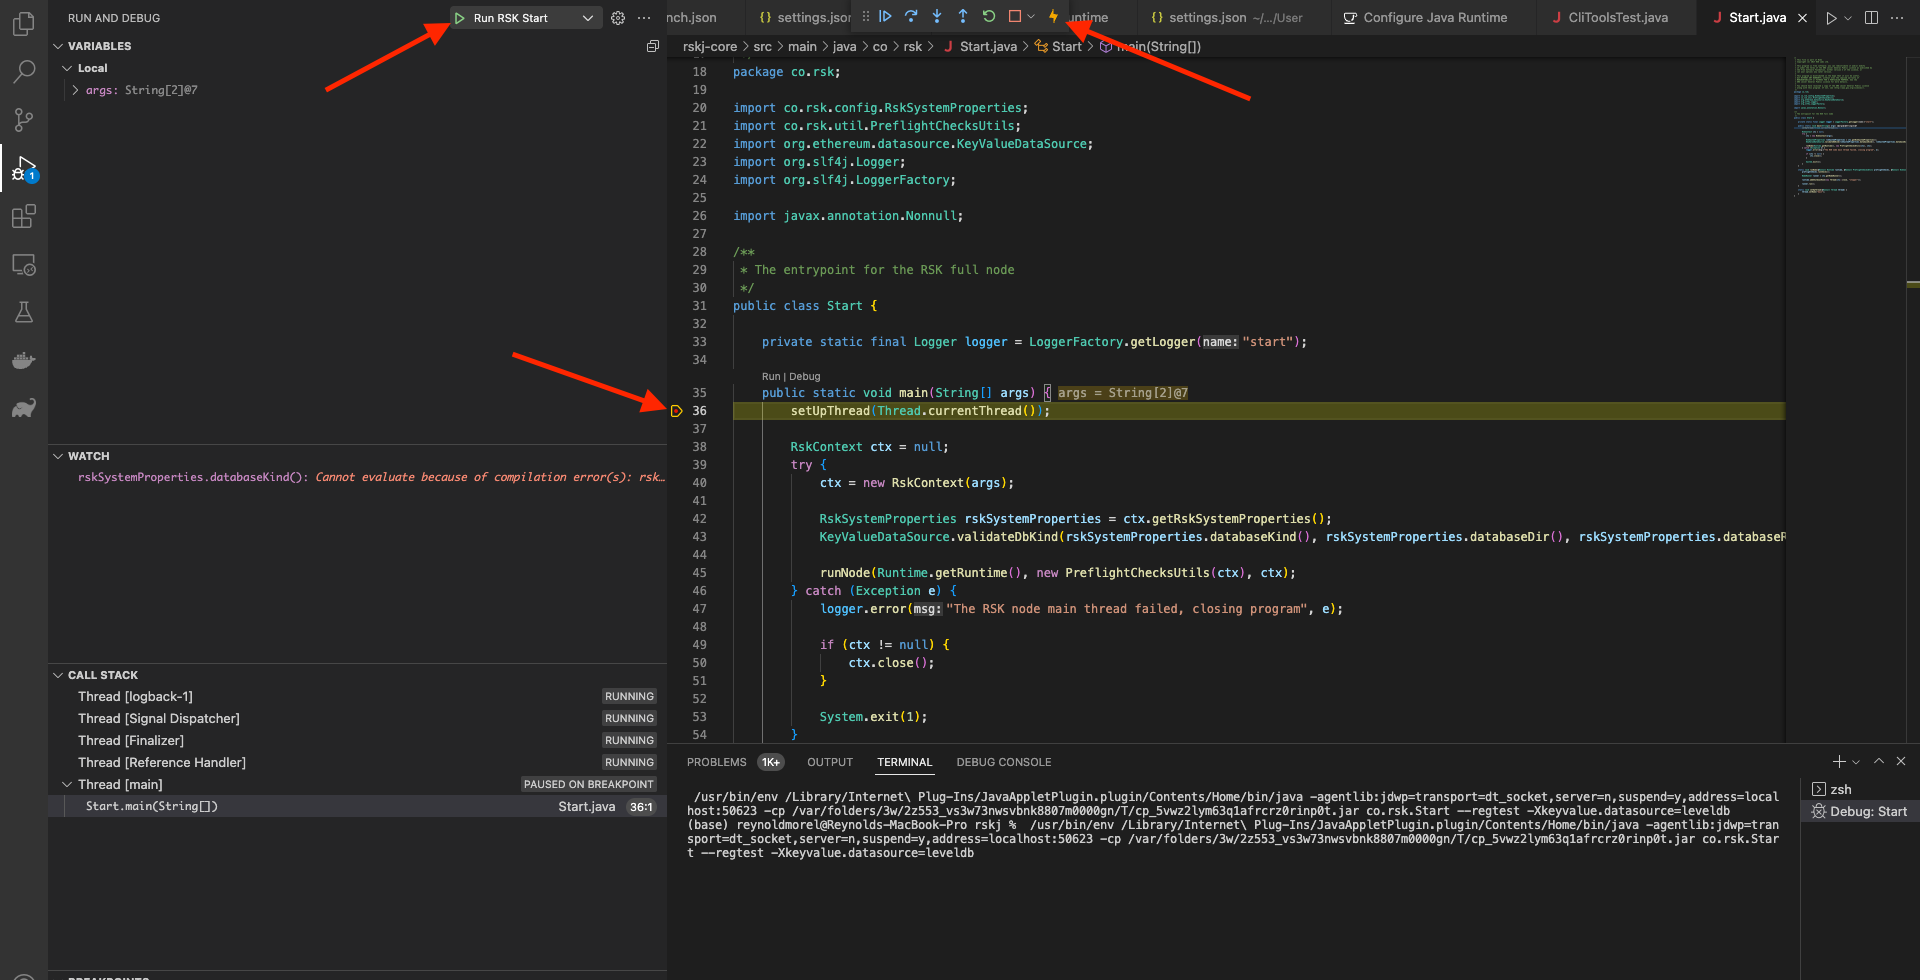
A debug tools menu shows up at the top of the IDE window, where you could run the node step by step!
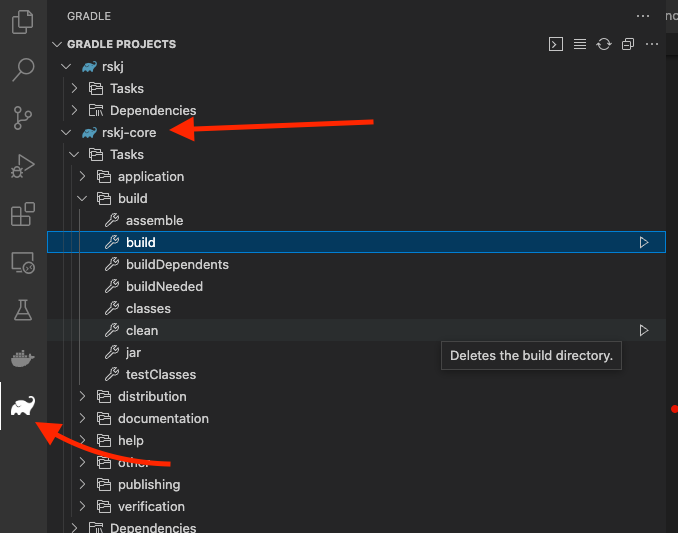
Building the project with Gradle in Visual Studio Code
In order to build the project using Gradle, we can simply go to the respective tab. On tab, we should be able to see all available Gradle configurations from the application. Select the project to be built and double-click the desired Gradle Task.
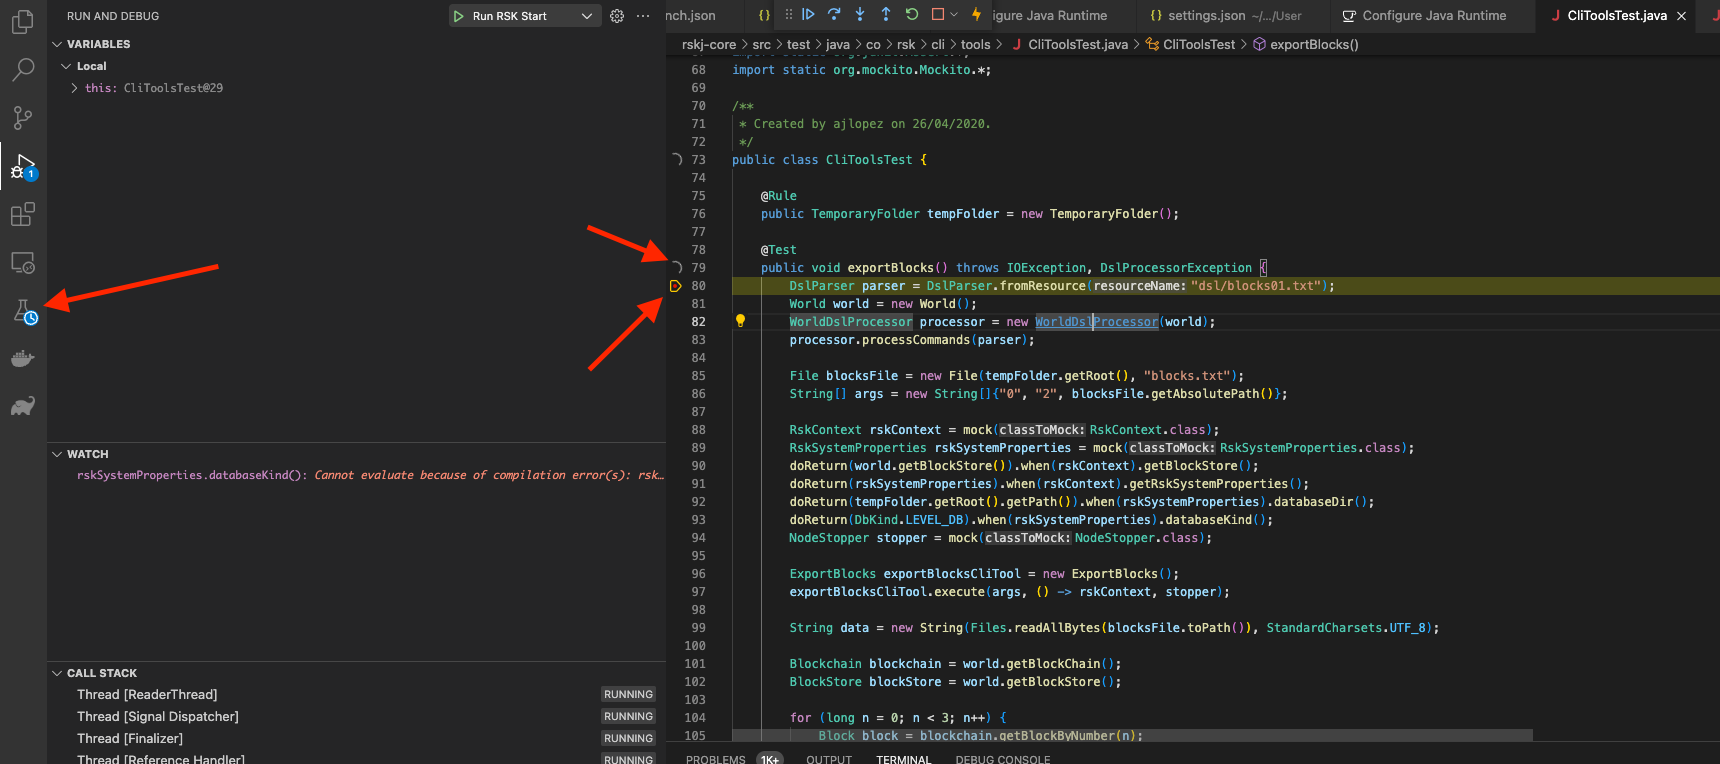
Testing in Visual Studio Code
In order to run tests, we can simply go to the Testing tab where you can see all the tests. We can also go directly to the test file and right-click the icon at the left of a declaration of a test and then decide to either run or debug the test.
Any problems?
Check out the troubleshooting section, hope it helps!