Rootstock Web3Auth Starter Kit
The blockchain trilemma states that a blockchain can only optimally achieve two out of three desirable properties: decentralization, security, and scalability. This inherent limitation often translates into challenges for dApp developers and, more importantly, for users. It complicates user onboarding (setting up wallets and acquiring cryptocurrency), makes interactions cumbersome (managing wallets and transaction fees), raises security concerns (protecting private keys), and can lead to slow performance due to transaction speeds and fees which directly impacts the user experience of dApps.
Web3Auth bridges this gap by offering a streamlined Single Factor Authentication (SFA) solution that simplifies user onboarding and wallet connections on Rootstock. Whether you're developing a decentralized application (dApp) for experienced crypto users or beginners new to blockchain, Web3Auth makes user interactions intuitive and secure.
By the end of this guide, you will learn how to use the starter kit to integrate Web3Auth and configure your dApp for Rootstock.
Who is this guide for?
This guide is designed for developers who:
- Are new to blockchain development and want to build user-friendly decentralized applications (dApps).
- Have experience with JavaScript and frameworks like Next.js but are unfamiliar with integrating blockchain functionalities.
- Want to simplify authentication and onboarding for their dApps using Web3Auth.
Why use Web3Auth?
Web3Auth enhances the dApp experience:
- Enhanced User Experience
- Provide passwordless logins, eliminating the need for users to remember complicated credentials.
- Simplify wallet management for both technical and non-technical users.
- Secure Authentication
- Implement robust Single Factor Authentication to protect user data and assets.
- Seamless Blockchain Interaction
- Enable direct integration with Rootstock blockchain using Wagmi, optimizing interactions like transaction signing and contract interaction.
Prerequisites
Before getting started, ensure to have the following tools installed:
-
Node.js
- Install Node.js (version 19.x or later recommended).
- Verify your installation by running:
node -v
-
Package Manager (Yarn or Bun)
- Use Yarn (preferred for Next.js projects) or Bun for package management.
- Install Yarn globally using:
npm install -g yarnConfirm installation:
yarn -v -
Fund Your Rootstock Blockchain Wallet
- Get test rBTC (tRBTC) from the Rootstock Faucet to fund your test account.
-
Web3Auth Account
- Sign up on the Web3Auth Dashboard.
- Create a project to generate your unique Client ID.
- Keep your Client ID handy for integration.
-
WalletConnect Account
- Sign up on WalletConnect Cloud.
- Create a project and obtain your WalletConnect Project ID.
Set up the Project
To set up the sample dApp project, follow the steps below:
1. Set Up a Next.js Project
Begin by cloning the Web3 Auth Sample dApp Starter Kit to set up your project environment.
git clone https://github.com/rsksmart/w3a-rsk-starter-kit.git
This will create a local copy of the starter kit, providing a solid foundation for development.
Step 2: Configure Web3Auth Client ID and WalletConnect Project ID
- Copy the Client ID
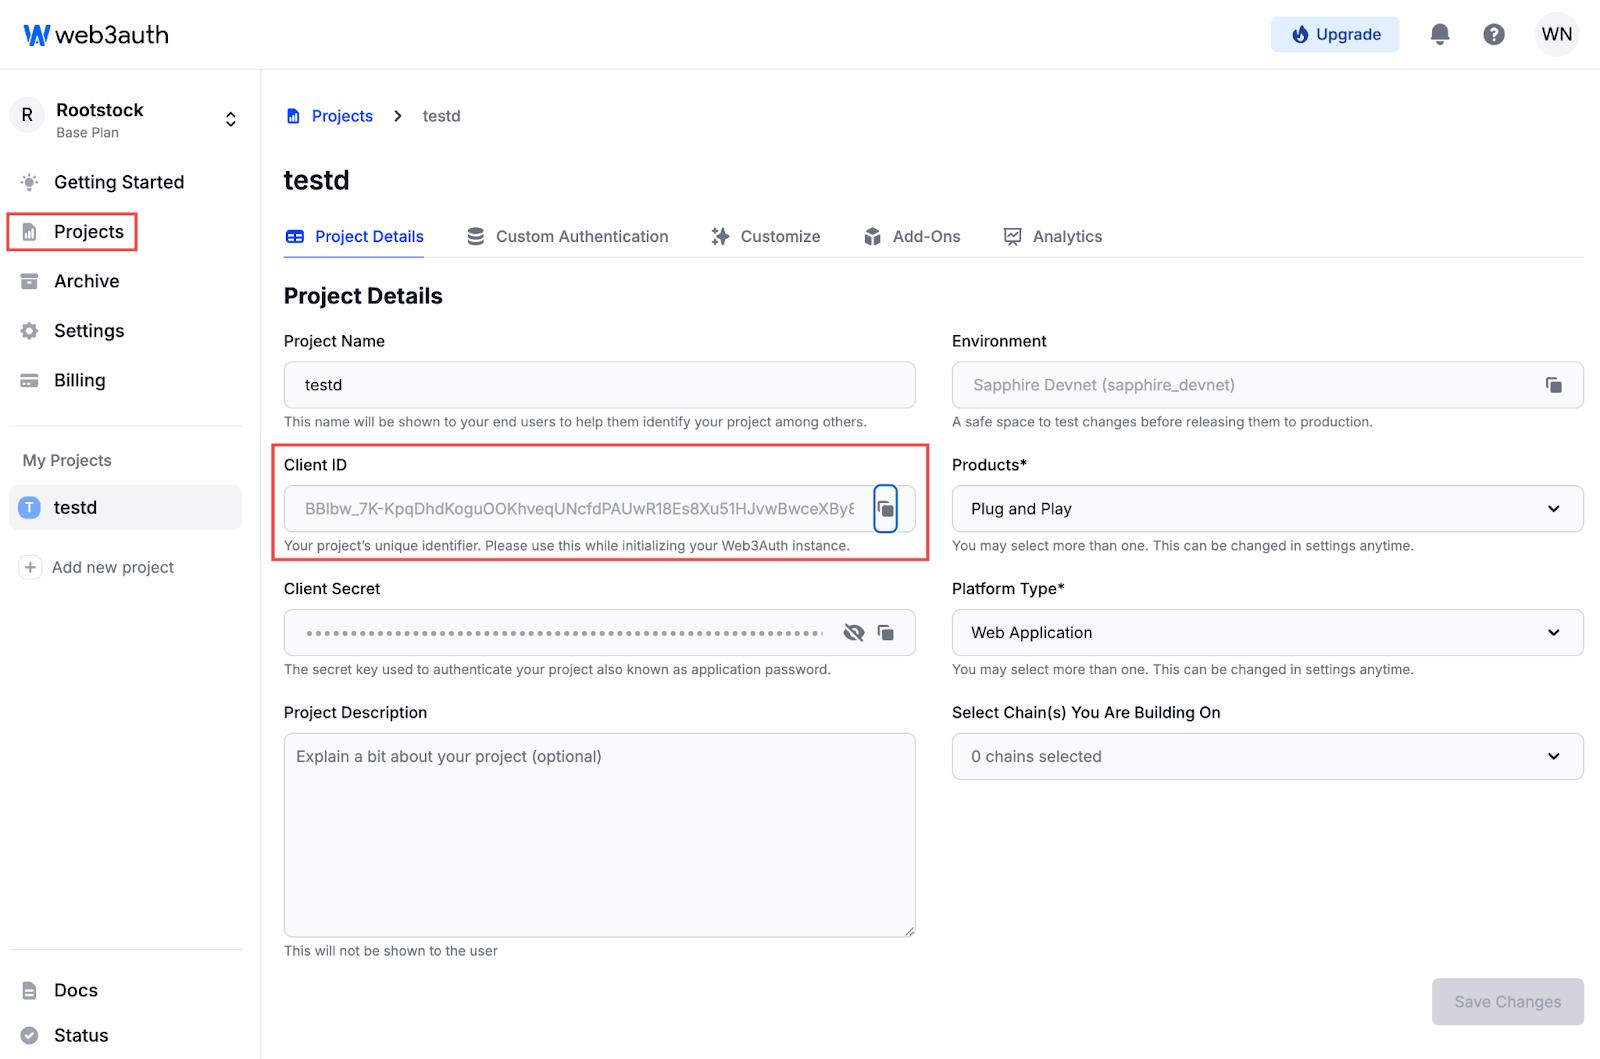
- After creating a project, view the project details screen.
- Copy the Client ID from the dashboard. This will be used for initializing Web3Auth.
- Add Client ID in page.tsx
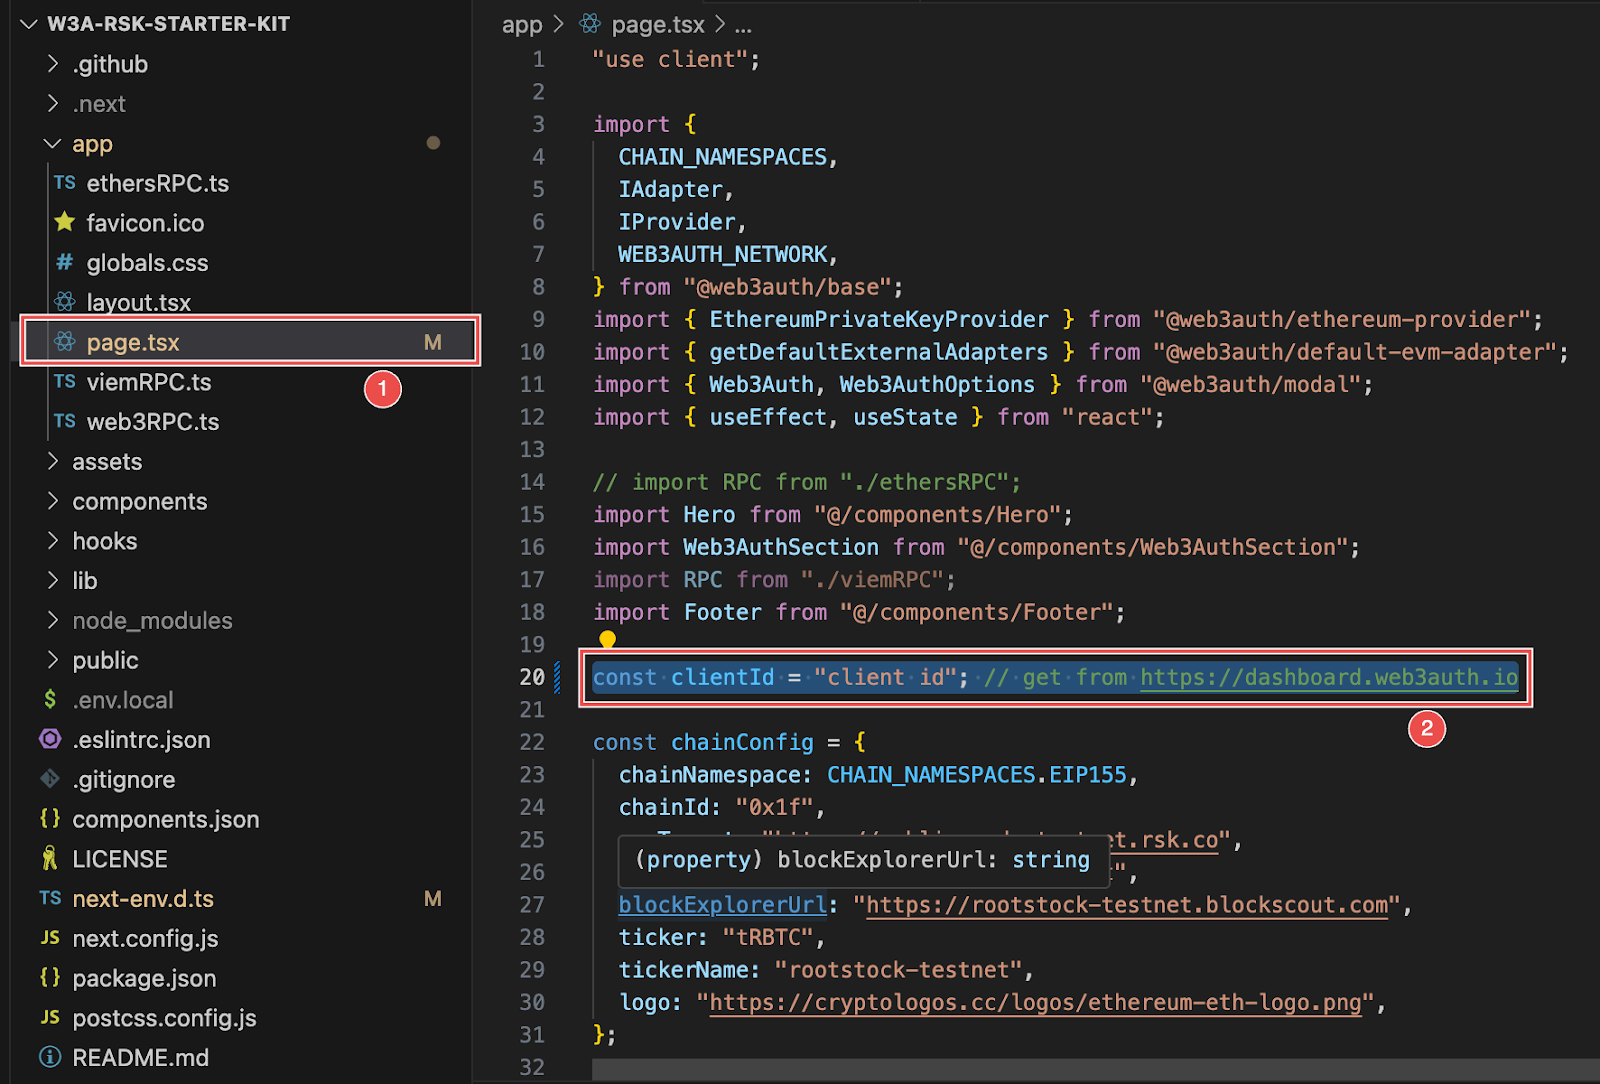
- Open
page.tsxfile in your project. - Copy and paste the copied Client ID into the appropriate configuration field in your code.
- Create a .env.local File
- In the root directory of your project, create a file named
.env.local. - Use this env file to store sensitive project information, including the client secret and Project ID.
NEXT_PUBLIC_WEB3AUTH_CLIENT_ID=your-client-id
- Get the WalletConnect Project ID
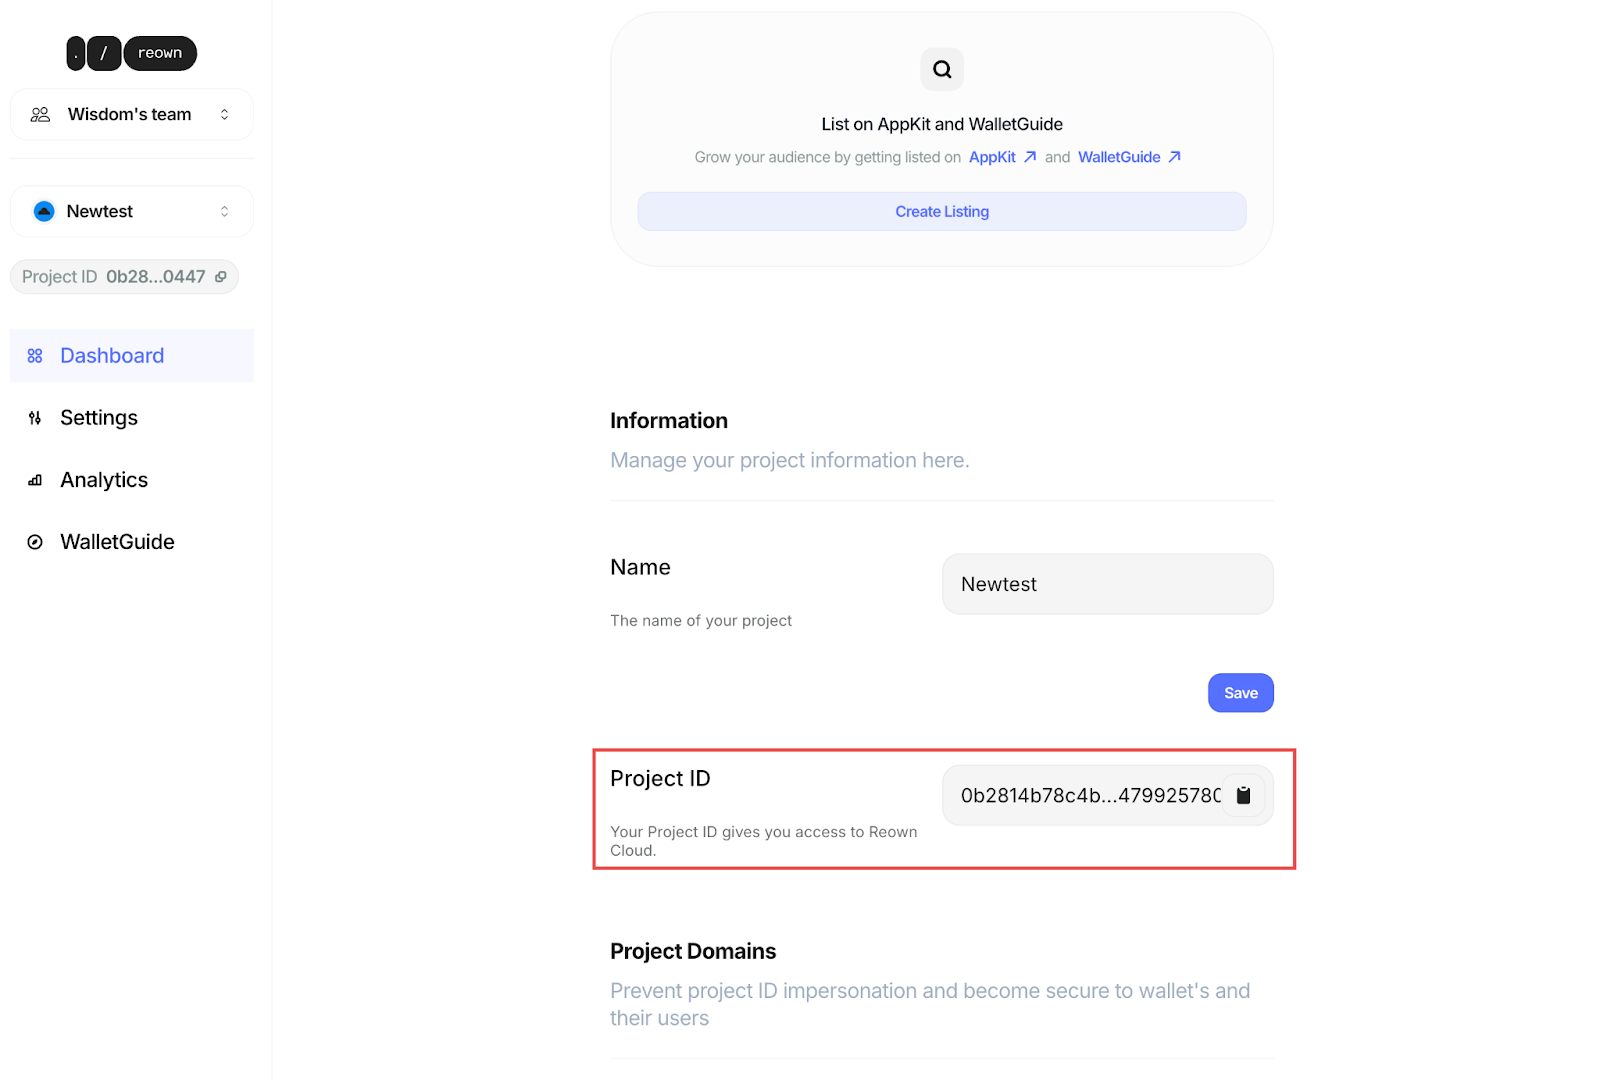
- Visit https://cloud.reown.com/ and create a WalletConnect project if you don’t already have one.
- Copy the Project ID provided by WalletConnect.
- Add WalletConnect to Web3Auth
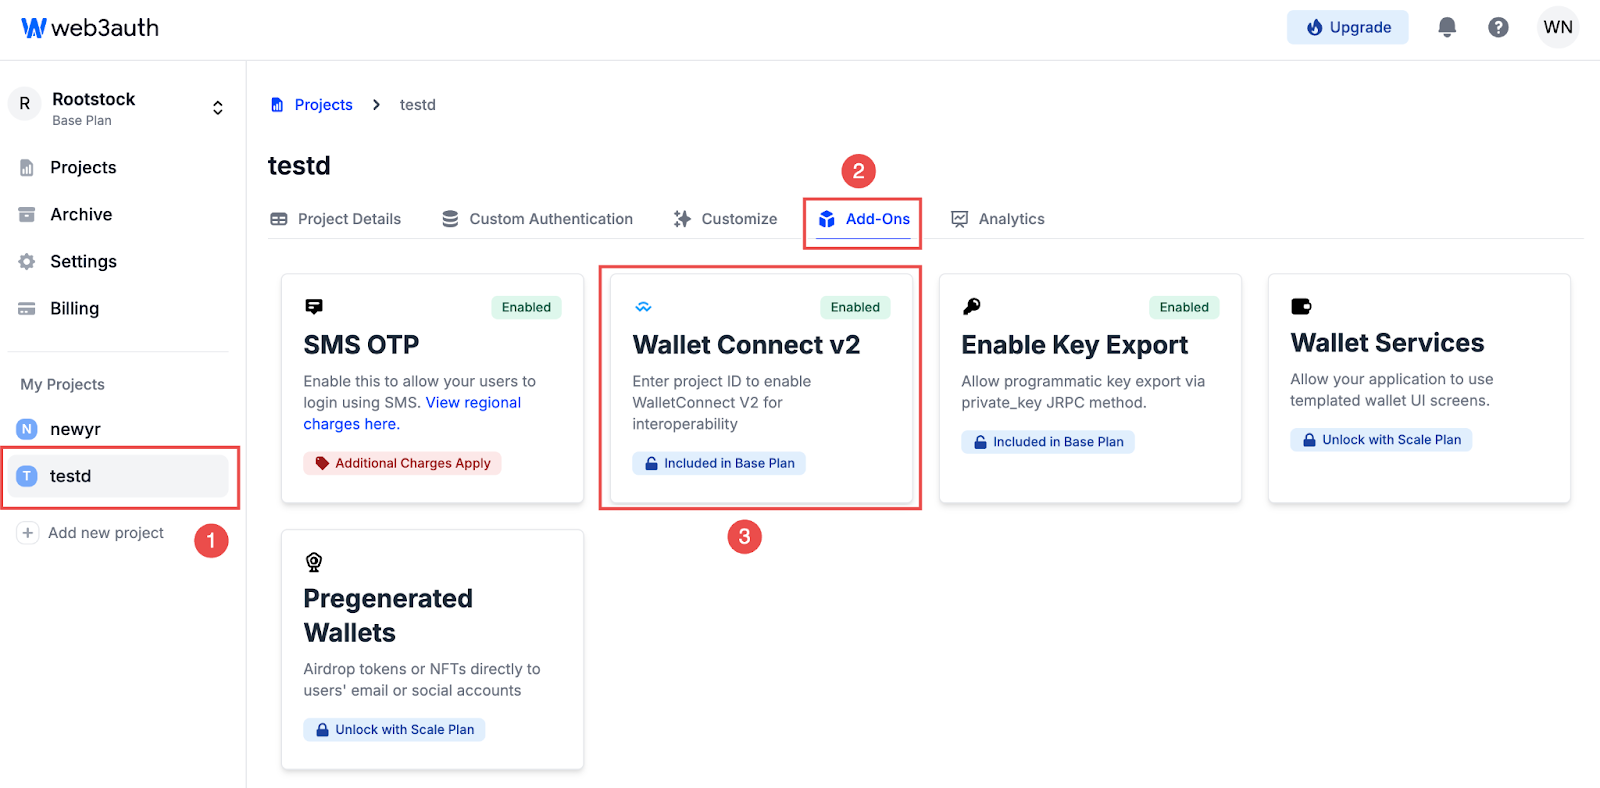
- Go to the Web3Auth dashboard, and navigate to
Dashboard > Project > Add-ons - Select WalletConnect v2 and input the WalletConnect Project ID.
Save changes. Ensure all configurations are saved in the Web3Auth dashboard and project files.
Step 3 Start the Project
- Run your project locally using:
npm run dev
OR;
yarn dev
- Open browser and go to http://localhost:3000/.
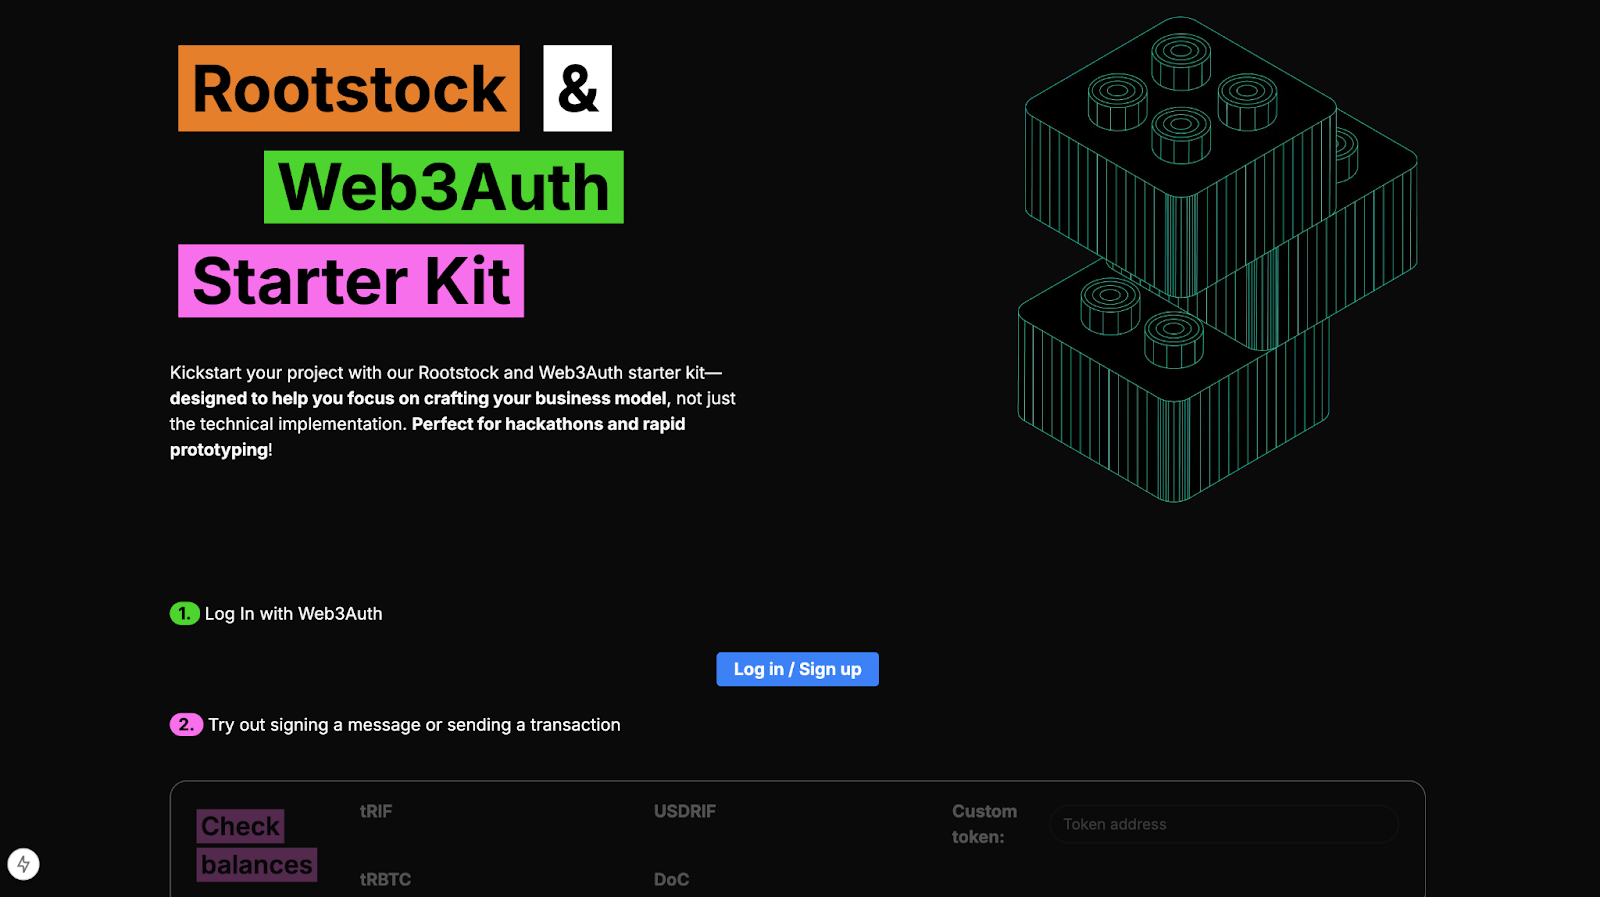
- You should see the Rootstock & Web3Auth Starter Kit welcome screen.
Interacting with the dApp
- Click the "Log In / Sign Up" button.
- A Web3Auth authentication modal will appear, offering multiple sign-in options:
- Social logins: Google, Facebook, Reddit, Discord, and others.
- Phone number or email authentication.
- Wallet-based authentication (connect with a crypto wallet).
- Once logged in, your connected wallet address will be displayed at the top.
Tip: You can copy your wallet address by clicking on the copy icon next to it.
-
Choose a Login Method
- Select the preferred login method from the available options.
- Follow the on-screen instructions to authenticate.
-
Successfully Sign In
- Once authenticated, you will be redirected to a new screen.
- This screen will allow you to interact with blockchain features, such as:
- Checking balances.
- Signing messages.
- Sending transactions.
Interacting with Rootstock
To interact with Rootstock using the sample dApp, we will do the following:
- Check balances
- Sign a message
- Send transactions on the Rootstock blockchain using Web3Auth authentication
Check Balances
The "Check Balances" section displays the token balances in your connected wallet. It shows the balances for the following Rootstock-based tokens:
- tRIF (Test Rootstock Infrastructure Framework token)
- tRBTC (Test Rootstock Bitcoin token)
- USDRIF (USD-pegged Rootstock token)
- DoC (Dollar on Chain stablecoin)
If you have any of these tokens in your wallet, the token balances will be updated automatically.
Tip: To add more tokens, use the "Custom token" input field and enter the token contract address.
Sign a Message
Click the "Sign a Message" button to sign a message with the connected Web3Auth wallet.
This feature can be used to verify ownership of your wallet or perform off-chain authentication. Once signed, the message will be securely linked to your wallet.
Tip: Signing a message attracts Zero gas fees.
Send a Transaction
- Select a Token
- Click the "Select Token" dropdown to choose the token you want to send (e.g., tRBTC, tRIF, USDRIF, DOC, or Custom token).
- Enter Recipient Address Paste the recipient’s wallet address into the "To" field.
- Specify the Amount
- Enter the amount of tokens you want to send in the "Amount" field.
- Send Transaction
- Click the "Send Transaction" button to initiate the transfer.
- Confirm the transaction in your Web3Auth wallet.
Tip: Ensure you have enough tRBTC in your wallet to cover gas fees before sending transactions.