Verify Address Ownership with Metamask Wallet
Let's say that you need to receive a transfer of RBTC, or tokens on the Rootstock network, for the very first time. To do this you need to set up a wallet and connect it to the Rootstock network.
However, you may be unsure if you actually "control" the addresses in the wallet. Understandably so, because it is your first time using it. That concern has a technical basis too - you need to be sure that you are able to sign transactions at this address, before you ask others to send you cryptocurrency or tokens at this address.
Here we will demonstrate exactly how to do this, and be sure that you truly "control" a particular address. All you need is Chrome (web browser) and MetaMask (browser extension). You do not need any RBTC balance to do so.
Getting Started
You can either use the metamask-landing.rifos.org tool to download/install Metamask, and add Rootstock custom network or follow the steps listed in metamask.io.
In Chrome, visit metamask.io, and follow the instructions to install this extension in your browser. If you are doing this for the first time, you will need to generate a seed phrase, and it is extremely important that you record this somewhere.
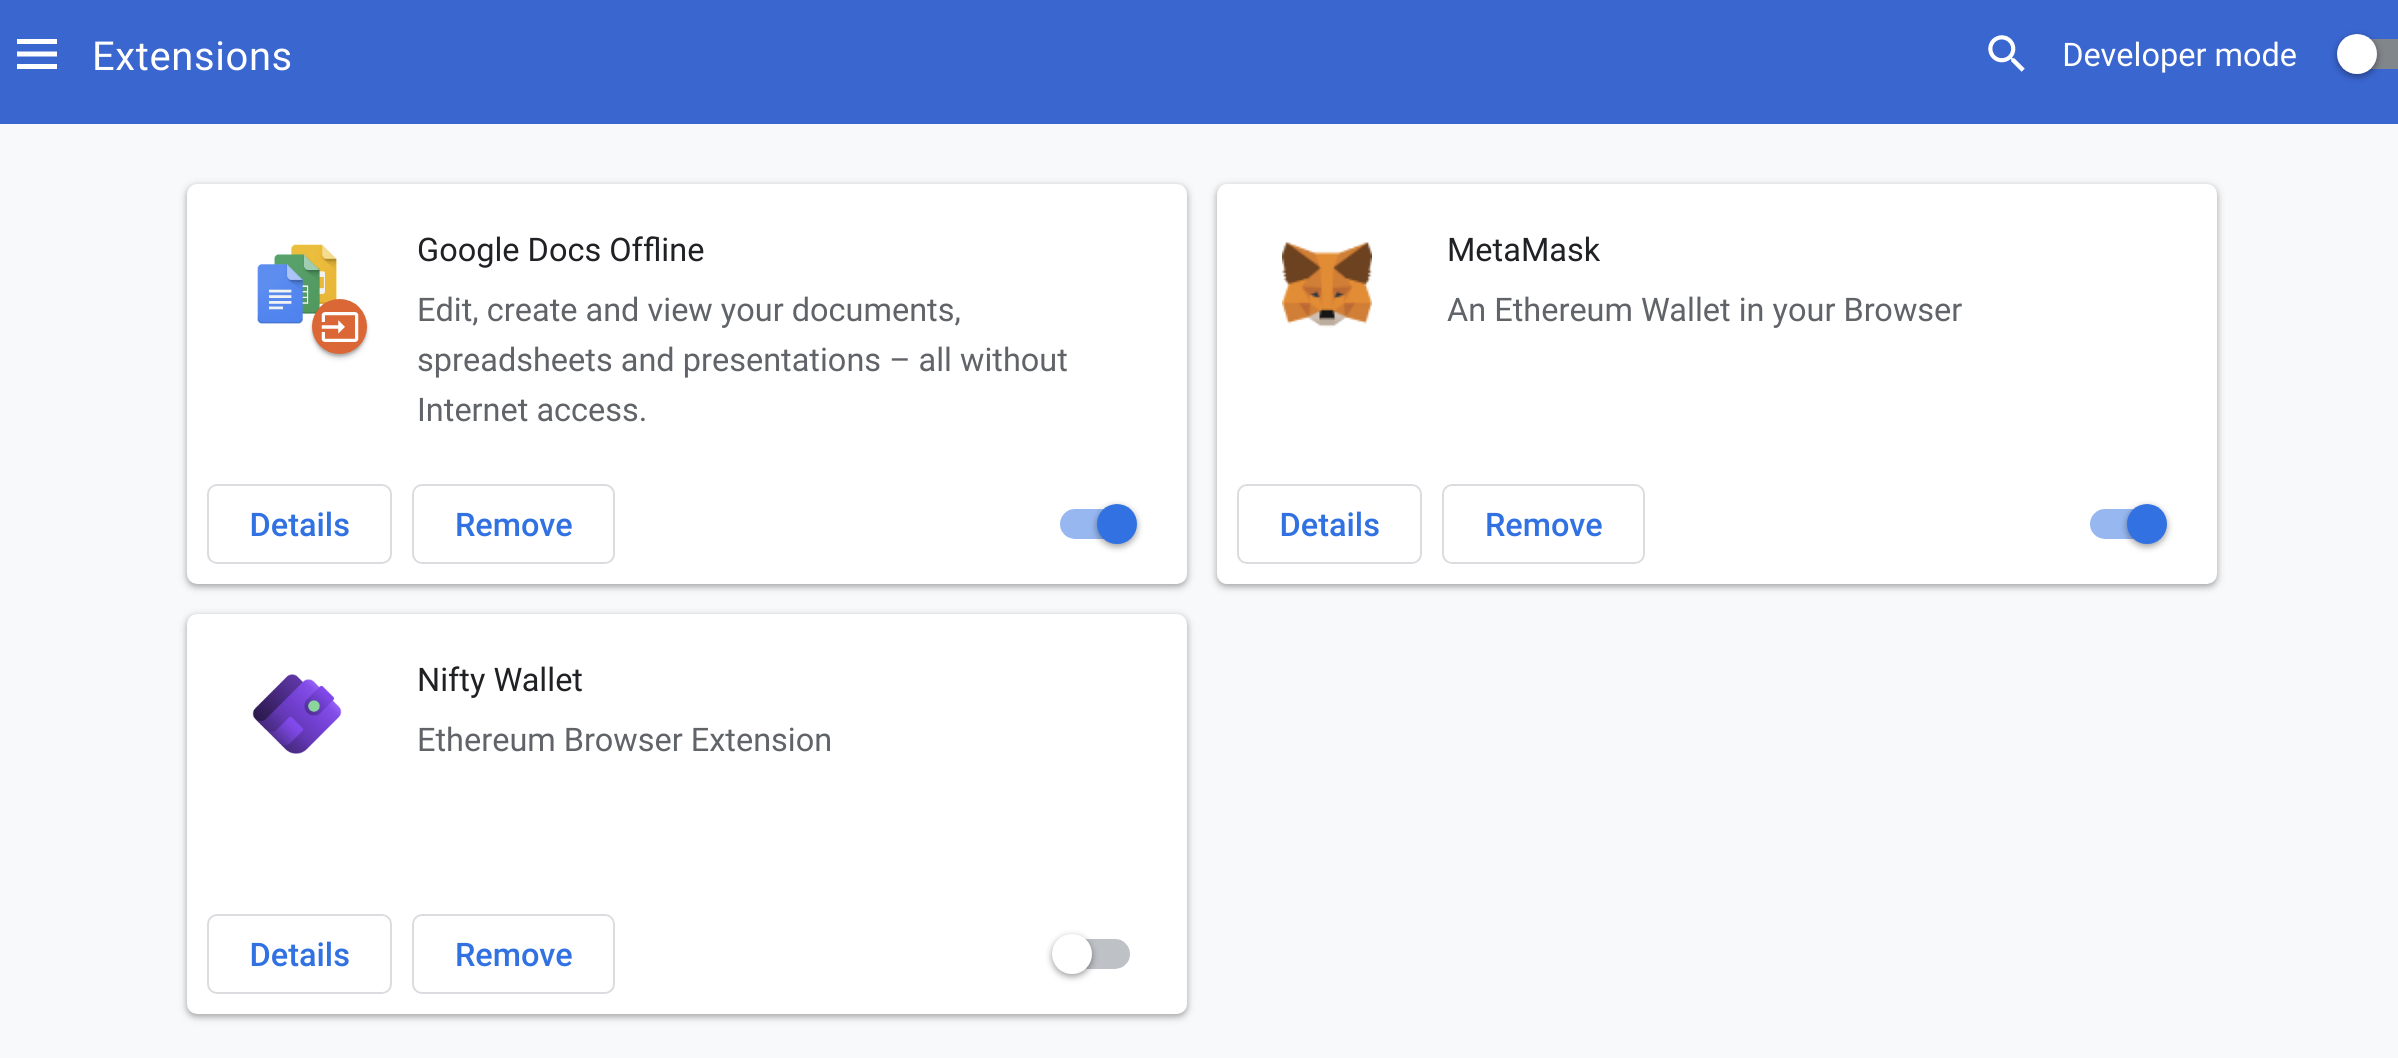
Enable only one Web3 browser extension
If you have more than one Web3 browser extension installed, for example, if you have either MetaMask, Liquality or Nifty, be aware that they can conflict with each other.
Paste chrome://extensions/ in your address bar,
to see all the browser extensions that you have installed.
Verify that you only have MetaMask installed, or
if you have other Web3 browser extensions,
you should disable all of the others by clicking on the toggle buttons.
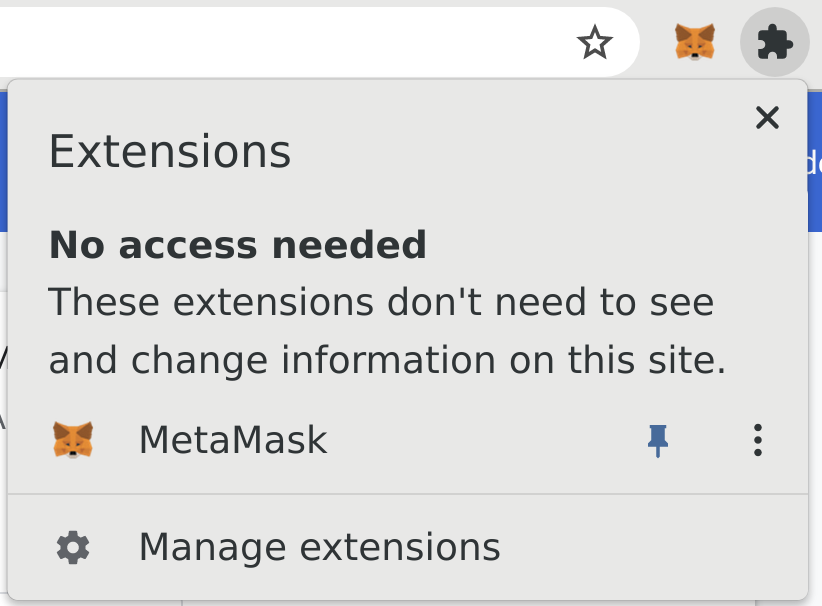
For a better user experience, you may also wish to
- Click on the extensions icon (jigsaw shape), and in the dropdown,
- Click the pin icon next to MetaMask to ensure it is always visible.
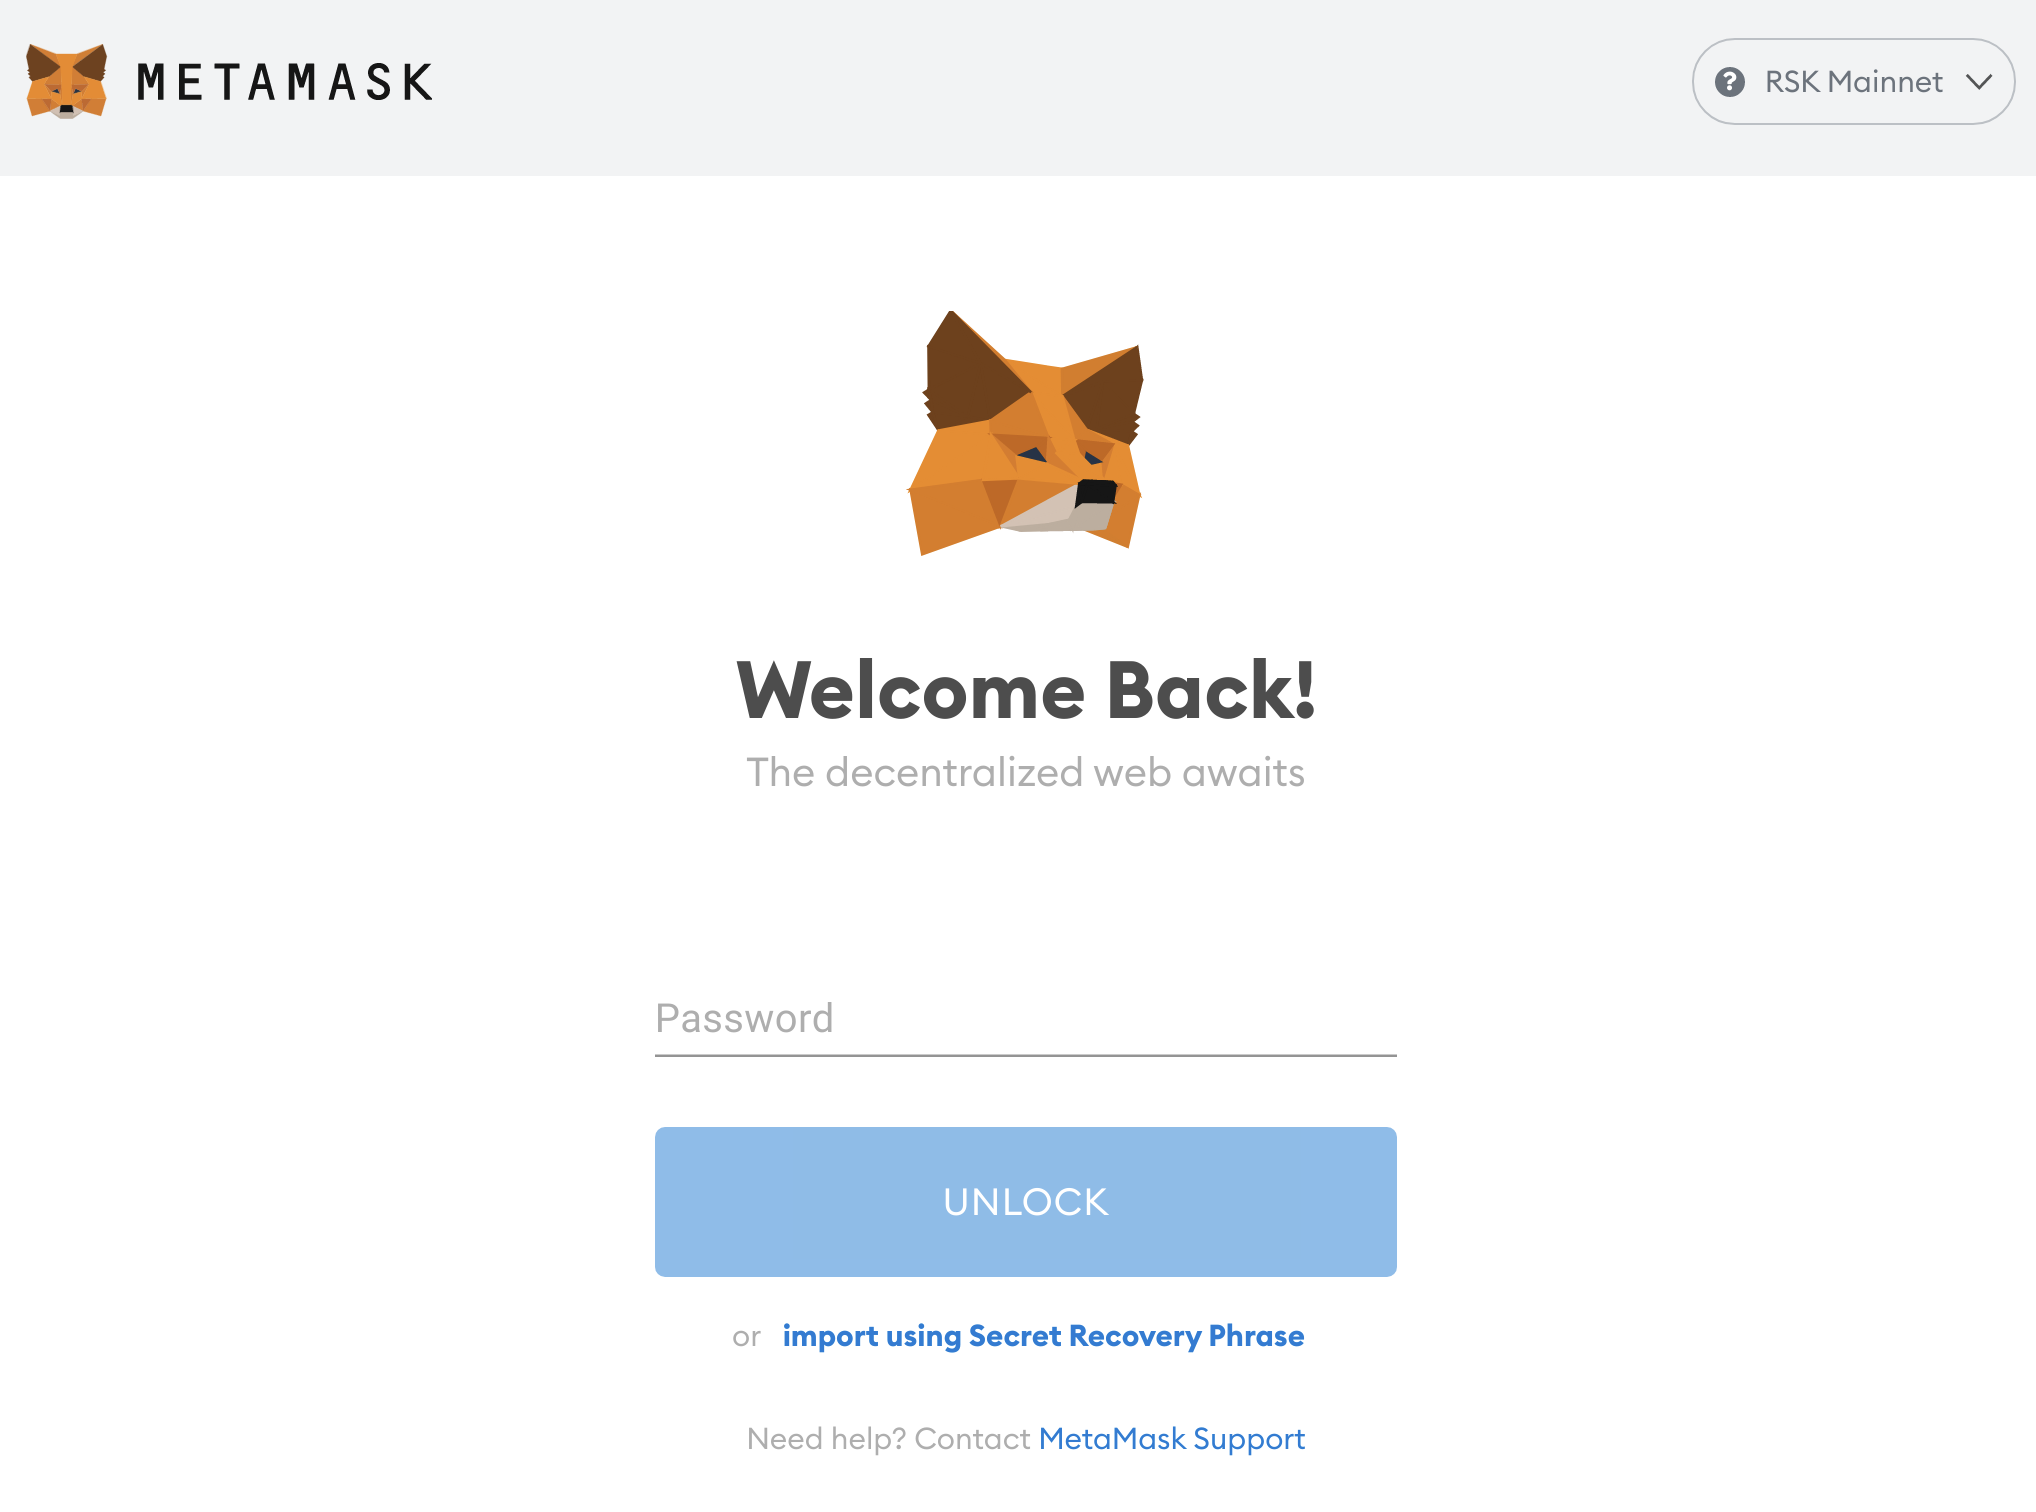
Unlock MetaMask
After installing the extension or starting your browser, MetaMask should display a popup asking you to unlock the account. Enter your MetaMask password. (Note that this is not the same as your seed phrase.)
If it does not popup, you can manually enter
chrome-extension://nkbihfbeogaeaoehlefnkodbefgpgknn/home.html#unlock
in your address bar to navigate there in "expanded view",
instead of within a popup.
Add custom network for Rootstock
MetaMask only contains network configurations to connect to Ethereum by default. To connect to Rootstock you will need to add Rootstock Network configurations.
You have the option to manually add Rootstock Mainnet network configuration to MetaMask.
Alternatively, you can do this automatically, by visiting https://rif.technology/, and when you attempt to connect using MetaMask, you will get presented with the following:
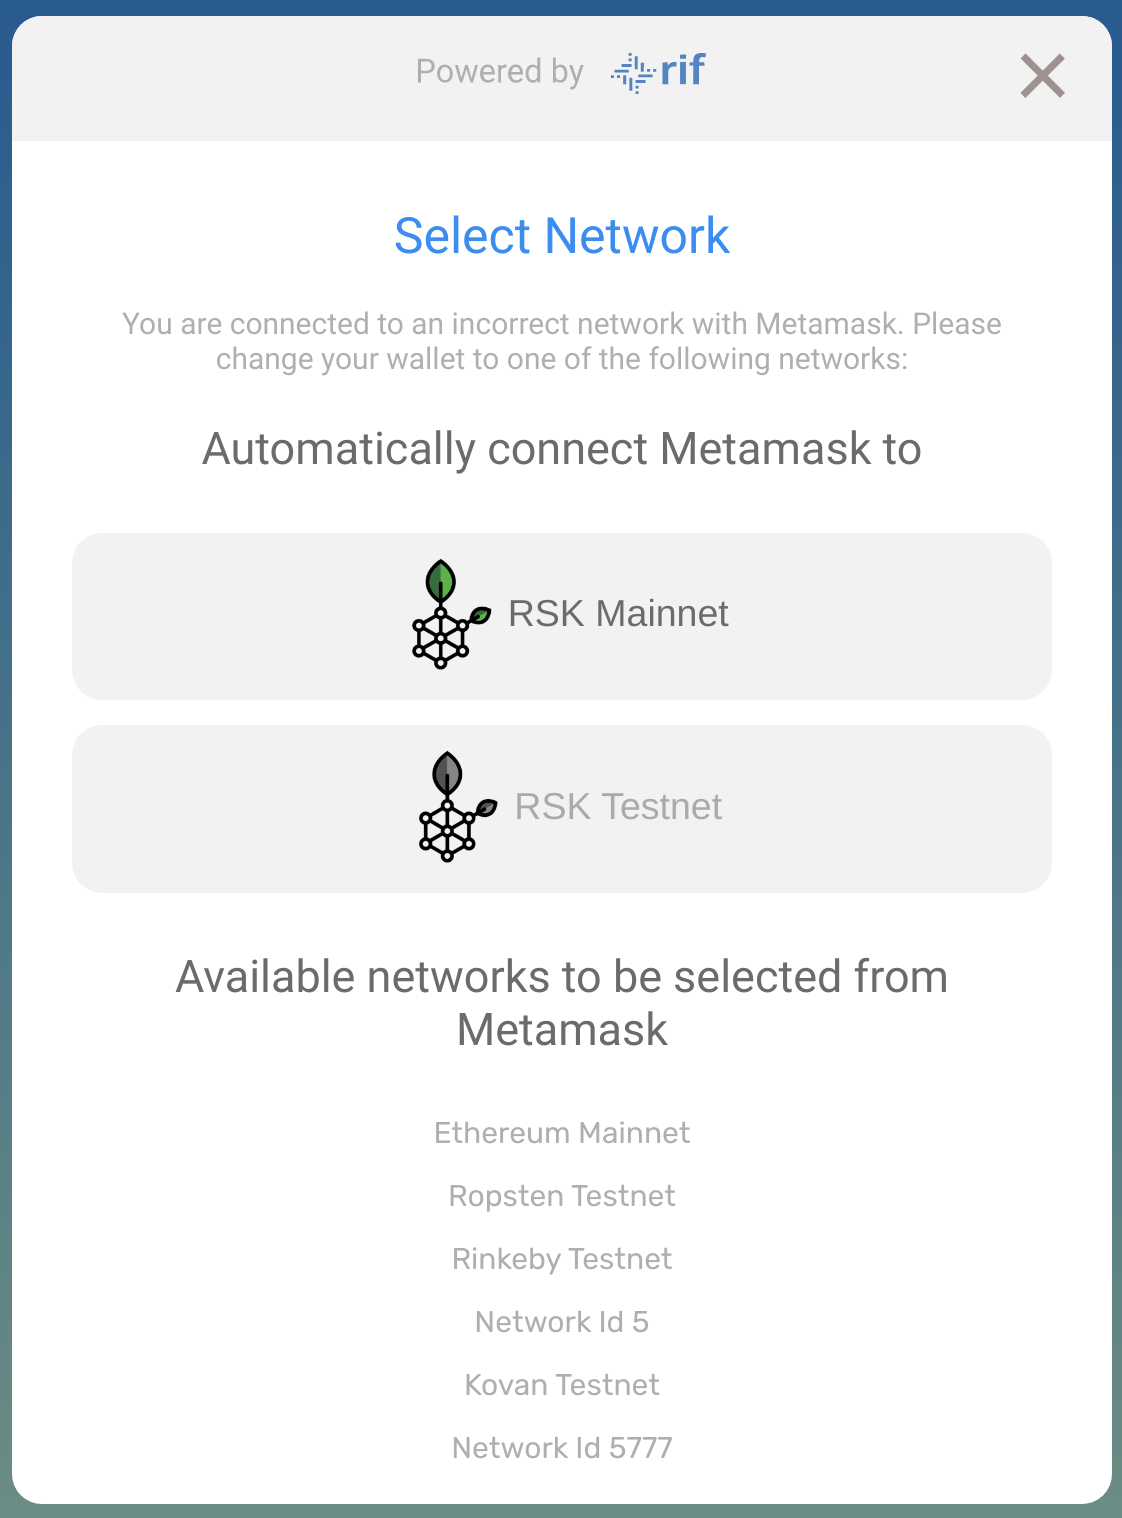
Click "RSK Mainnet". MetaMask will then show this popup:
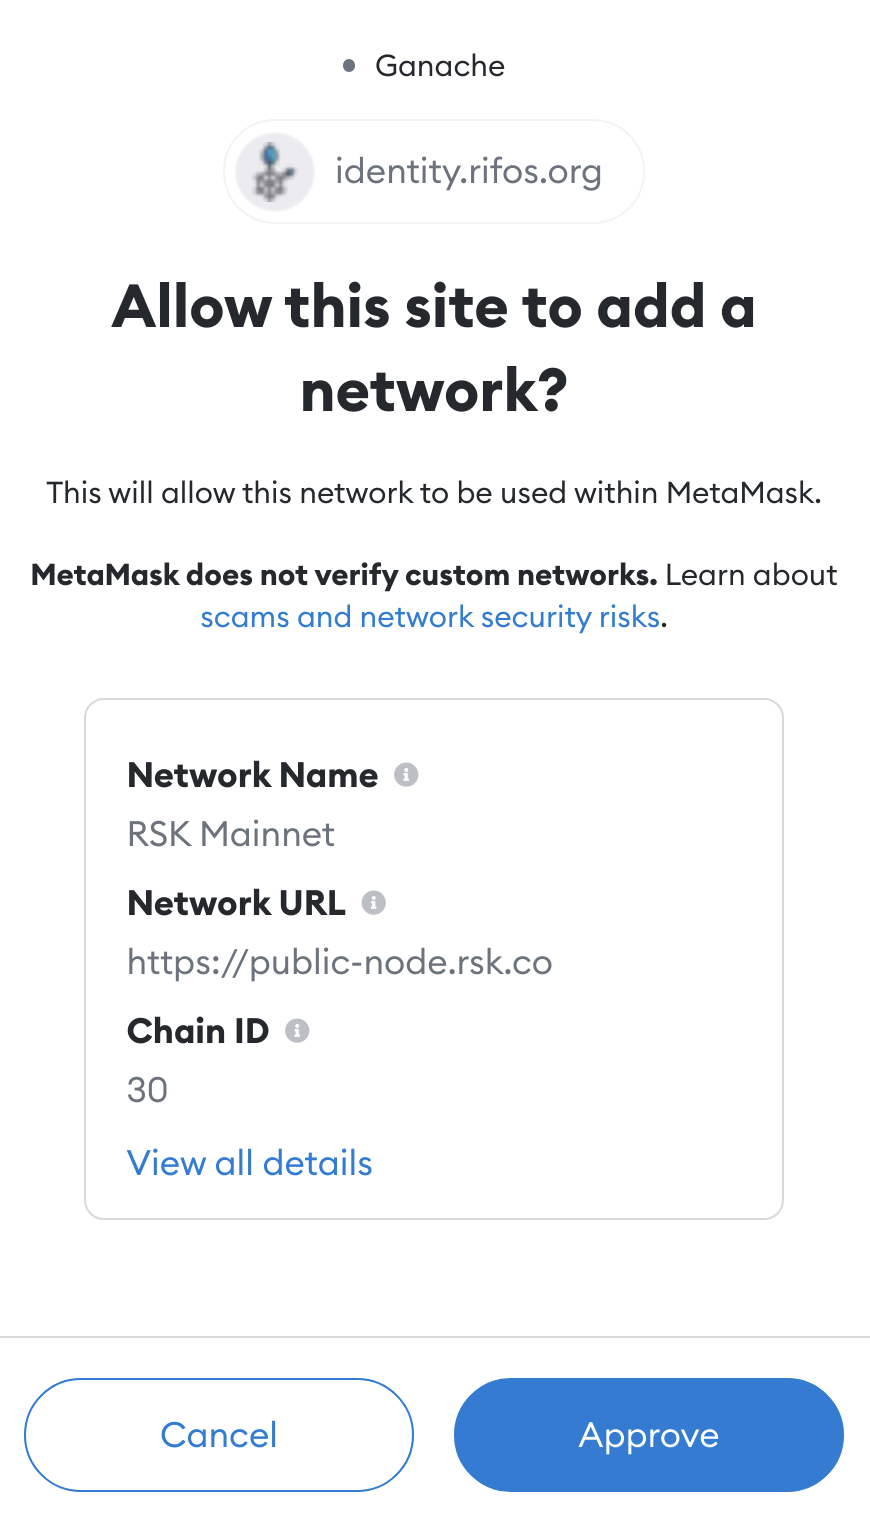
Click "Approve". This will automatically fill out the network configuration for you.
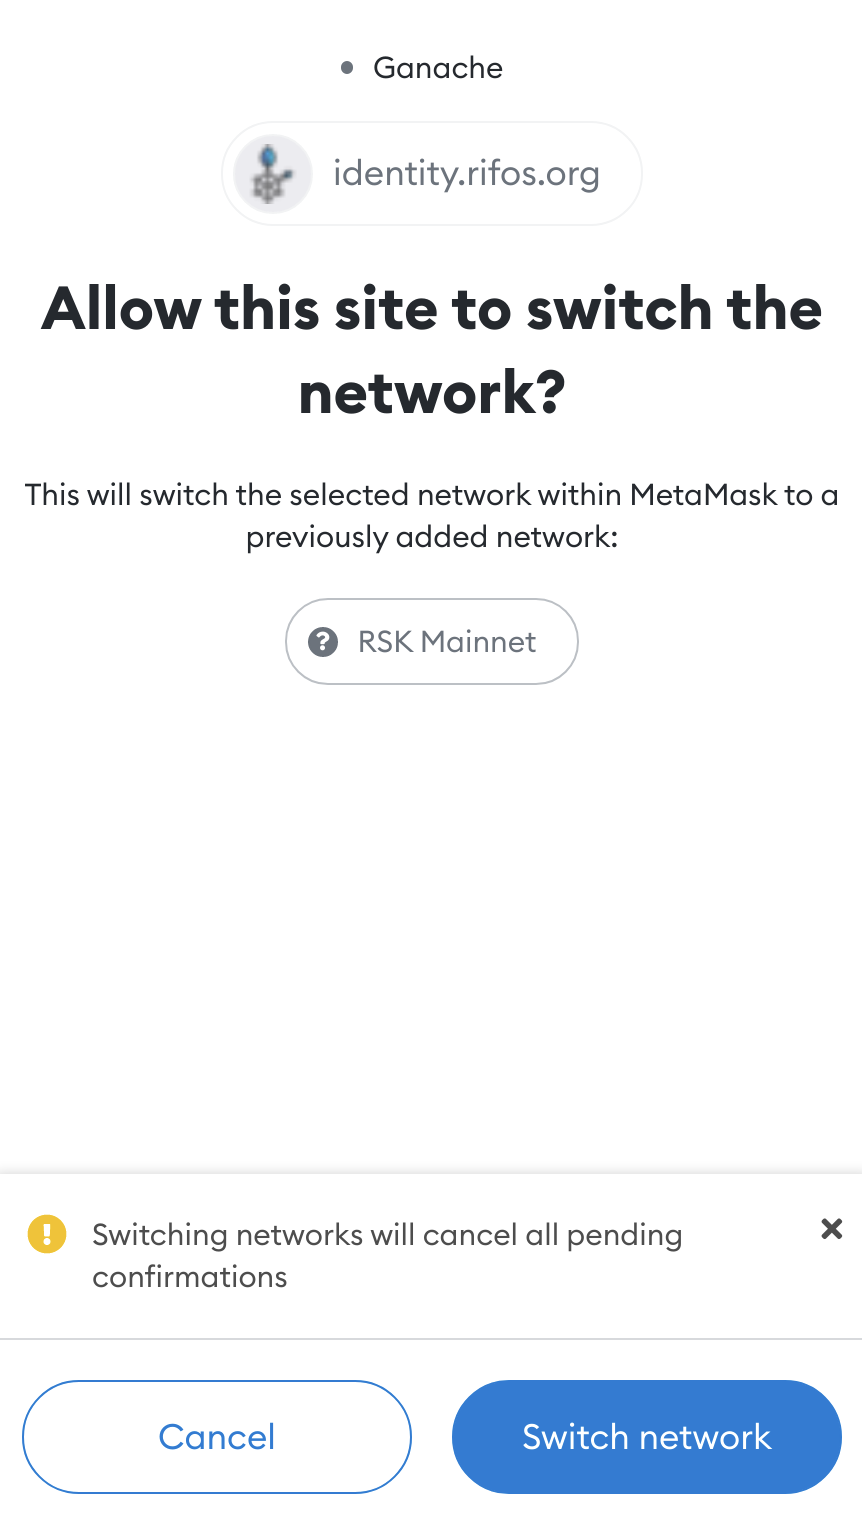
Then click "Switch Network" to connect to the Rootstock Mainnet.
Verifying your Rootstock account
At this point, you should have everything set up: You have a wallet installed, that wallet is connected to the RSK Mainnet, and you have addresses inside that wallet.
You're ready to verify that you can use your wallet to sign messages!
View transaction history
In MetaMask, you can view your transaction history for a particular address by selecting the "Activity" tab in the main screen.
"Expanded view":
chrome-extension://nkbihfbeogaeaoehlefnkodbefgpgknn/home.html#
![]()
If your activity tab is empty, like the one above,
it means that there are zero transactions at this address.
Let's copy the address by clicking on it.
It is located near the top, begins with 0x,
and should be under a label similar to "Account 1".
Visit block explorer
Let's check the address that you've just copied on the Rootstock block explorer.
Visit explorer.rsk.co/address/${YOUR_ADDRESS}.
Replace ${YOUR_ADDRESS} with the address copied from MetaMask earlier.
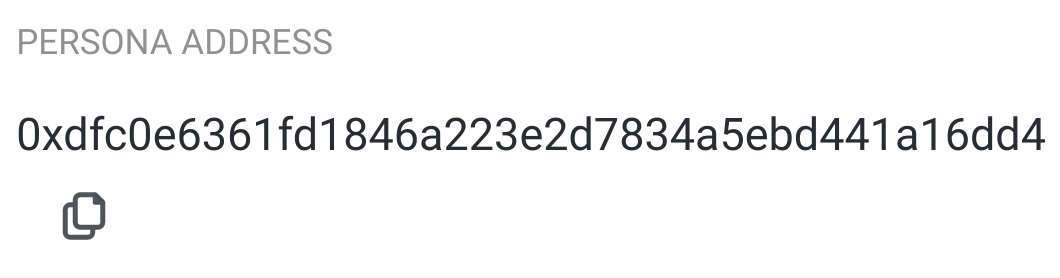
For example, if you copied 0xdfc0e6361fd1846a223e2d7834a5ebd441a16dd4,
the URL will be https://explorer.rsk.co/address/0xdfc0e6361fd1846a223e2d7834a5ebd441a16dd4
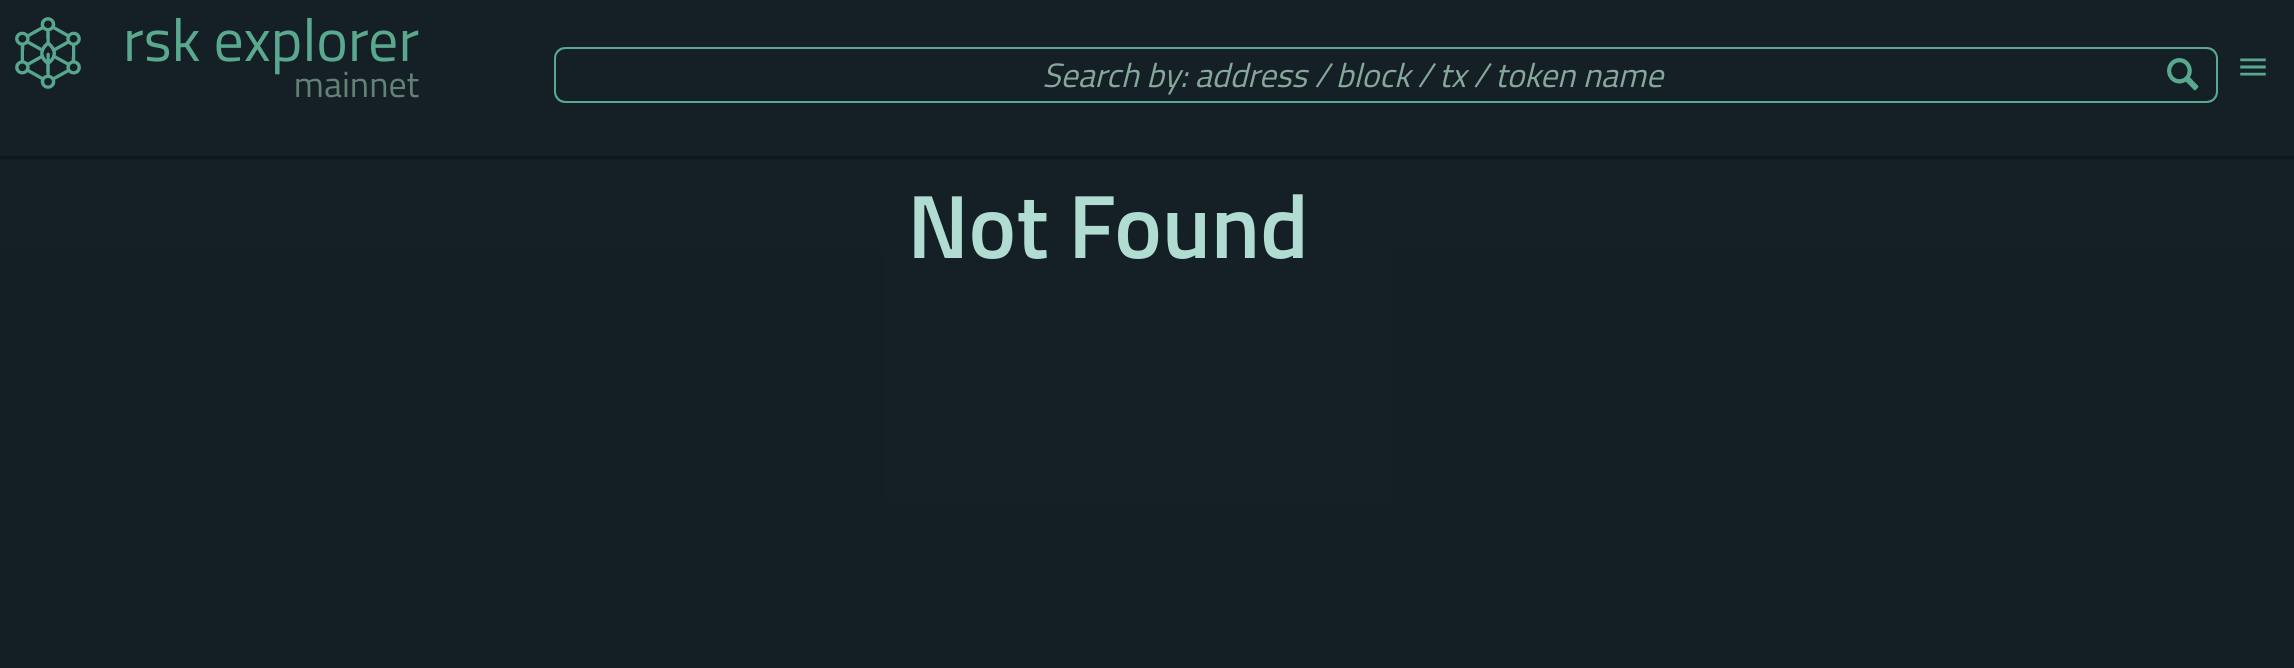
Here you may see "Not Found". This does not necessarily mean that the account does not exist. Instead, it means that there simply are no transactions on the blockchain at this address.
MetaMask site connection permission
You will be presented with a popup from MetaMask, which essentially is asking you whether you trust RIF Identity Manager.
Click "Next". This allows MetaMask to interact with RIF Identity Manager
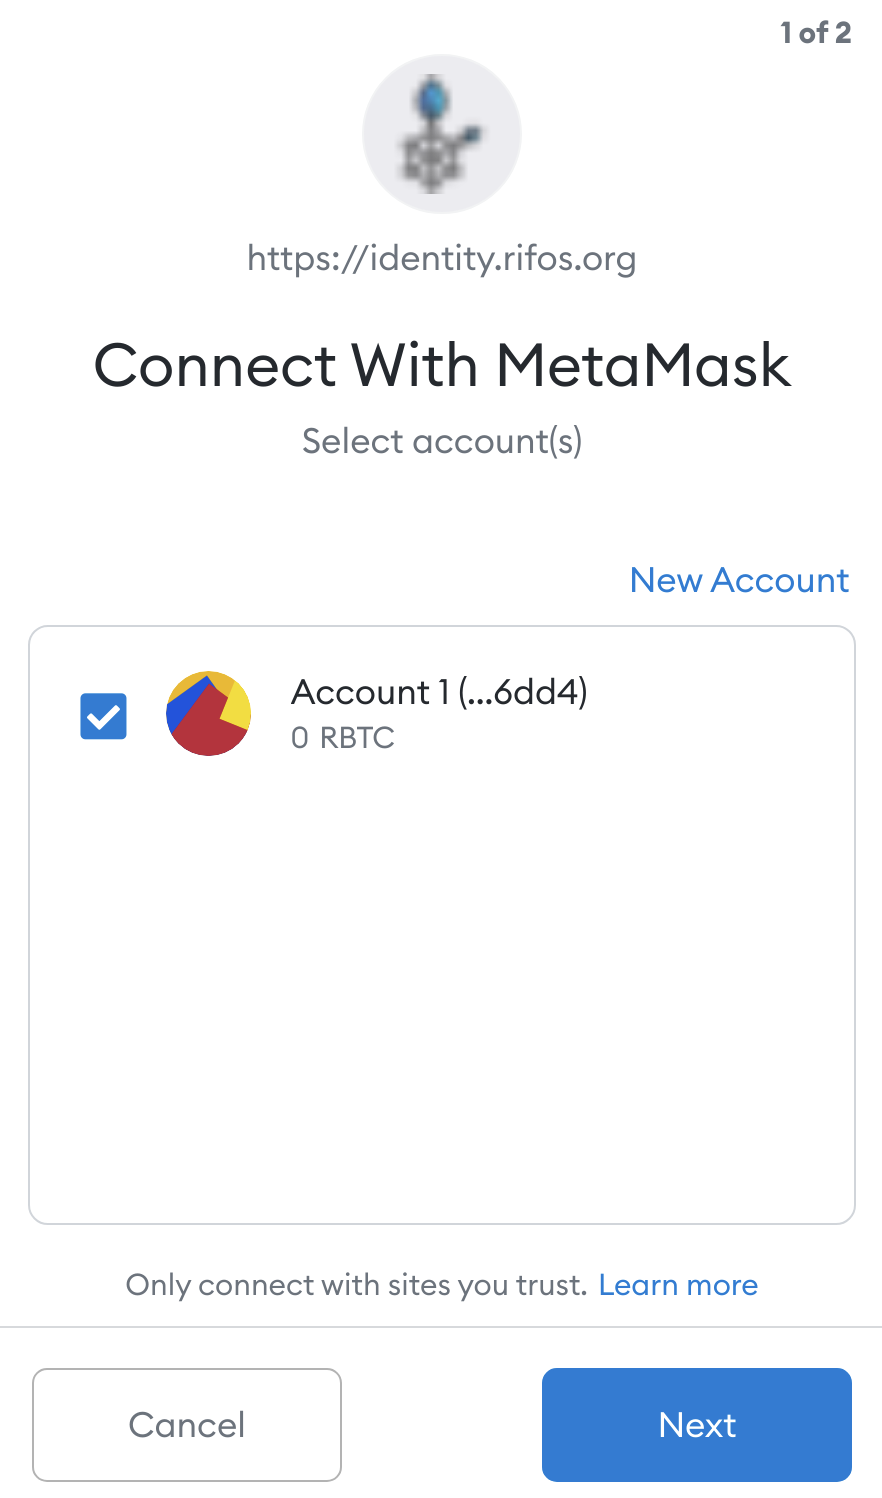
MetaMask will then show another popup, asking you whether you want to allow RIF Identity Manager to see your account addresses.
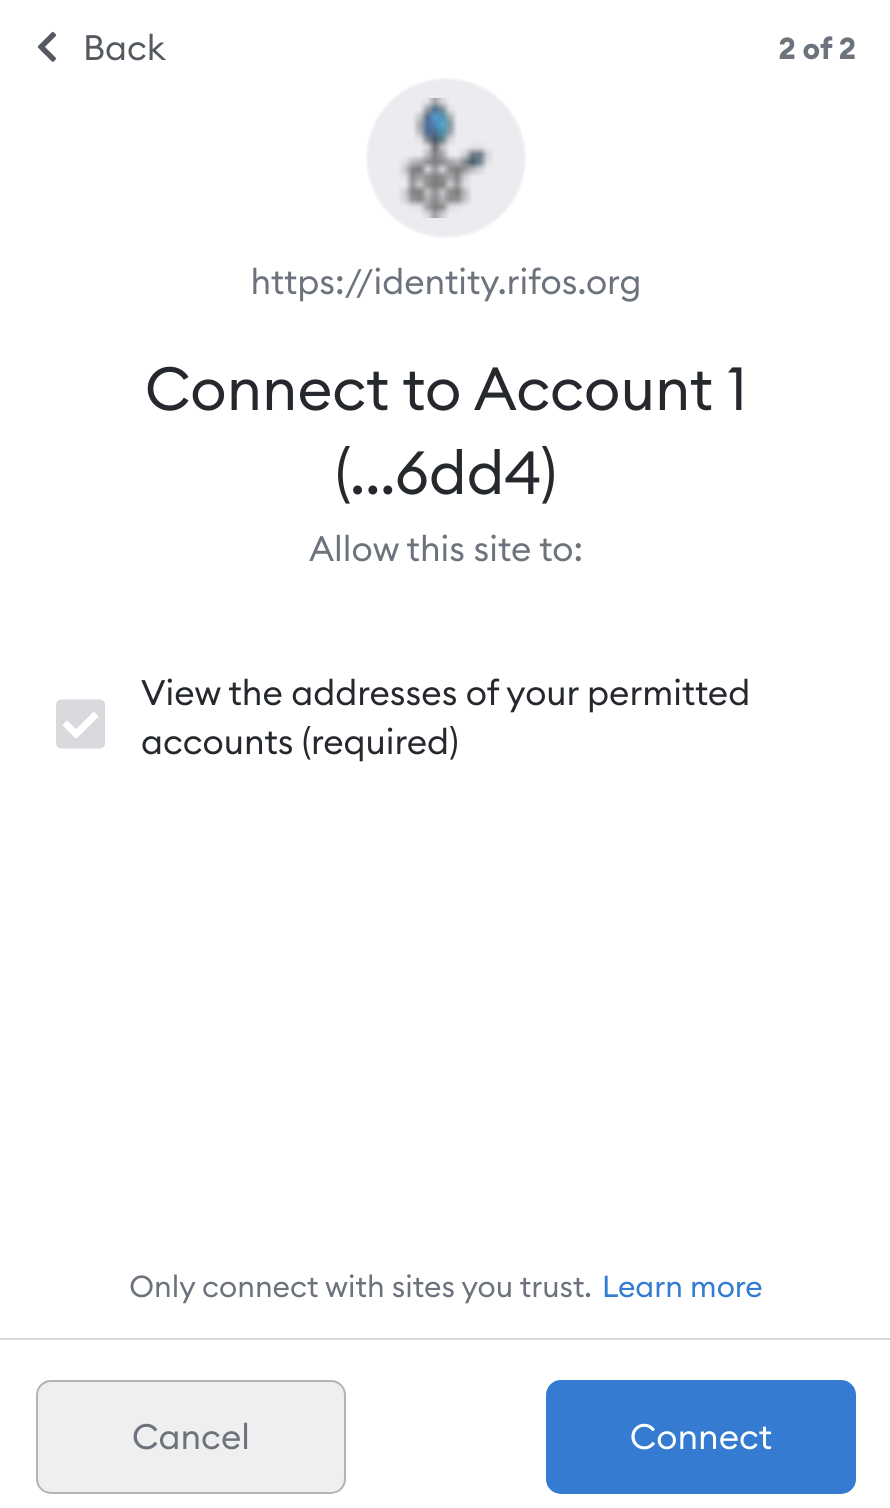
Click "Connect". This allows MetaMask to see your account addresses.
RIF Identity Authentication
Upon granting these permissions, the RIF Identity Manager DApp presents you with yet another MetaMask popup.
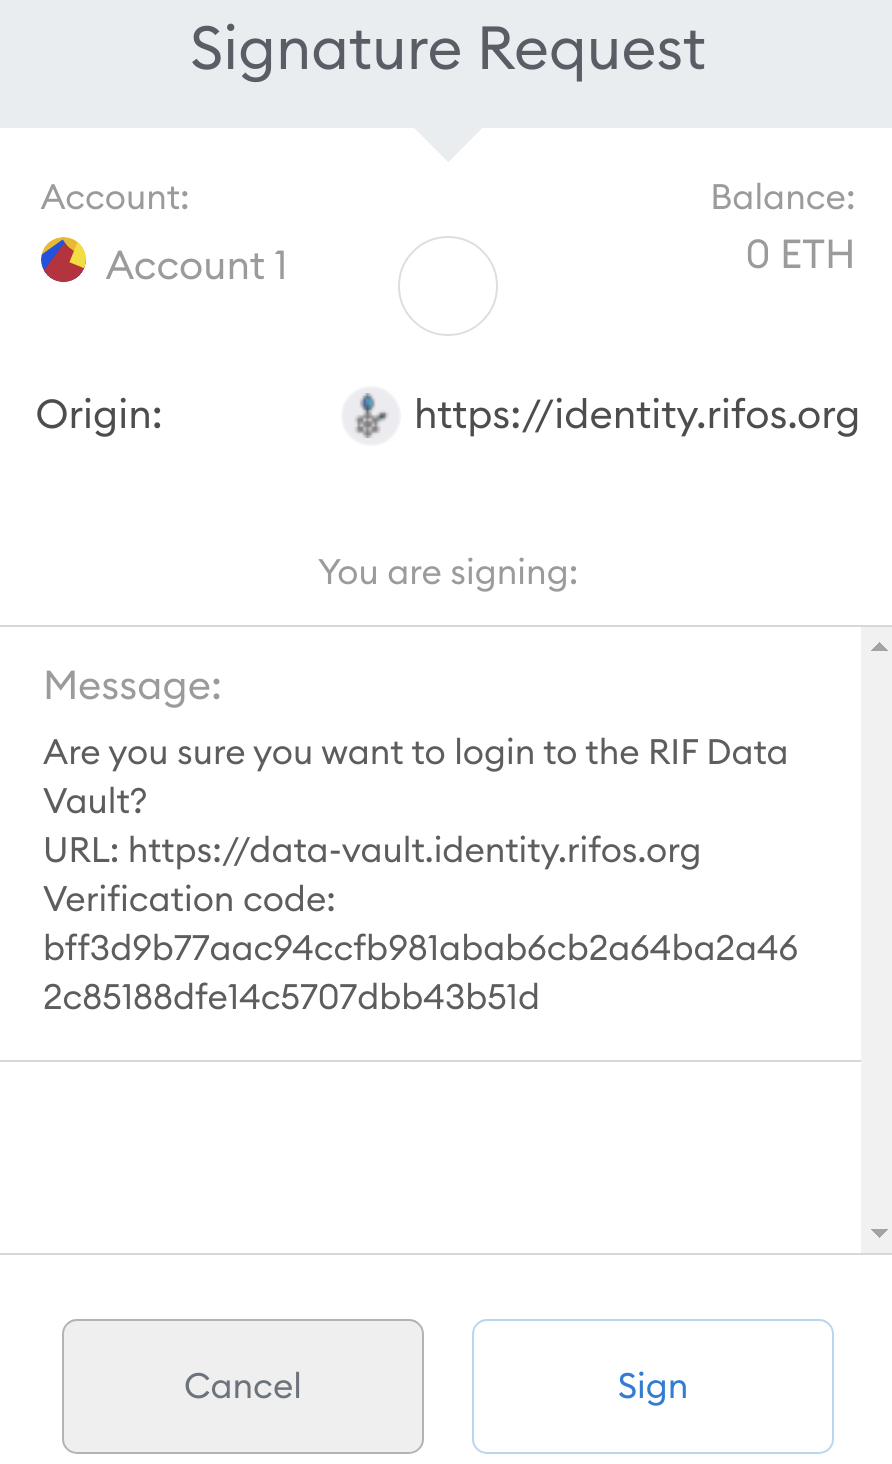
This time, it asks to sign a text message, which should look similar to the following:
Are you sure you want to login to the RIF Data Vault?
URL: https://data-vault.identity.rifos.org
Verification code: ${SOME_RANDOM_VALUE}
Click "Sign". When you do this, the crucial part happens!
- MetaMask uses the private key corresponding to the address to sign that message.
- The signed message is transmitted to RIF Identity Manager's backend, which performs digital signature verification, which it uses to confirm whether it has indeed been signed by this particular address.
- Since this is a plain text message, and does not involve adding a transaction to the blockchain, no gas fees need to be paid, and therefore your RBTC balance can be zero.
This is perfect for newly generated accounts!
Check the dashboard
Once you have signed the message and it has been verified, you will see the dashboard for the RIF Identity Manager.
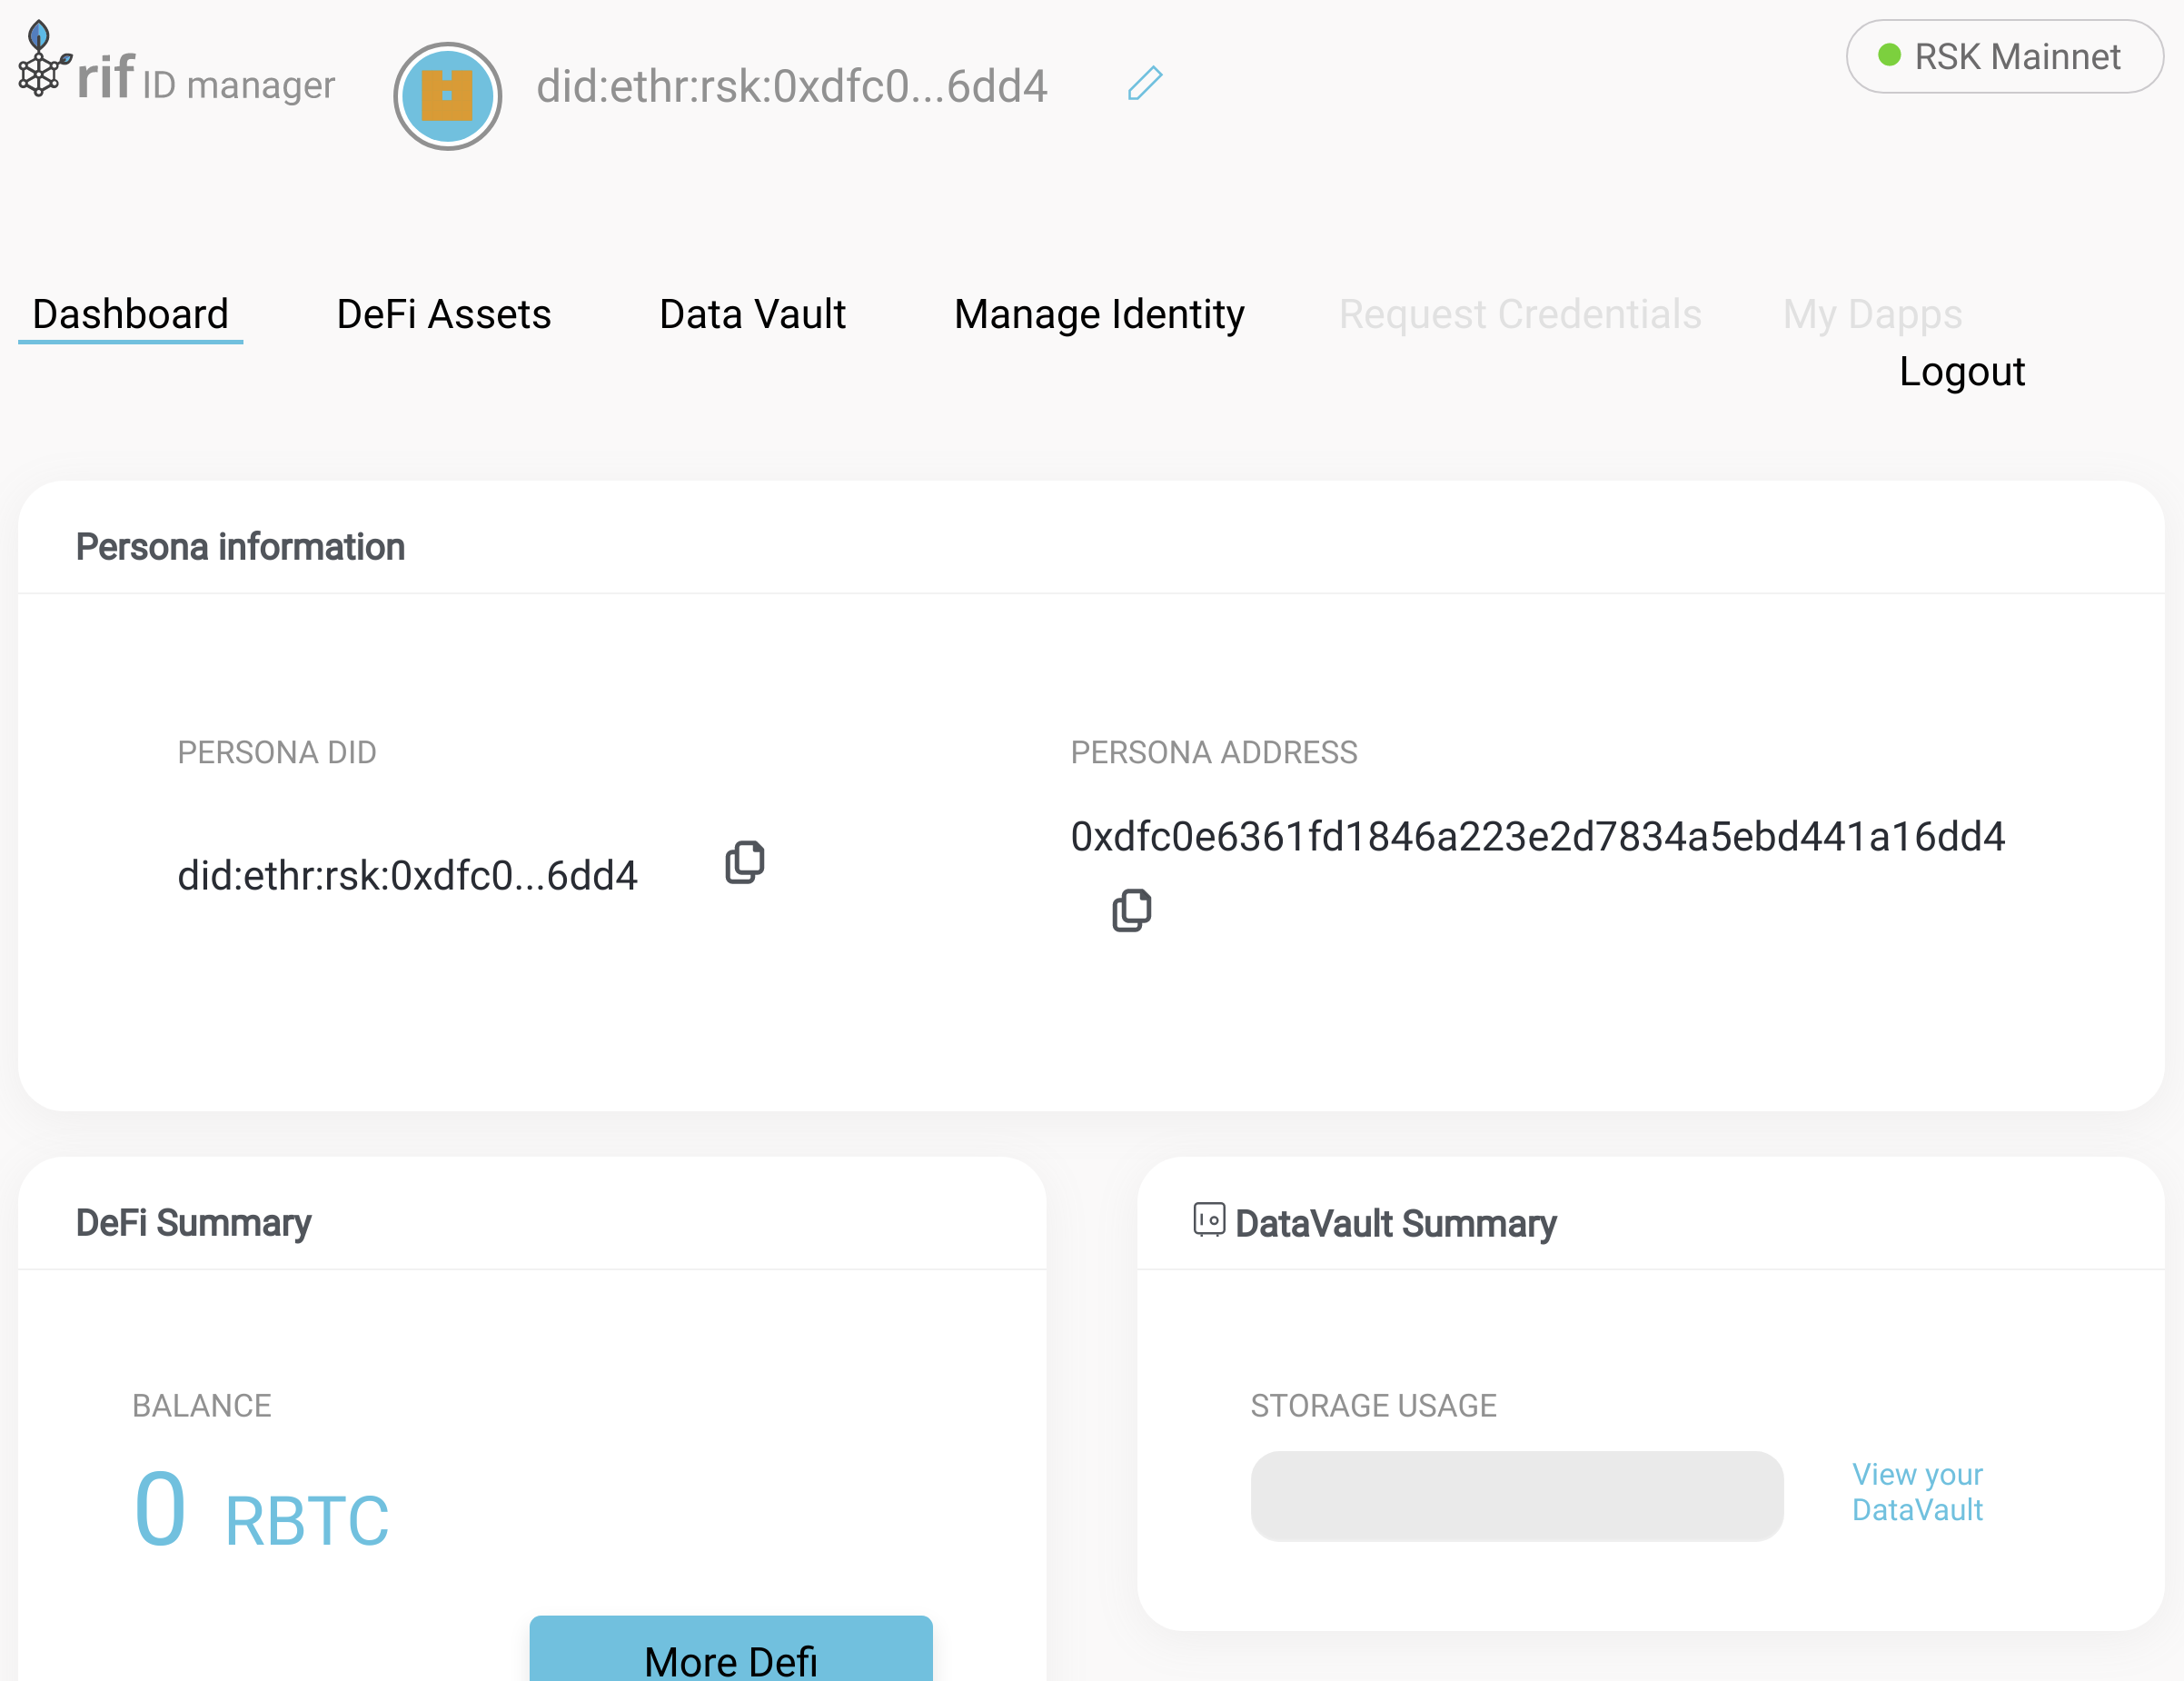
Check that the "Persona Address" field that is displayed here matches the address of your account in MetaMask.
That's all - now you can be confident that you do control this address on the Rootstock Mainnet!