Deploy, Interact and Verify Smart Contracts using Remix and Rootstock Explorer
The process of writing, compiling and deploying Solidity contracts can be tedious or a bit obscure at the beginning, if you try to do it programmatically or using terminals. Get started writing, compiling, and deploying Solidity contracts quickly with Remix. Remix offers an online IDE that allows for writing, compiling, interacting and deploying smart contracts to any network.
In this guide, we will use the Remix online IDE to write, compile, deploy, interact and verify a smart contract on the Rootstock Testnet Explorer.
Prerequisites
- Remix online IDE, go to the Remix online IDE
- MetaMask Wallet. See how to Configure MetaMask Wallet for Rootstock
- Rootstock Testnet Explorer
Setting up Remix
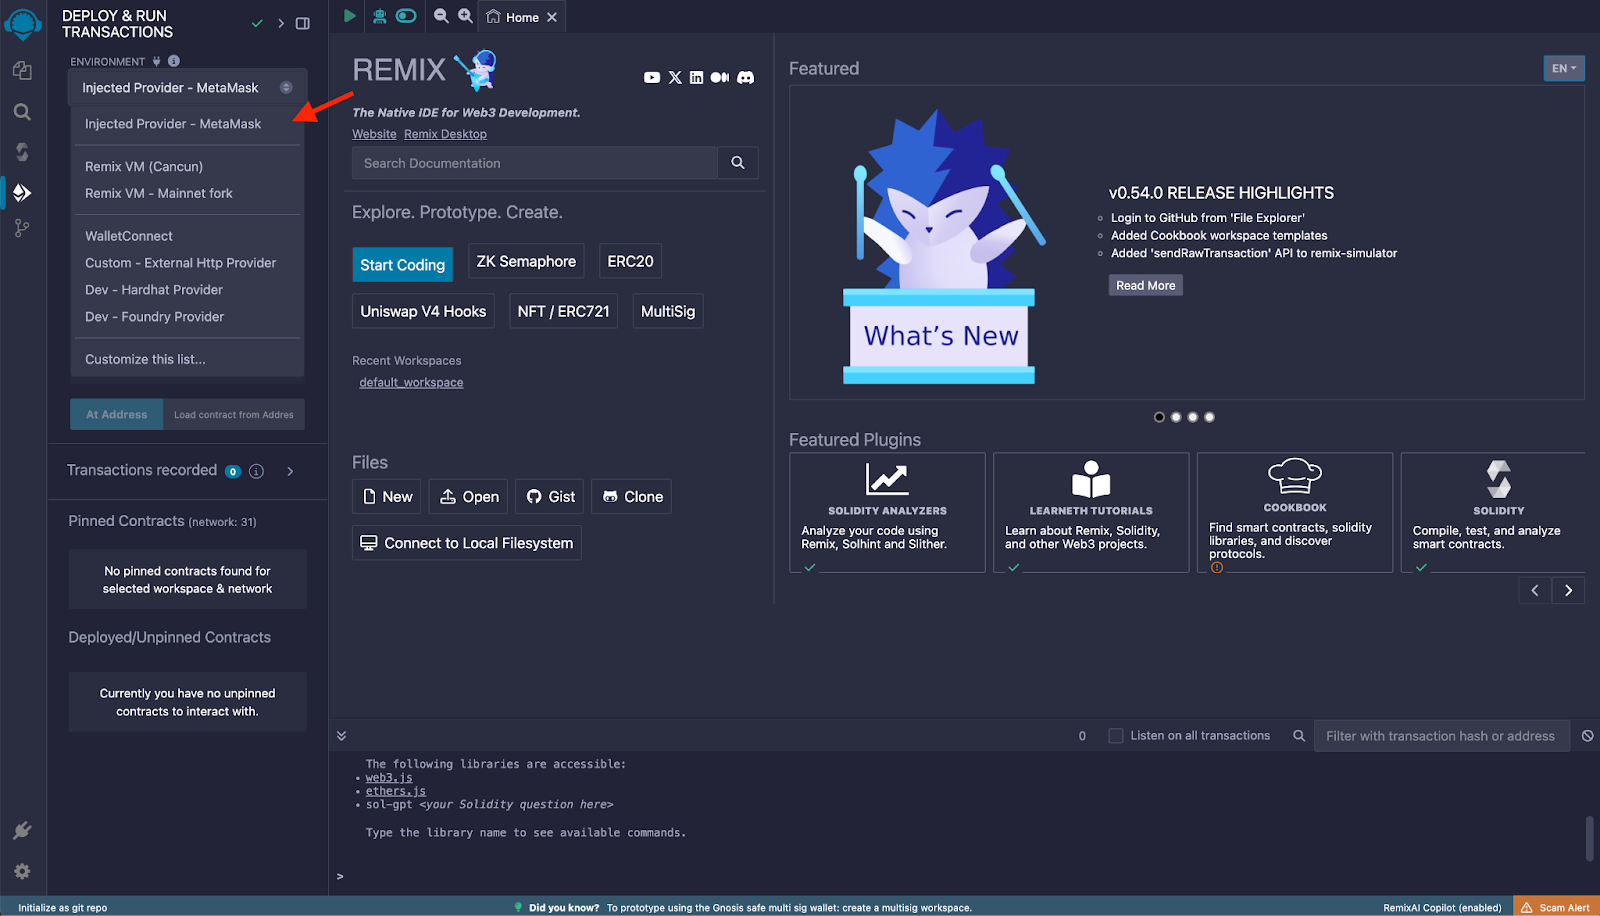
In the left menu, click on Deploy and run transactions, and under Environment select Injected provider - MetaMask, this will trigger the MetaMask Wallet, confirm connection, and ensure you are logged in to Metamask and connected to the Testnet or Mainnet Rootstock network.
Once selected, under Account, select the account you want to deploy the contract with.
Writing a Smart Contract
In the left menu, click on File explorer, and under Workspaces, you can create separate workspaces with different templates, like ERC20, ERC1155, an empty one, or use the default one that comes with a simple set of example contracts.
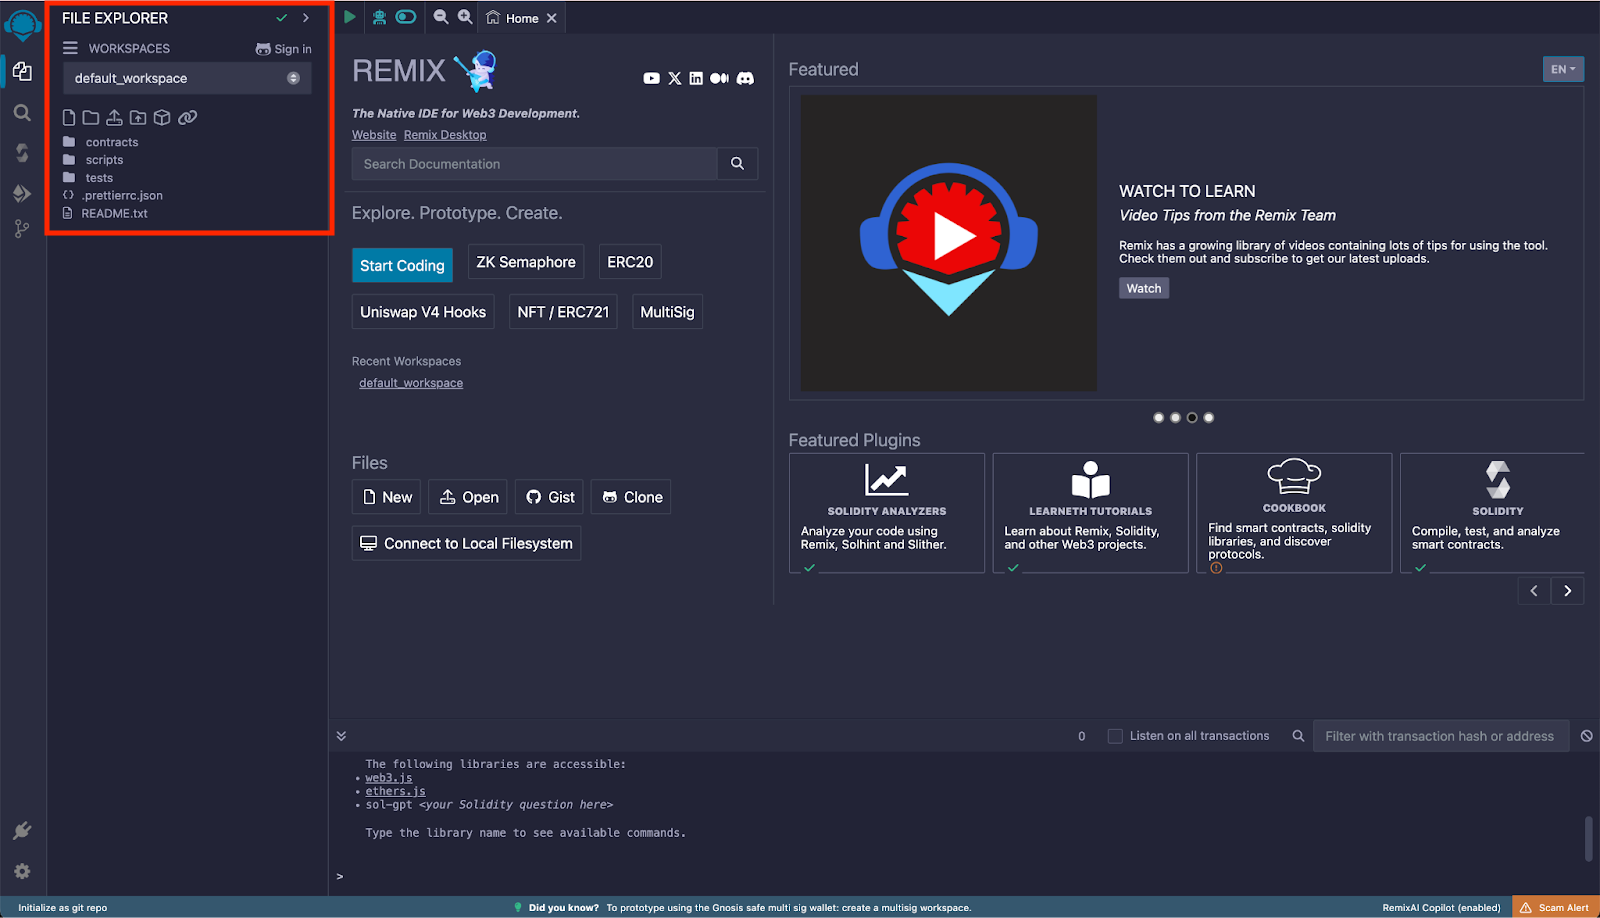
Inside the contracts folder, put all the contracts you want that satisfy the dependencies of the main contract you want to deploy, if any.
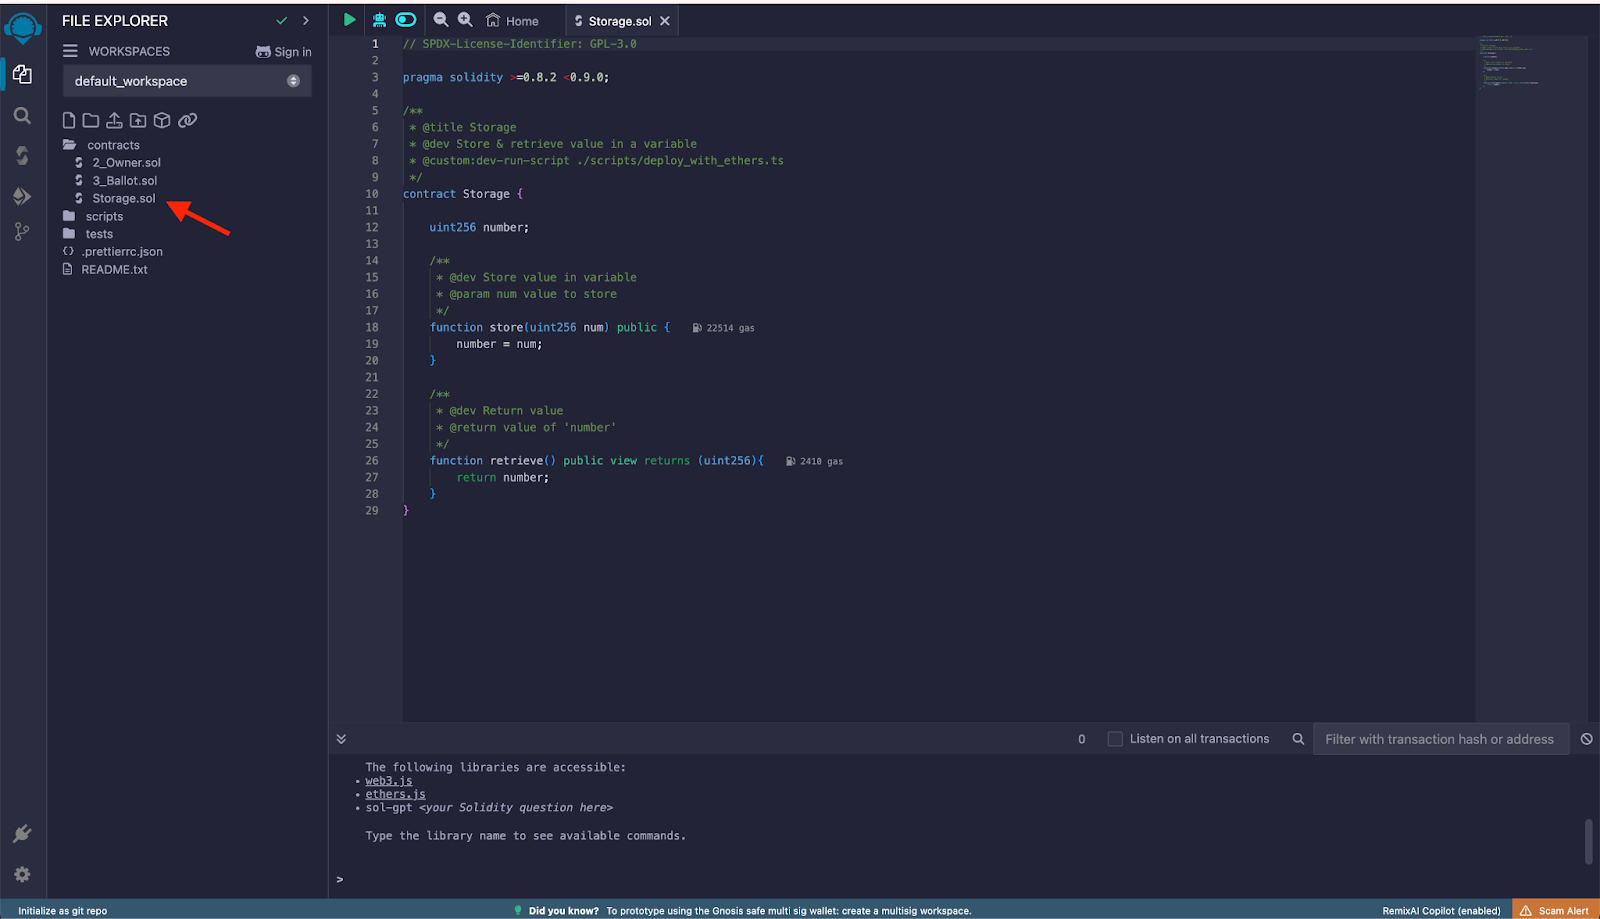
In this guide, we’ll use one of the example contracts that Remix provides in the default workspace, 1_Storage.sol.
⚠️ Note: for the sake of the verification process some steps after, ensure the
.solfilename of the main contract matches exactly its declared name. So we’ll rename it toStorage.sol.
Compiling the Contract
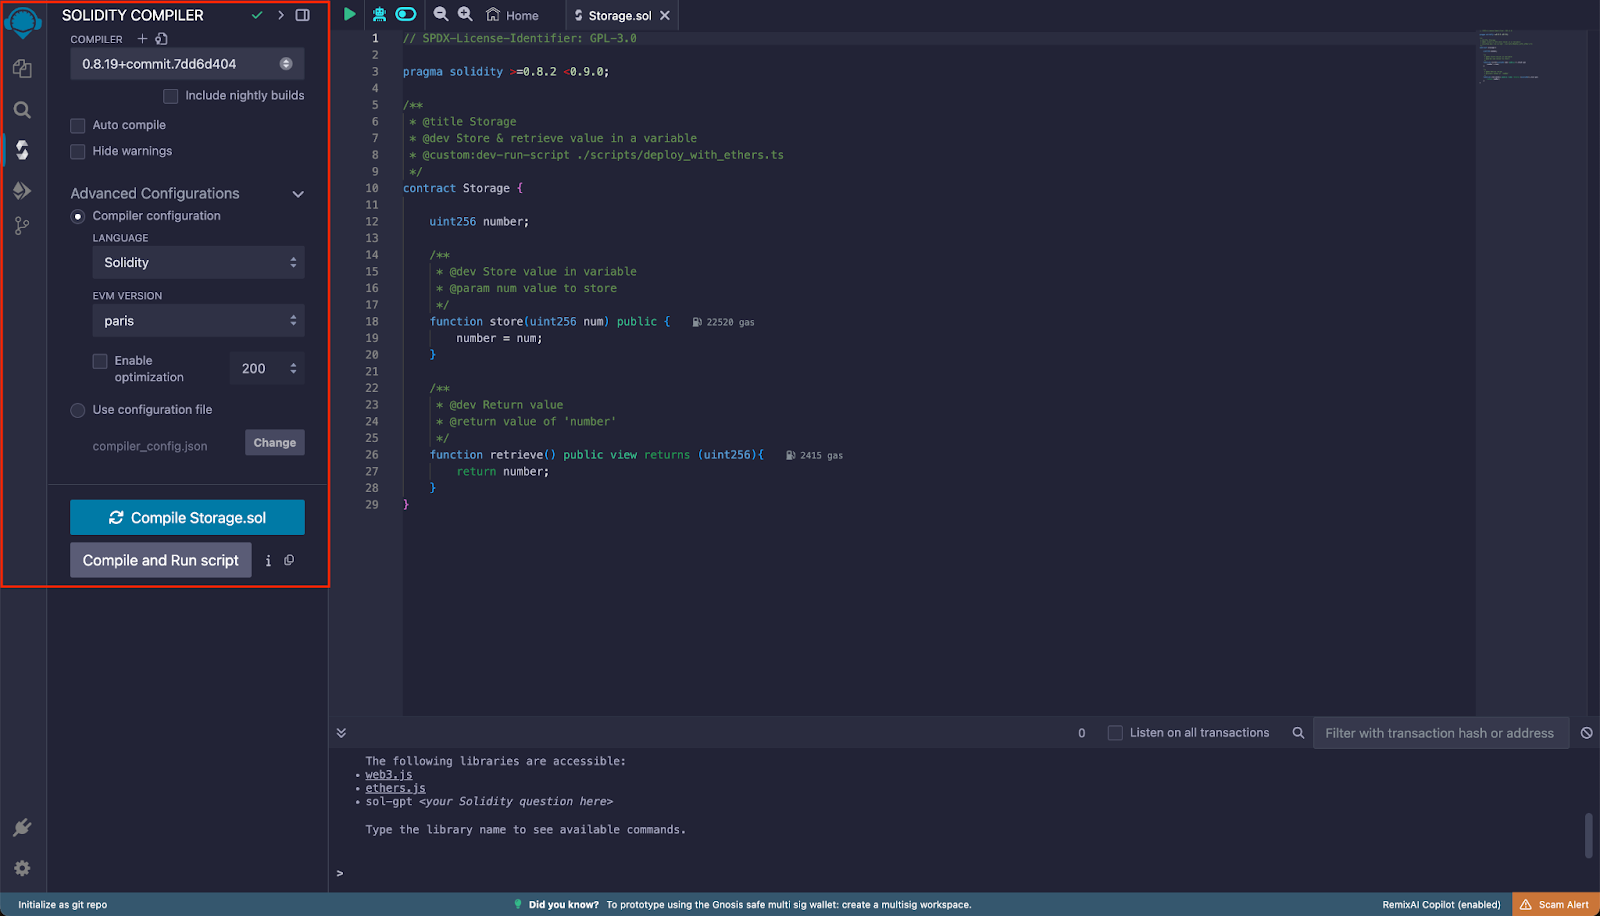
In the left menu, click on Solidity compiler and set the compilation parameters:
- Compiler: ensure the commit version is accurate for what you defined in the pragma of the contract.
- Under Advanced Configurations you can specify the EVM version and the optimization runs. You can also disregard this form and use a custom JSON with the configuration options.
Current supported solidity version for Rootstock is 0.8.25.
Return to File explorer and right click on the contract you want to deploy, and click on Compile Storage.sol. Note that you can also compile the contract by clicking the Compiler Options button in the left menu, and clicking Compile (currentFileOpenInEditor).sol
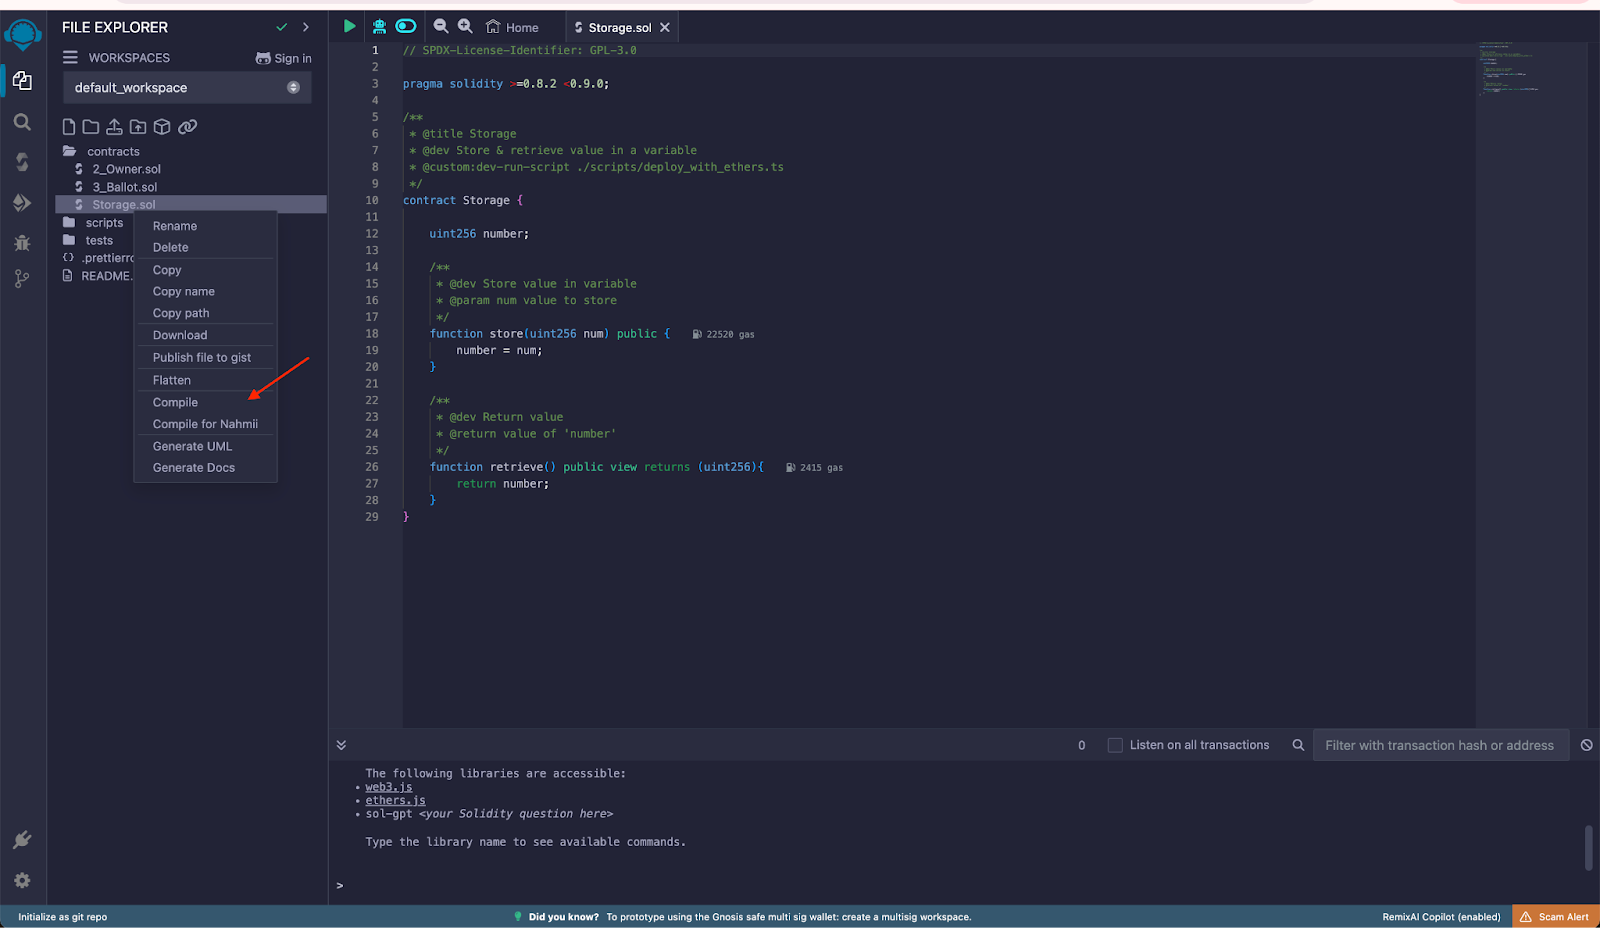
If successful, you will see a green checkmark (highlighted as selected), this is necessary so that in the next step the compiled contracts can be detected for deployment.

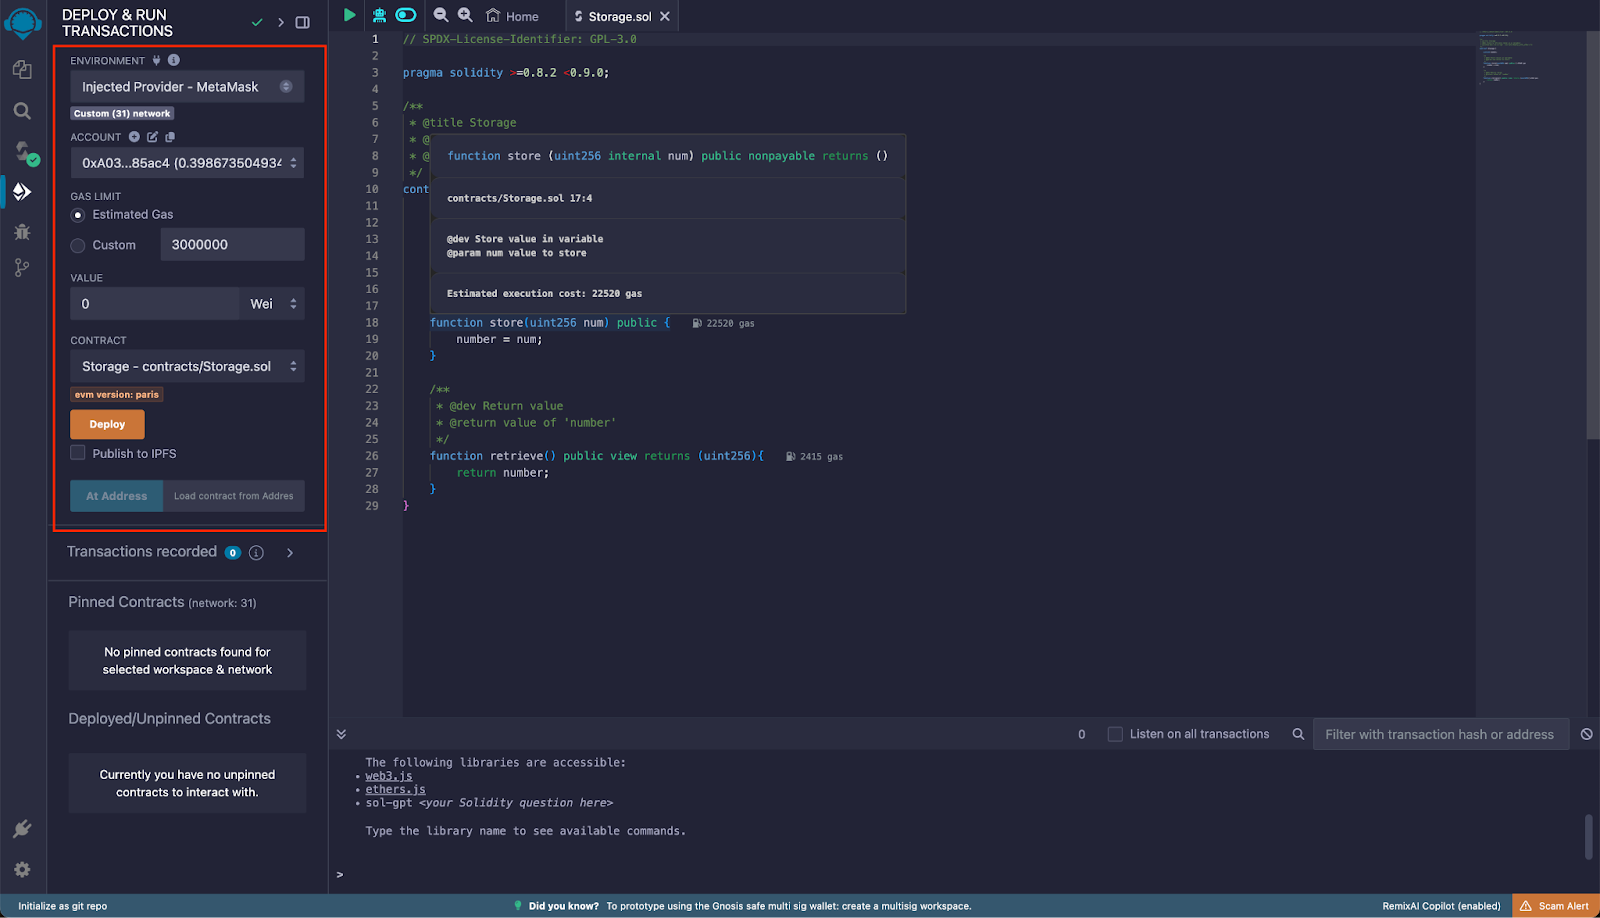
Deploying the Contract
In the left menu, click on Deploy and run transactions. Under Contract, ensure the contract is selected. Click on Deploy and MetaMask will then prompt you to sign the deploy transaction.
Ensure the Environment and Account are correctly set as explained in the previous step. If the contract had any constructor arguments, those inputs would appear next to the Deploy button for you to fill them.
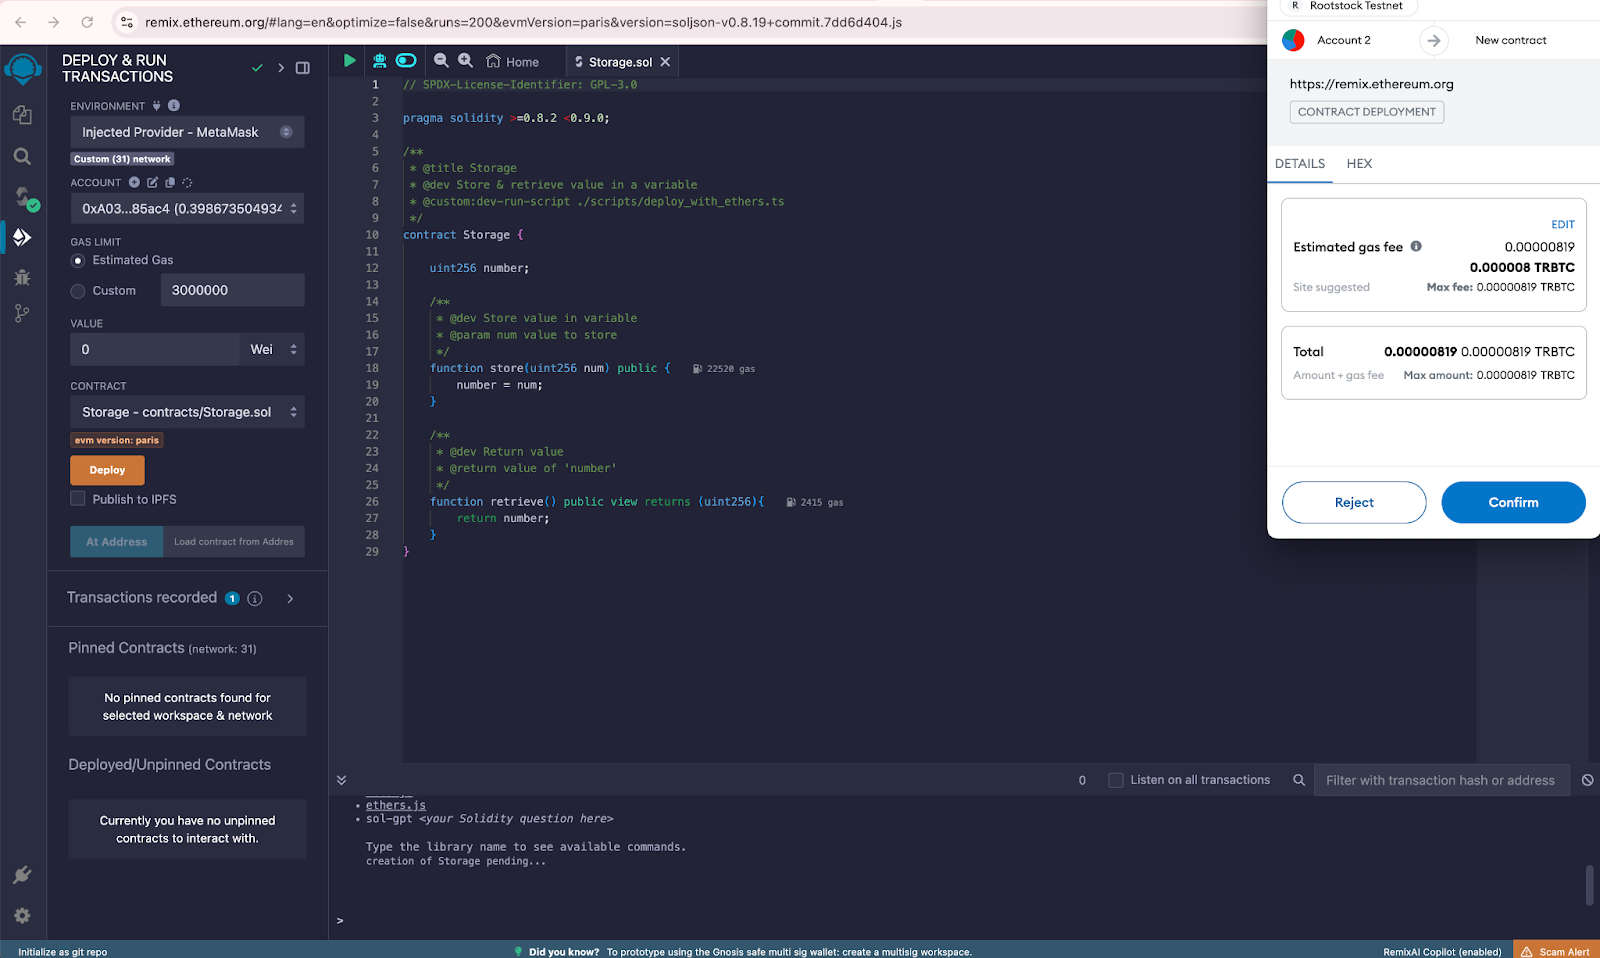
Confirm the transaction in MetaMask:
If deployment is successful, it will appear under Deployed/Unpinned Contracts section
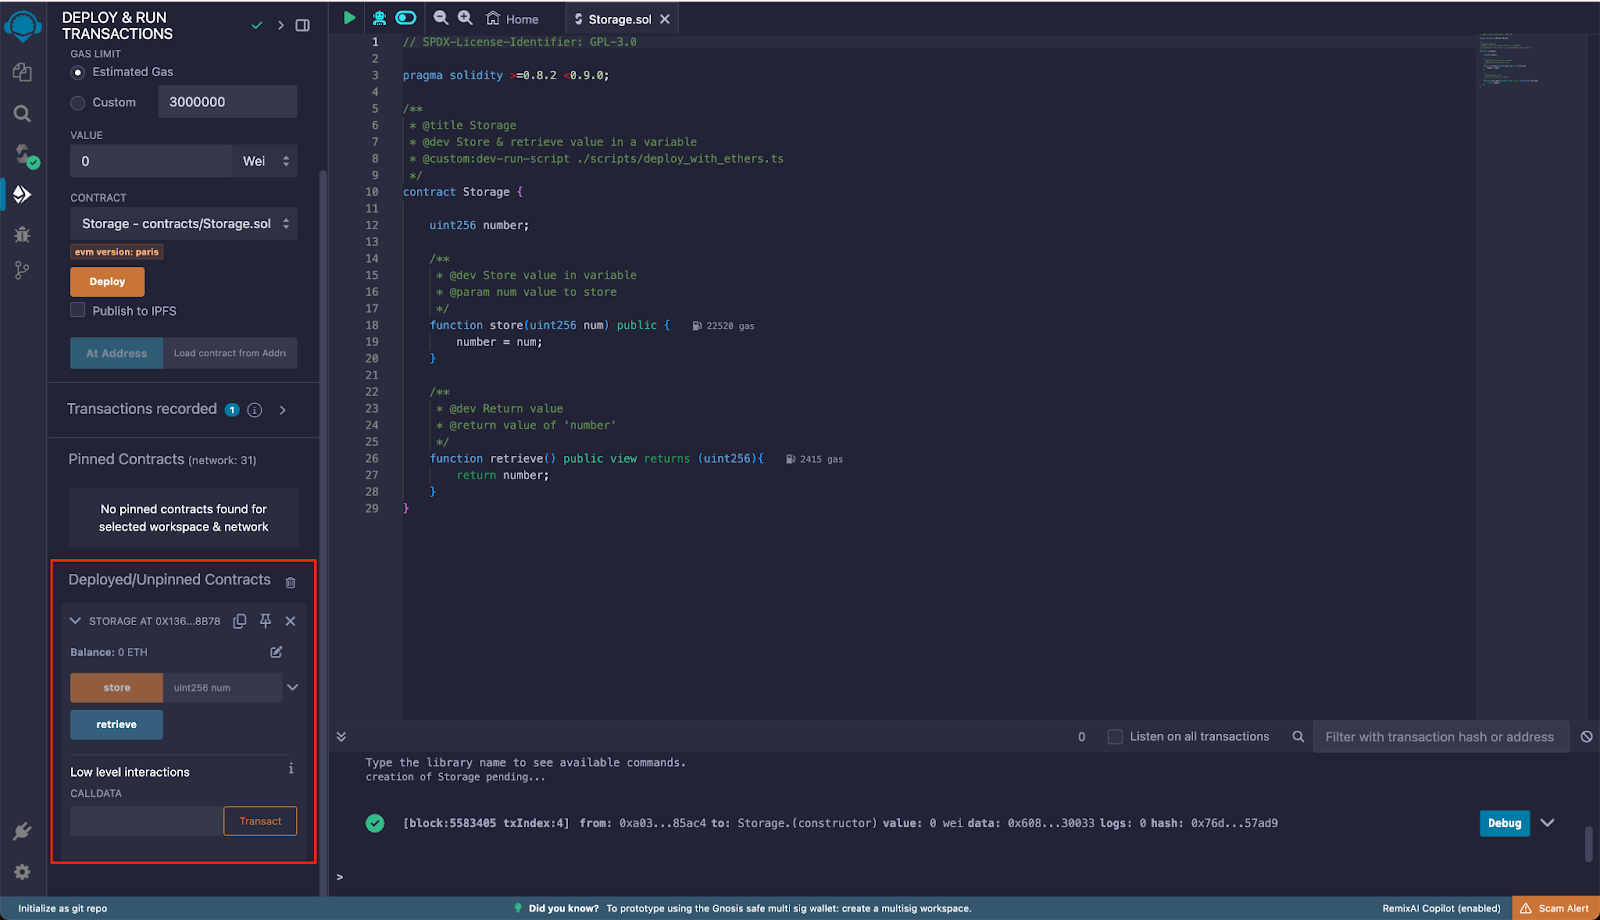
Interacting with the Contract
As shown in the previous step after deploying the contract, you can expand the desired contract and interact with it, calling the available functions by entering the required arguments, if any. Once entered the arguments, click on the method name and, in the event that it’s a writing method, Metamask will prompt you to sign the transaction. If the method is read only, it will show the return value under the method name.
Verifying the Contract on Rootstock Explorer
Smart contracts are the backbone of decentralized applications (dApps). They automate agreements and processes, but their code can be complex and prone to errors. Verifying your smart contracts is crucial to ensure they function as intended.
The Rootstock Explorer provides a UI for exploring and verifying transactions, blocks, addresses, tokens, stats, and interacting with smart contracts.
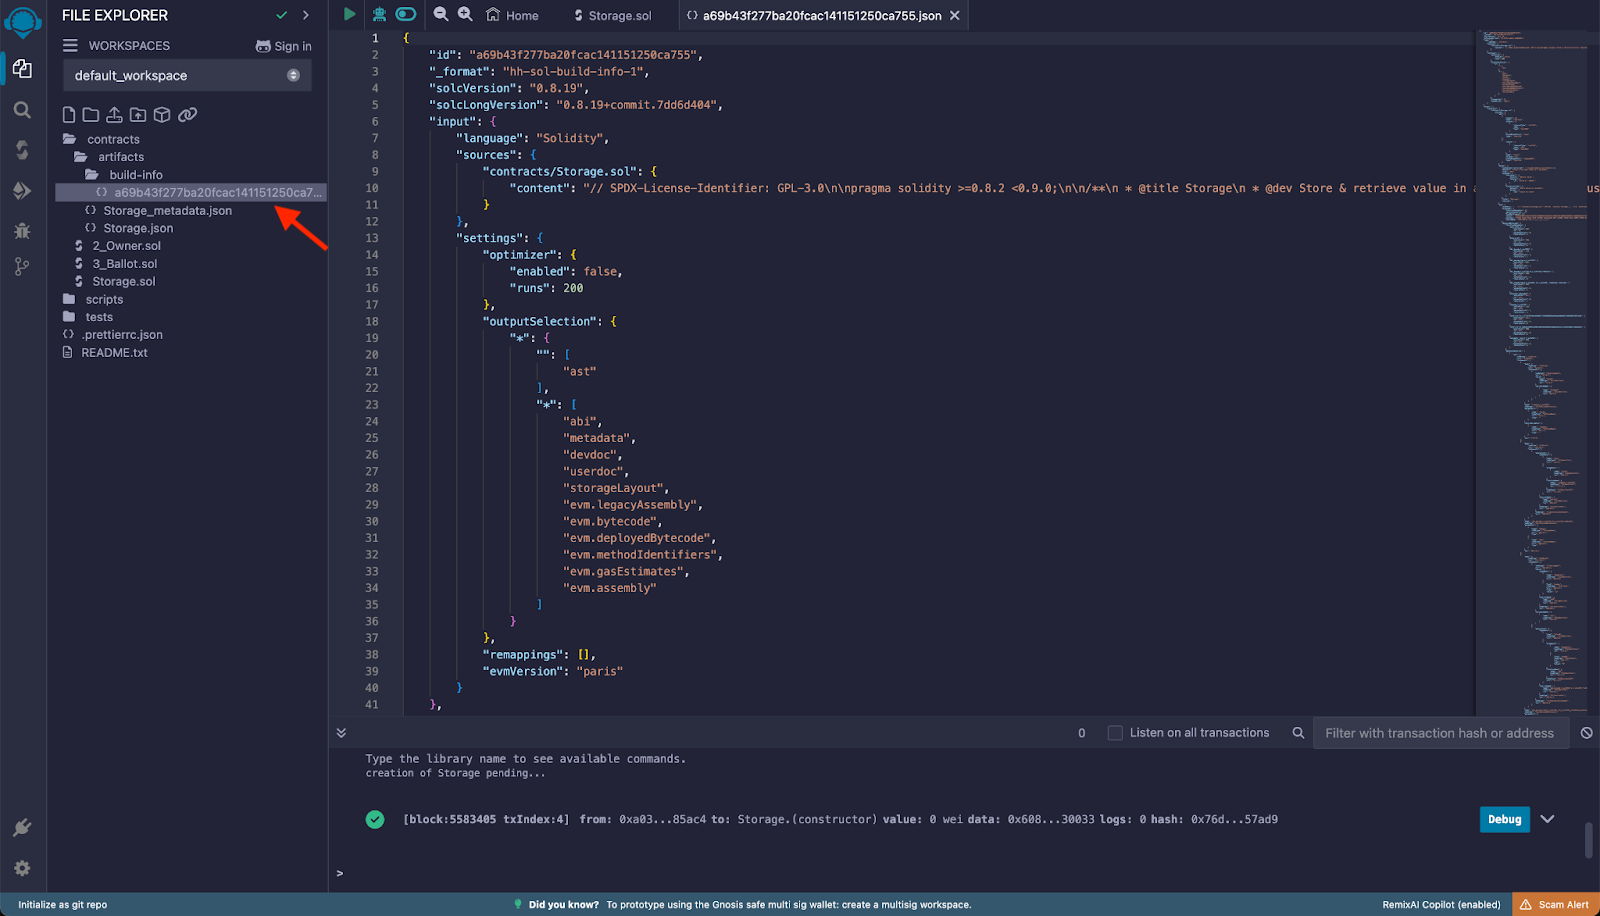
To verify the deployed contract on the explorer, go back to Remix file explorer and go to contracts -> artifacts -> build-info. In this folder there will be a json file containing the information of the compilation process. You’ll need this in order to verify the contract on the Rootstock Testnet Explorer. Copy the value of the input attribute and save it as a json file in your computer.
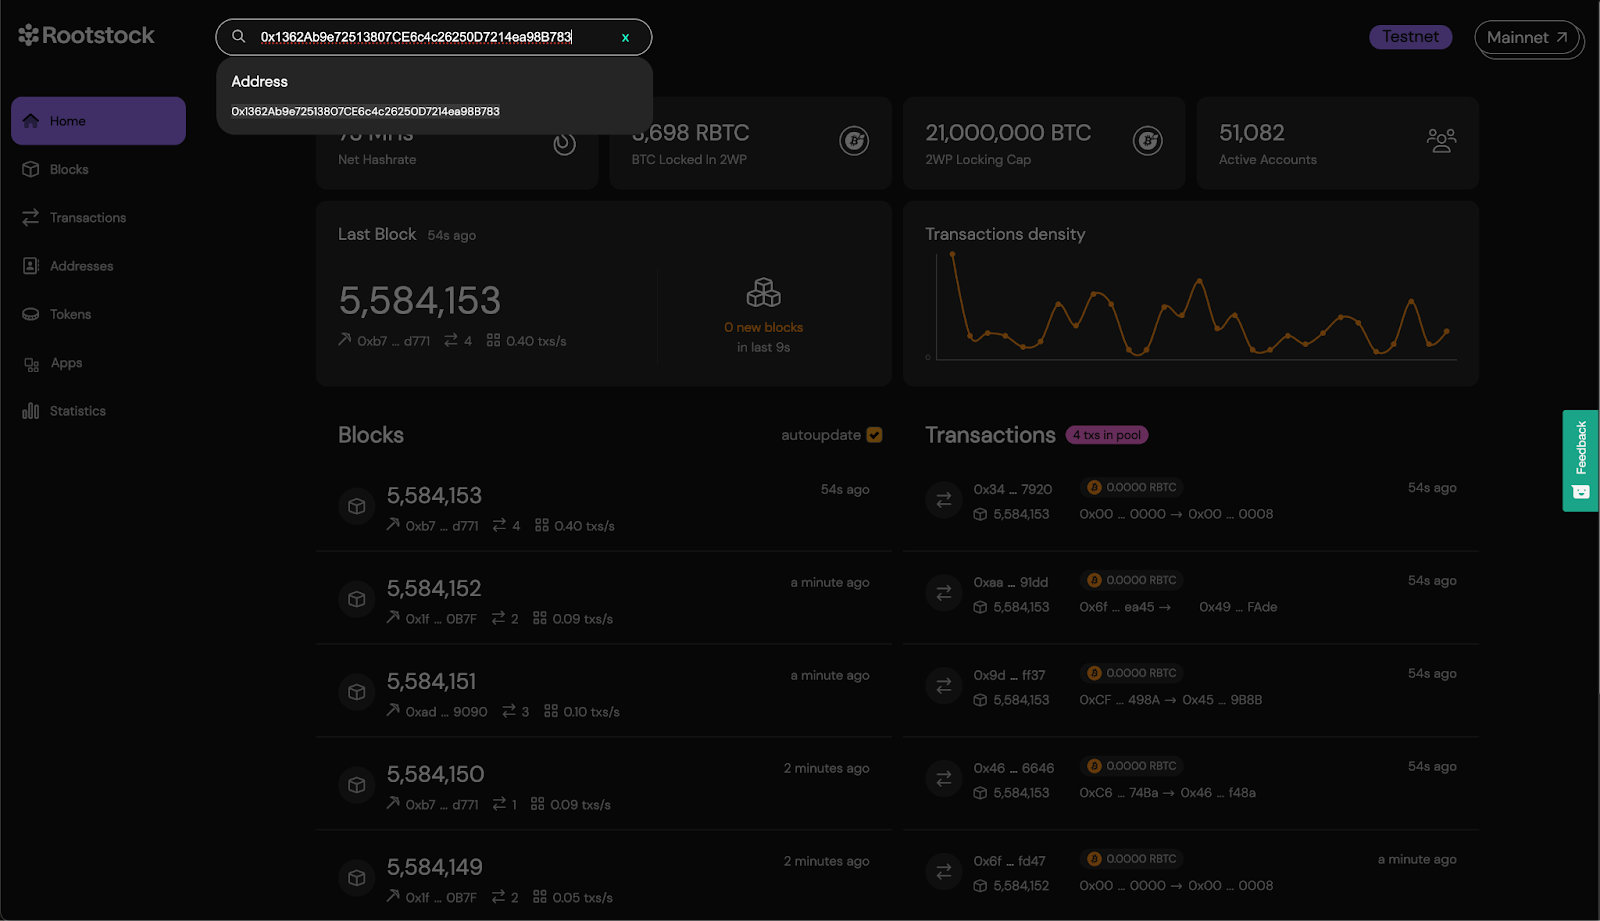
Copy the contract's address from the Remix deployment output, you can find the contract address under the Deployed/Unpinned Contracts.

Visit the Rootstock Testnet Explorer and paste the Contract Address in the search field.
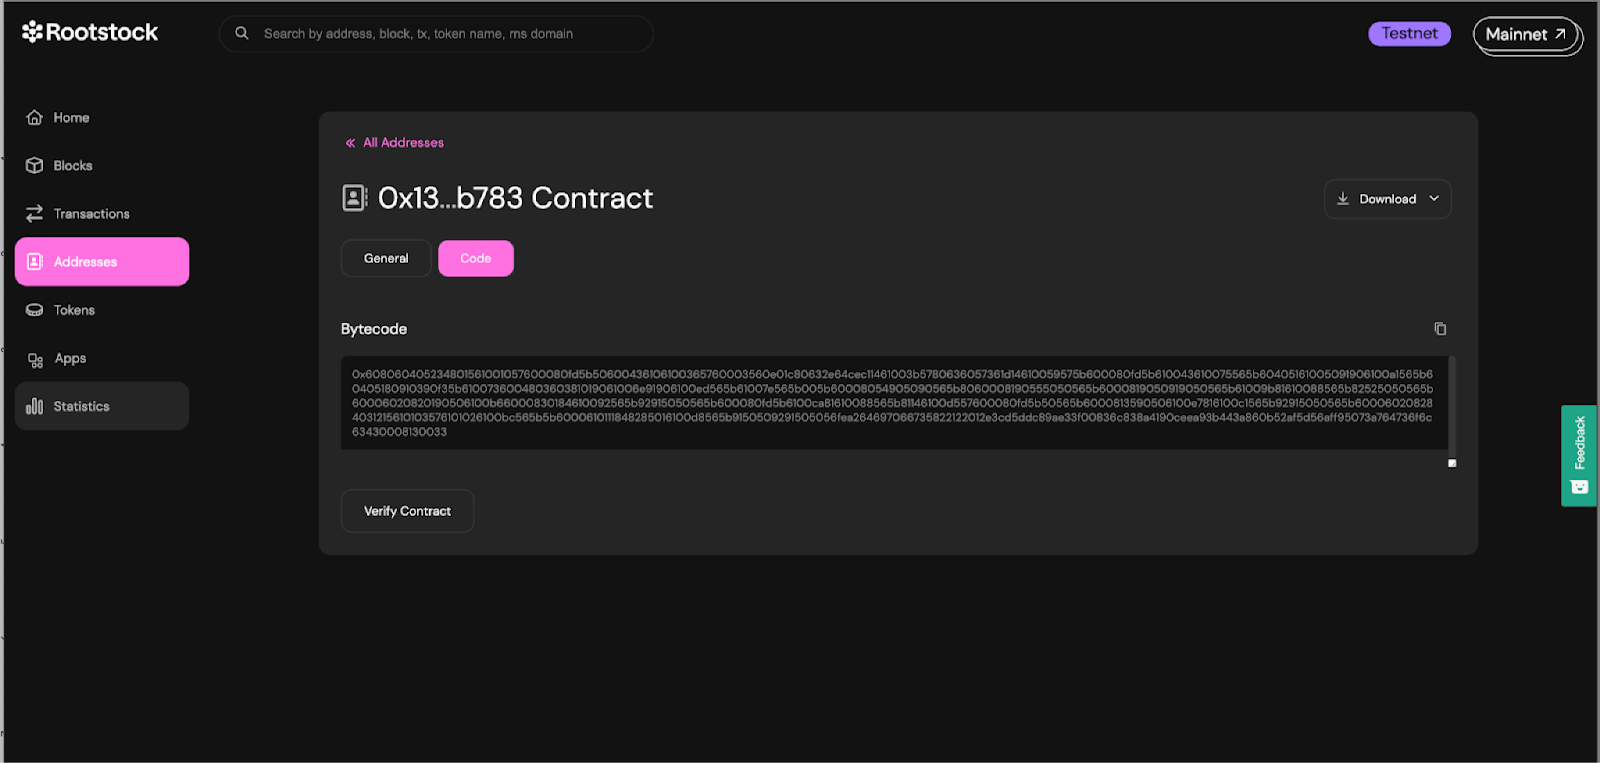
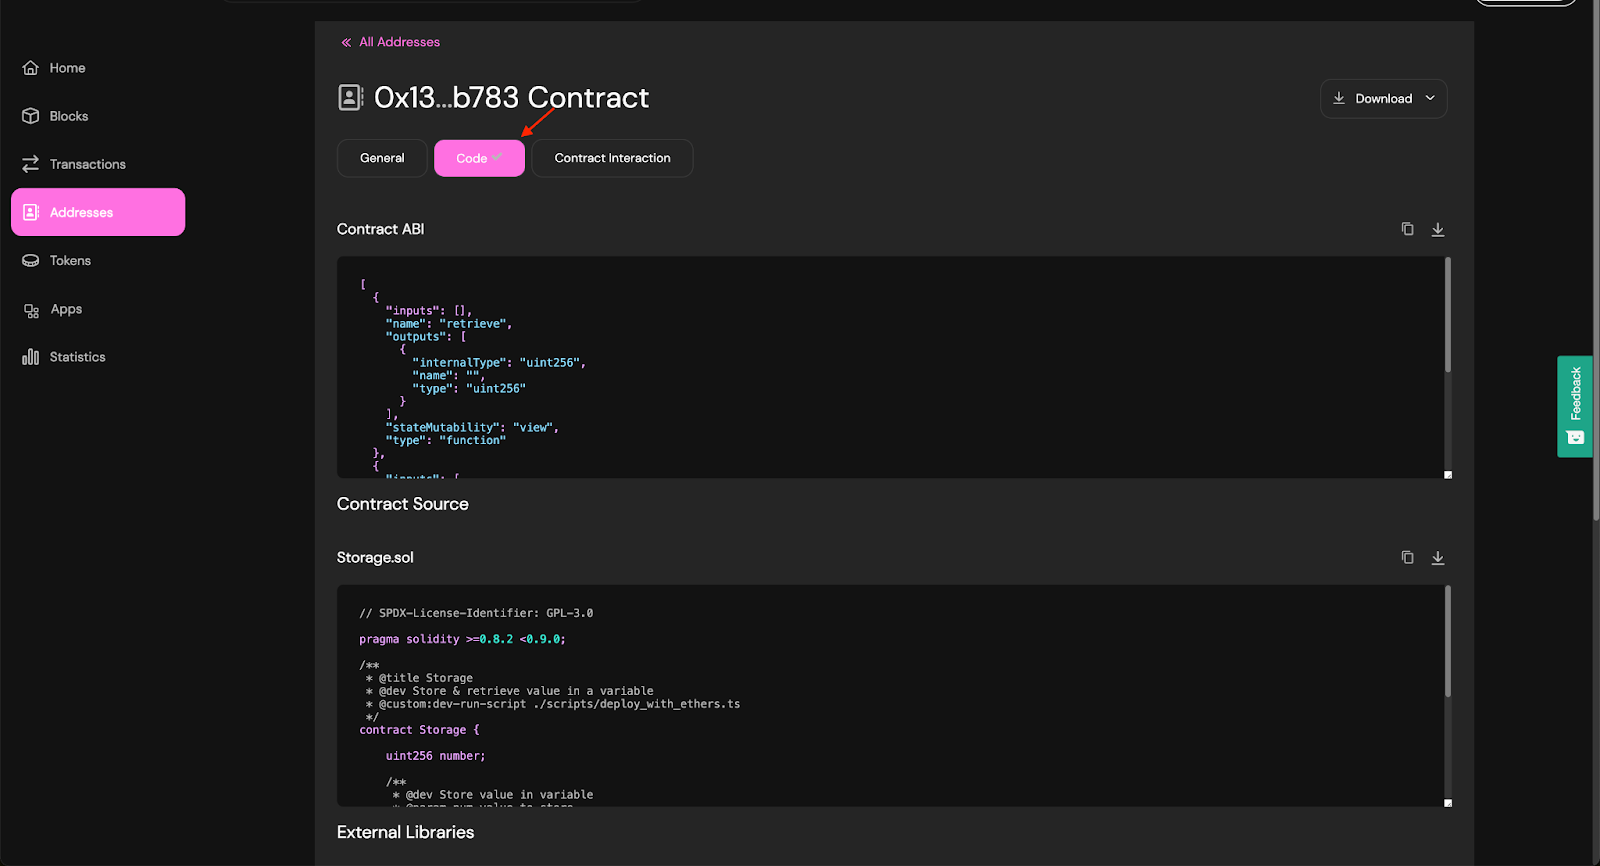
Click on the Code tab and click the button to Verify Contract.
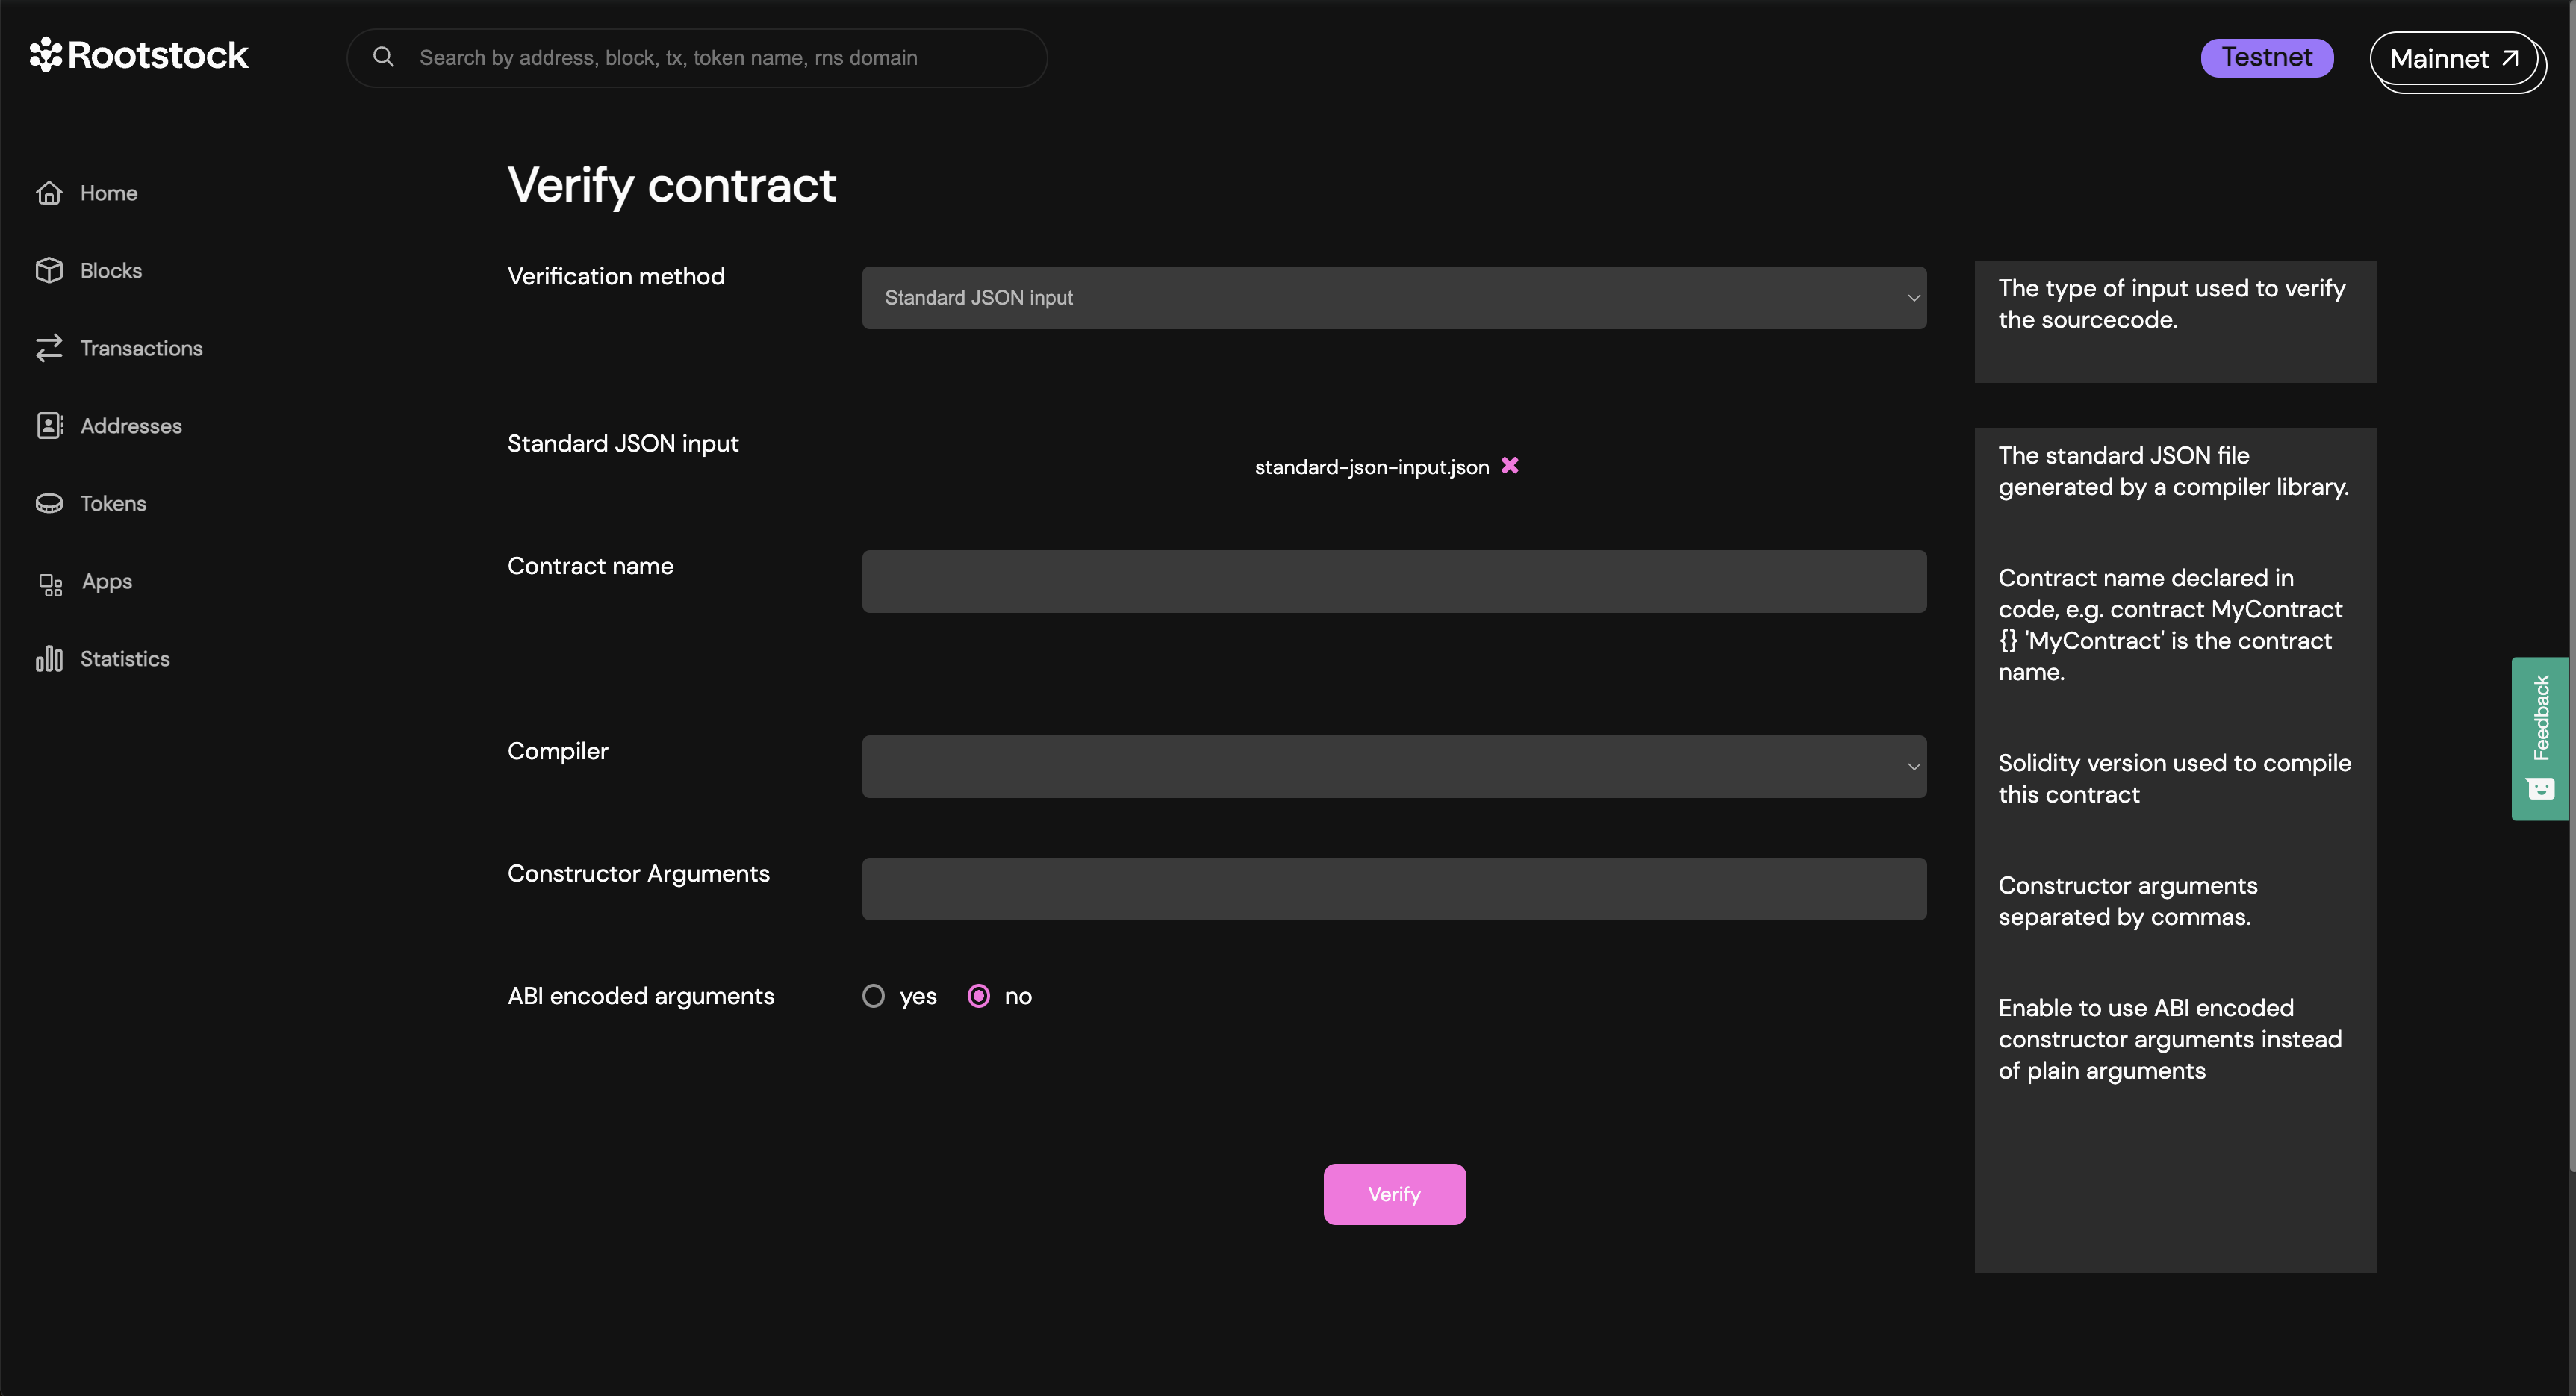
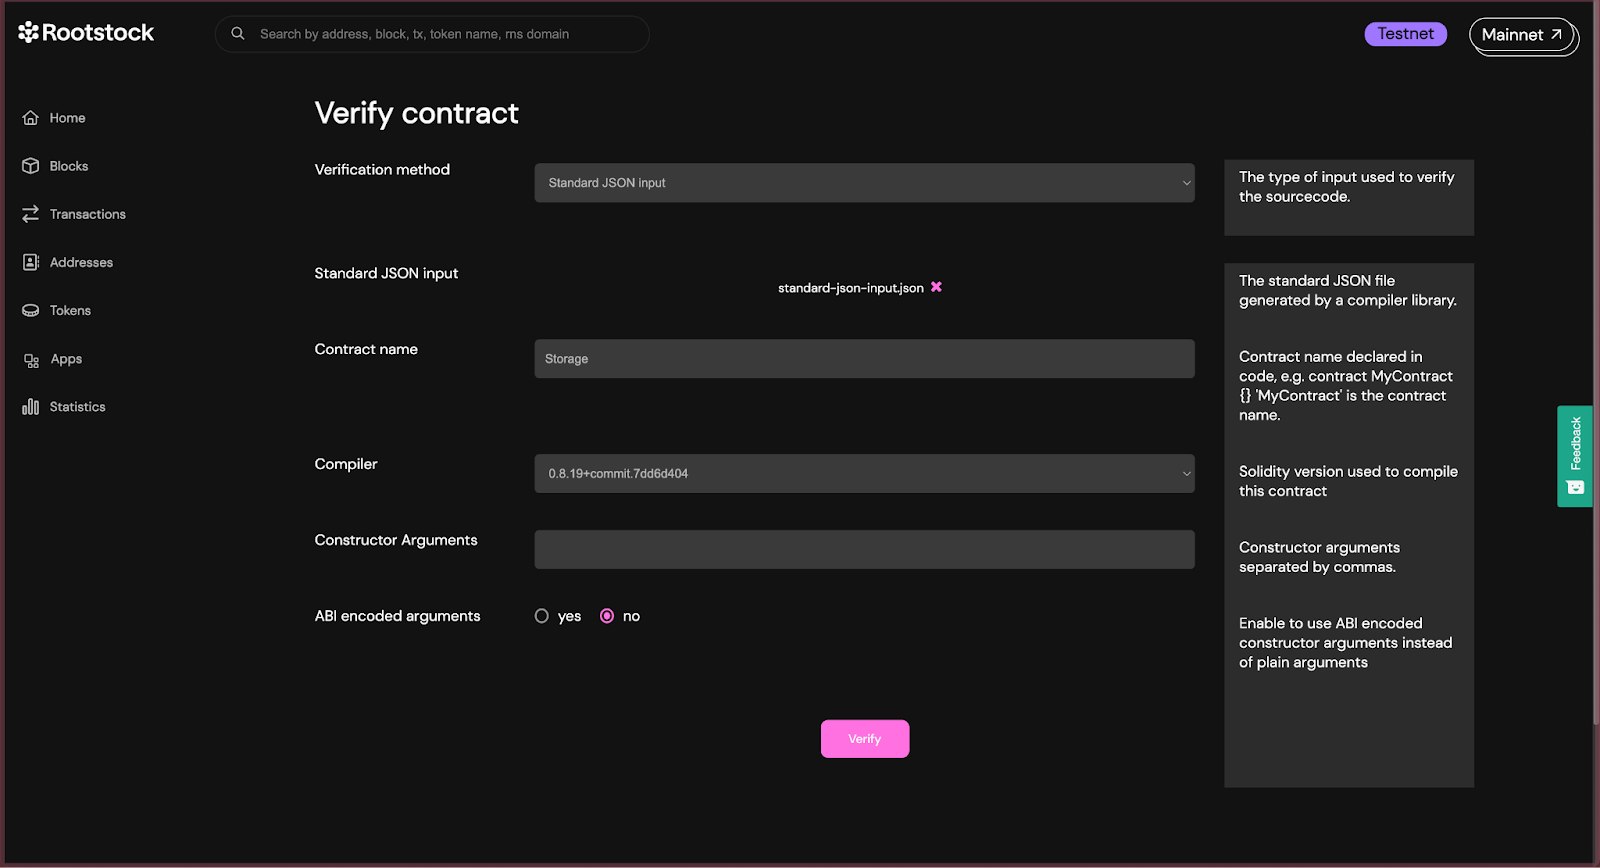
Select Standard JSON Input as the verification method and fill the form:
- Standard JSON input: In the standard JSON input, upload the file you created from the build info of the contract.
- Contract name: The name of the contract which you declared it with. Remember that it’s important the file of the contract has the same matching name as the standard-json-input.json. Now, click on add file to upload.
- Compiler: This is the compiler version the contract has been compiled with. For example Constructor arguments: The constructor arguments of the contract, if any. If you don’t know the arguments at first, continue with the process and the explorer will attempt to identify the constructor arguments from the bytecode and suggest them, if possible.
- ABI encoded arguments: if the arguments provided are ABI encoded, check this option.
Copy only the input value (curly braces included), see verifying contract on the explorer and paste the code into a file named standard-json-input.json, then click on add file:
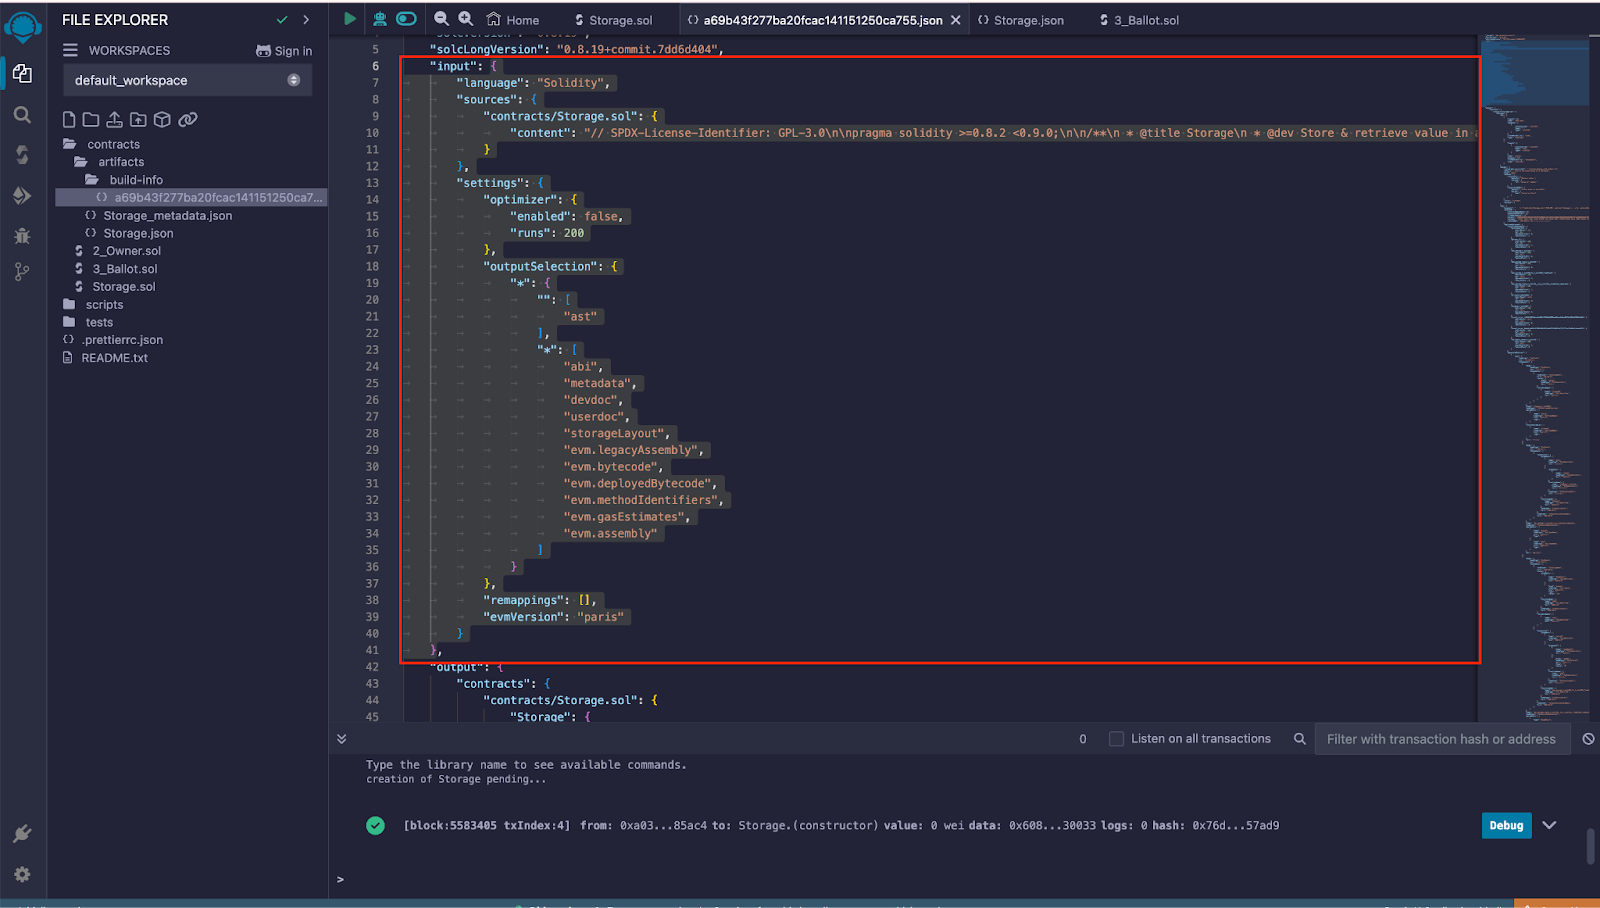
Here’s the example code of an input value:
{
    "language": "Solidity",
    "sources": {
        "contracts/Storage.sol": {
            "content": "// SPDX-License-Identifier: GPL-3.0\n\npragma solidity >=0.8.2 <0.9.0;\n\n/**\n * @title Storage\n * @dev Store & retrieve value in a variable\n * @custom:dev-run-script ./scripts/deploy_with_ethers.ts\n */\ncontract Storage {\n\n    uint256 number;\n\n    /**\n     * @dev Store value in variable\n     * @param num value to store\n     */\n    function store(uint256 num) public {\n        number = num;\n    }\n\n    /**\n     * @dev Return value \n     * @return value of 'number'\n     */\n    function retrieve() public view returns (uint256){\n        return number;\n    }\n}"
        }
    },
    "settings": {
        "optimizer": {
            "enabled": false,
            "runs": 200
        },
        "outputSelection": {
            "*": {
                "": [
                    "ast"
                ],
                "*": [
                    "abi",
                    "metadata",
                    "devdoc",
                    "userdoc",
                    "storageLayout",
                    "evm.legacyAssembly",
                    "evm.bytecode",
                    "evm.deployedBytecode",
                    "evm.methodIdentifiers",
                    "evm.gasEstimates",
                    "evm.assembly"
                ]
            }
        },
        "remappings": [],
        "evmVersion": "paris"
    }
}
- Enter the Contract name, this can be found in the Contract declaration.
contract Storage {
  // code
}
- Select the compiler version, note to use the same compiler version used when compiling the contracts on Remix.
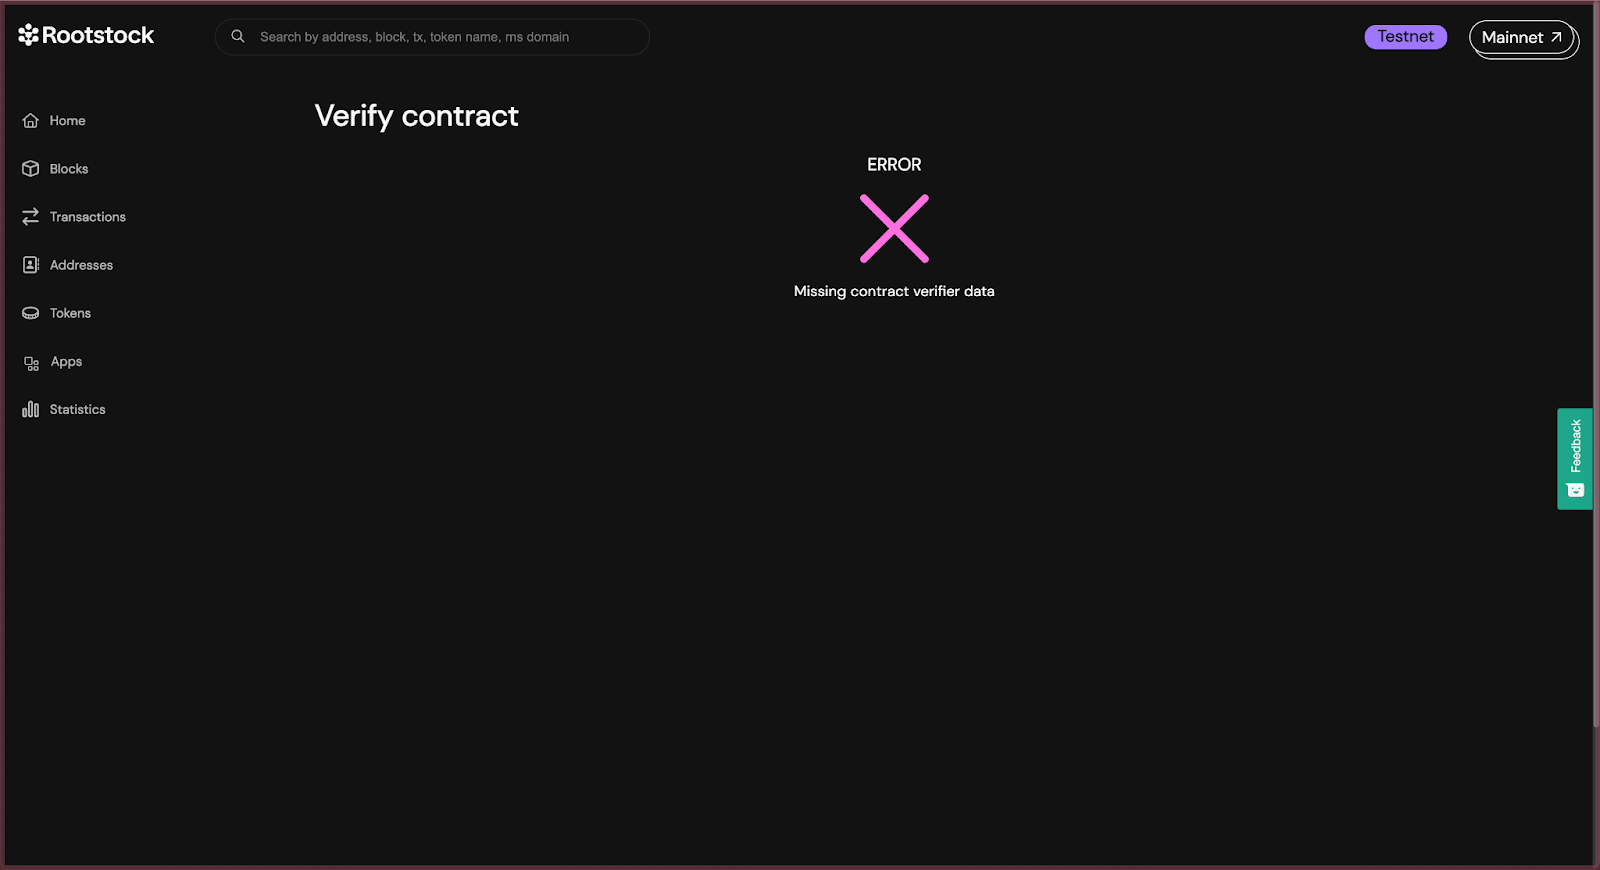
At the bottom, below the form, click on the verify button and wait for the verification attempt to finish. If successfull, you’ll see a success screen.
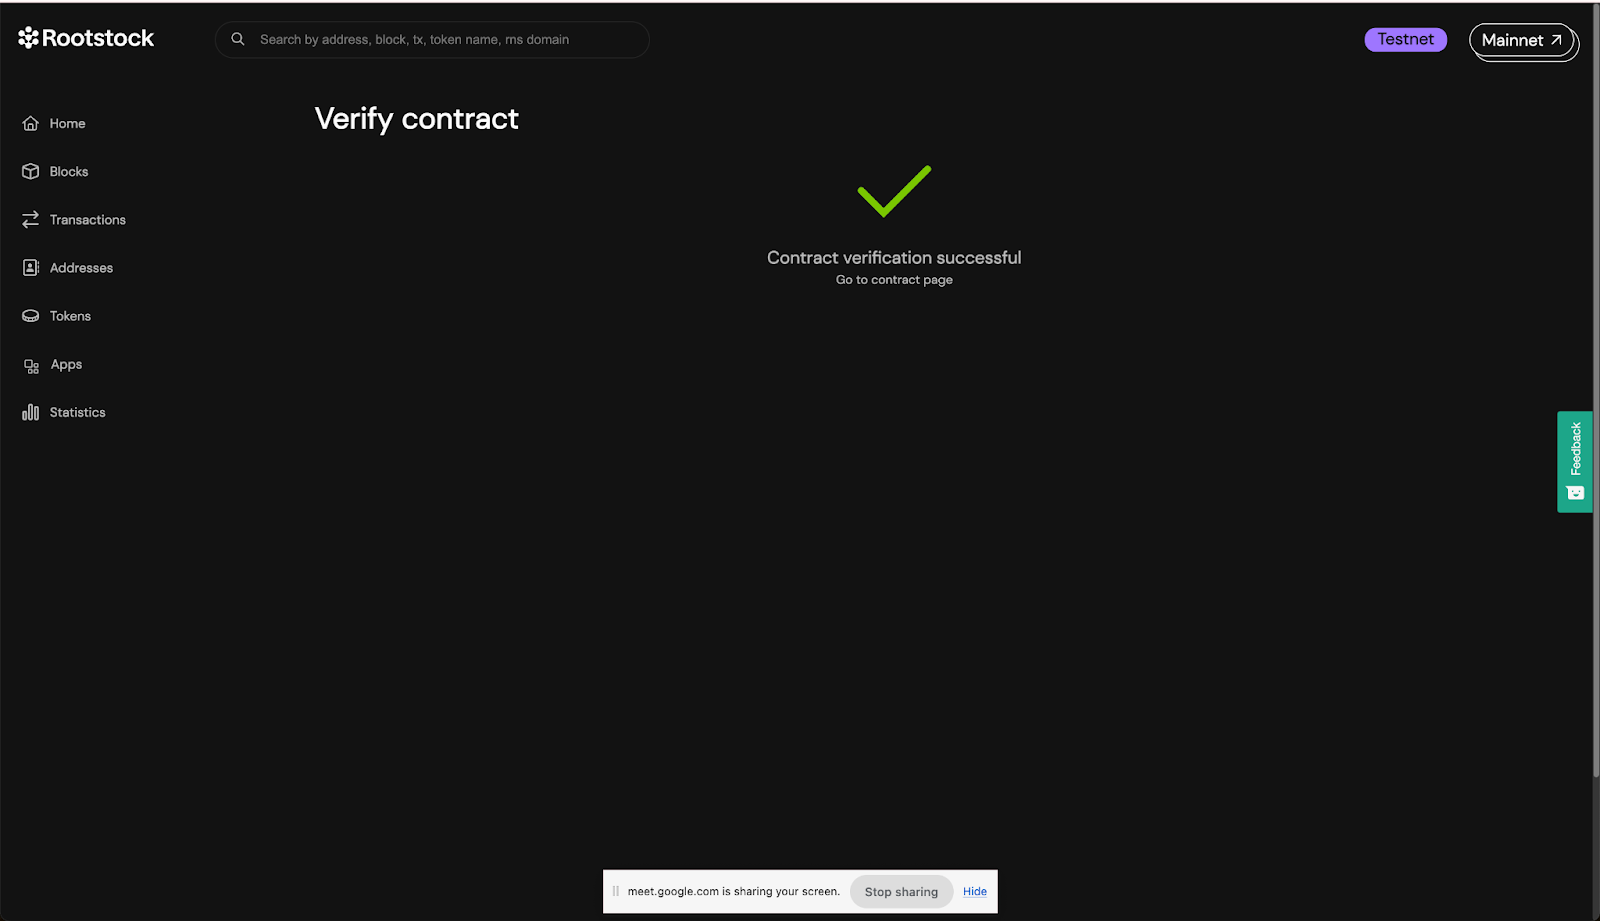
You can view all the solidity code of the contract and its dependencies.
Congratulations, we have successfully compiled, deployed, interacted and verified a smart contract using Remix and the Rootstock Explorer.
Troubleshooting
FIX: Ensure to refresh your tab and verify the contract again.