Get Started with Goldsky
Goldsky is a data indexer that offers high-performance subgraph hosting and realtime data on Rootstock.
It offers the following products that can be used independently or in conjunction to power your data stack.
- Subgraphs: Backwards-compatible subgraph indexing solution
- Mirror: Stream onchain data directly to your database.
This data is available on:
Prerequisites
- Node.js
or newer
Installation
Install the goldsky CLI
curl https://goldsky.com | sh
Run the command below to confirm the installation and see the available options.
goldsky --help
This should produce the output below. If the command fails, open a new terminal for the changes to take effect.
goldsky <cmd> args

Commands:
  goldsky            Get started with Goldsky              [default]
  goldsky login      Log in to Goldsky to enable authenticated CLI c
                     ommands
  goldsky logout     Log out of Goldsky on this computer
  goldsky subgraph   Commands related to subgraphs
  goldsky project    Commands related to project management
  goldsky pipeline   Commands related to Goldsky pipelines
  goldsky dataset    Commands related to Goldsky datasets
  goldsky indexed    Analyze blockchain data with indexed.xyz
  goldsky secret     Commands related to secret management
  goldsky telemetry  Commands related to CLI telemetry

Options:
      --token    CLI Auth Token               [string] [default: ""]
      --color    Colorize output           [boolean] [default: true]
  -v, --version  Show version number                       [boolean]
  -h, --help     Show help                                 [boolean]
Create a project
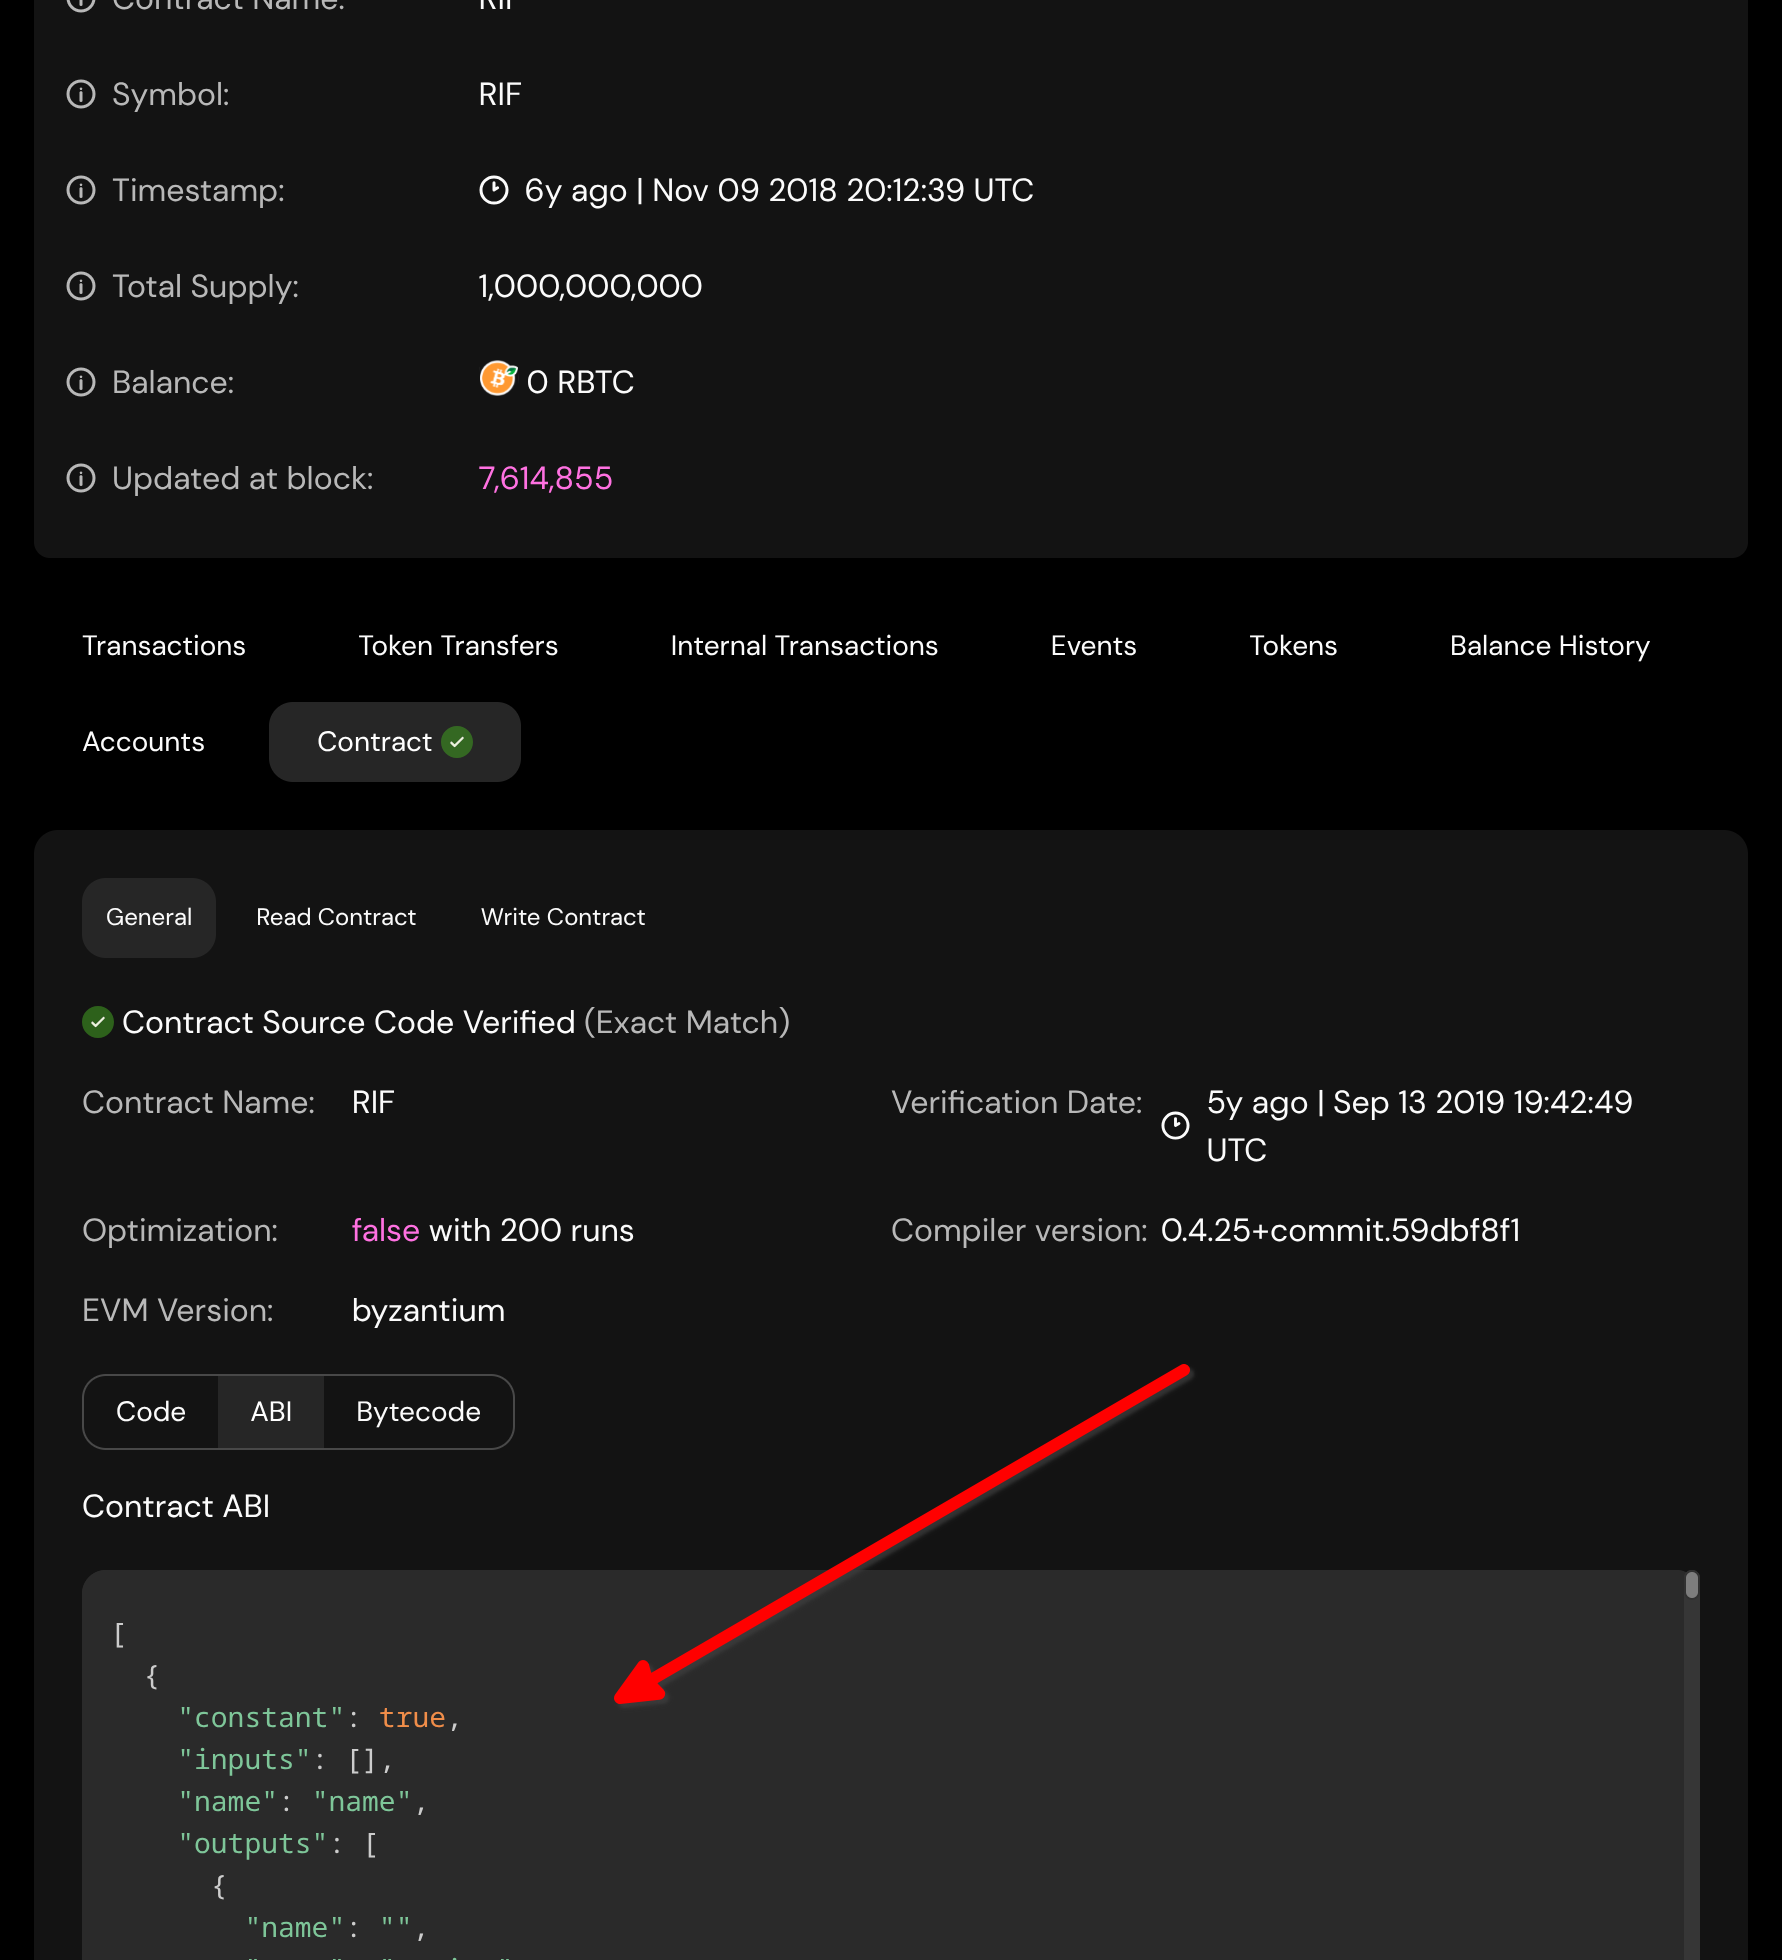
For this example, we will index the official RIF token contract on mainnet. More details about the contract can be found on the RIF Token page.
Create a folder rif for the project and navigate into it.
The contract's address and ABI will be needed to configure the subgraph.
Visit the RIF contract's block explorer link. Click on the Contract tab just below the Contract Details section. Inside the Contract section, click on ABI.
Copy the contents of the contract ABI into a json file, rif-abi.json.
Create the subgraph’s configuration file, rif-config.json.
This file has the following sections:
-
Version number
This is the version number of Goldsky’s configuration file format. Leave this as 1. This is not the version number of your subgraph. -
Name
Used to identify the subgraph config. -
ABIs
The abi files to be used in the config.
This accepts an object whose key is the name you assign to the ABI file. The value is another object with the key as"path"and its value is the relative path of the ABI file. -
Instances
Individual configuration details for each contract that should be indexed by the subgraph. This has several sections:-
Address
The address of the deployed smart contract. -
ABI
This defines the smart contract's constructors, methods, events and their inputs and outputs. The value used here should match a key defined in the ABIs section. -
Chain
The chain where the contract is deployed. -
StartBlock
The block number where indexing should begin.
-
Assuming this is your folder structure,
rif
|_ rif-abi.json
|_ rif-config.json
your rif-config.json should look similar to this.
{
  "version": "1",
  "name": "rif",
  "abis": {
    "rif-abi": {
      "path": "./rif-abi.json"
    }
  },
  "instances": [
    {
      "abi": "rif-abi",
      "address": "0x2aCc95758f8b5F583470bA265Eb685a8f45fC9D5",
      "startBlock": 7500000,
      "chain": "rootstock"
    }
  ]
}
More configuration options can be found in the Goldsky docs.
Create an API key
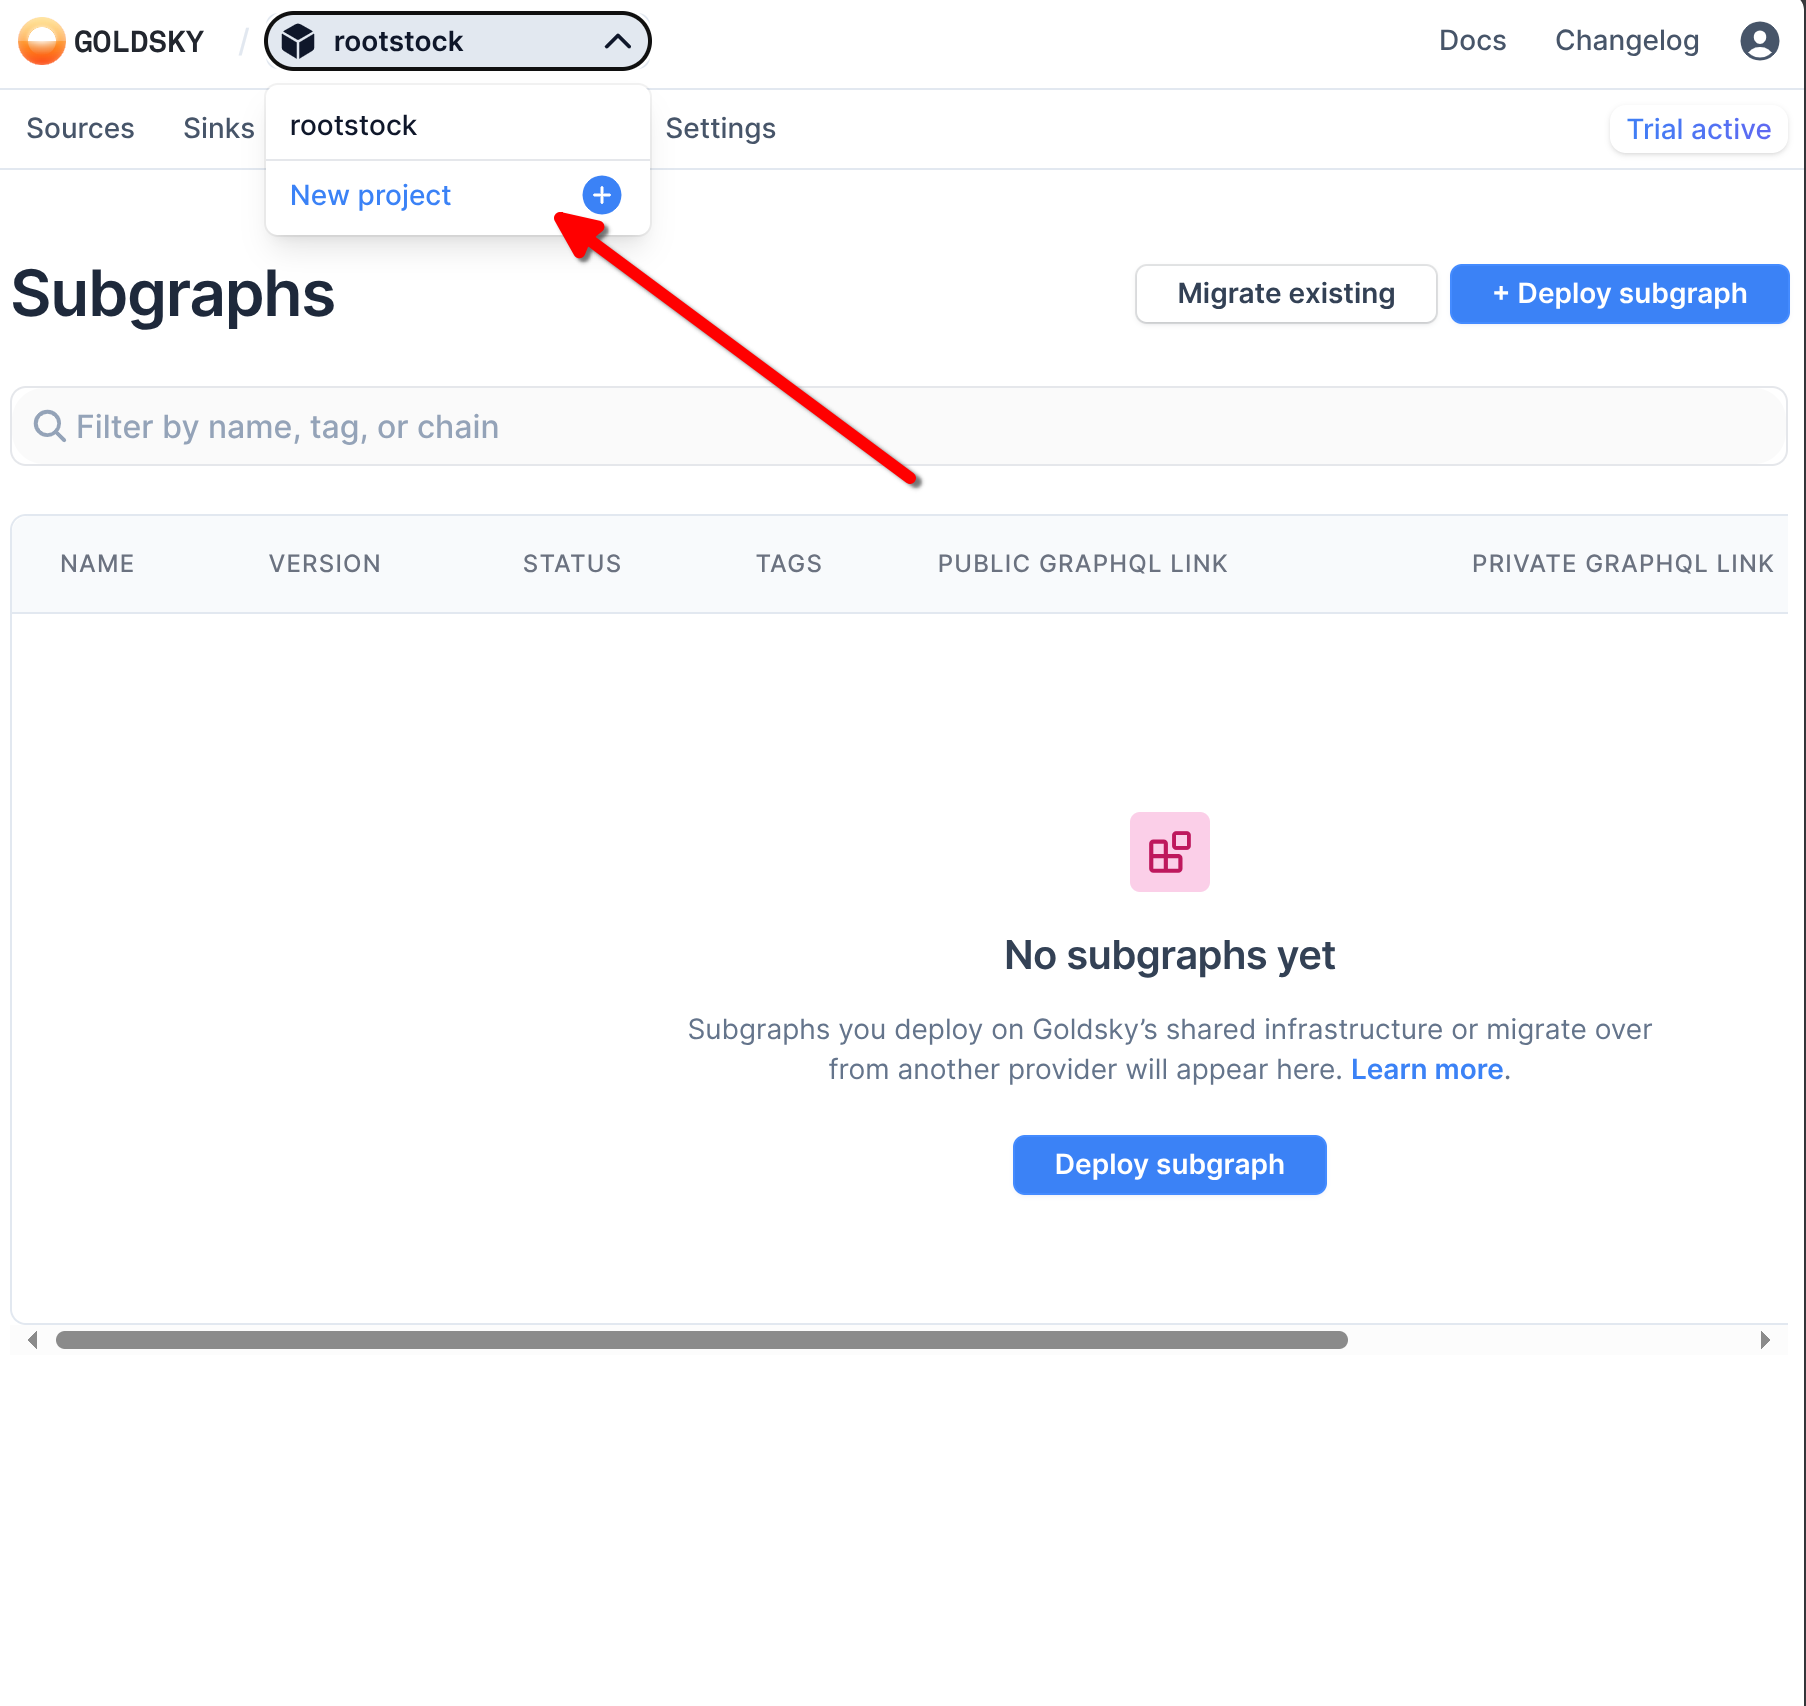
Create or log in to your goldsky account on https://app.goldsky.com/.
If you have no project in your dashboard yet, create one.
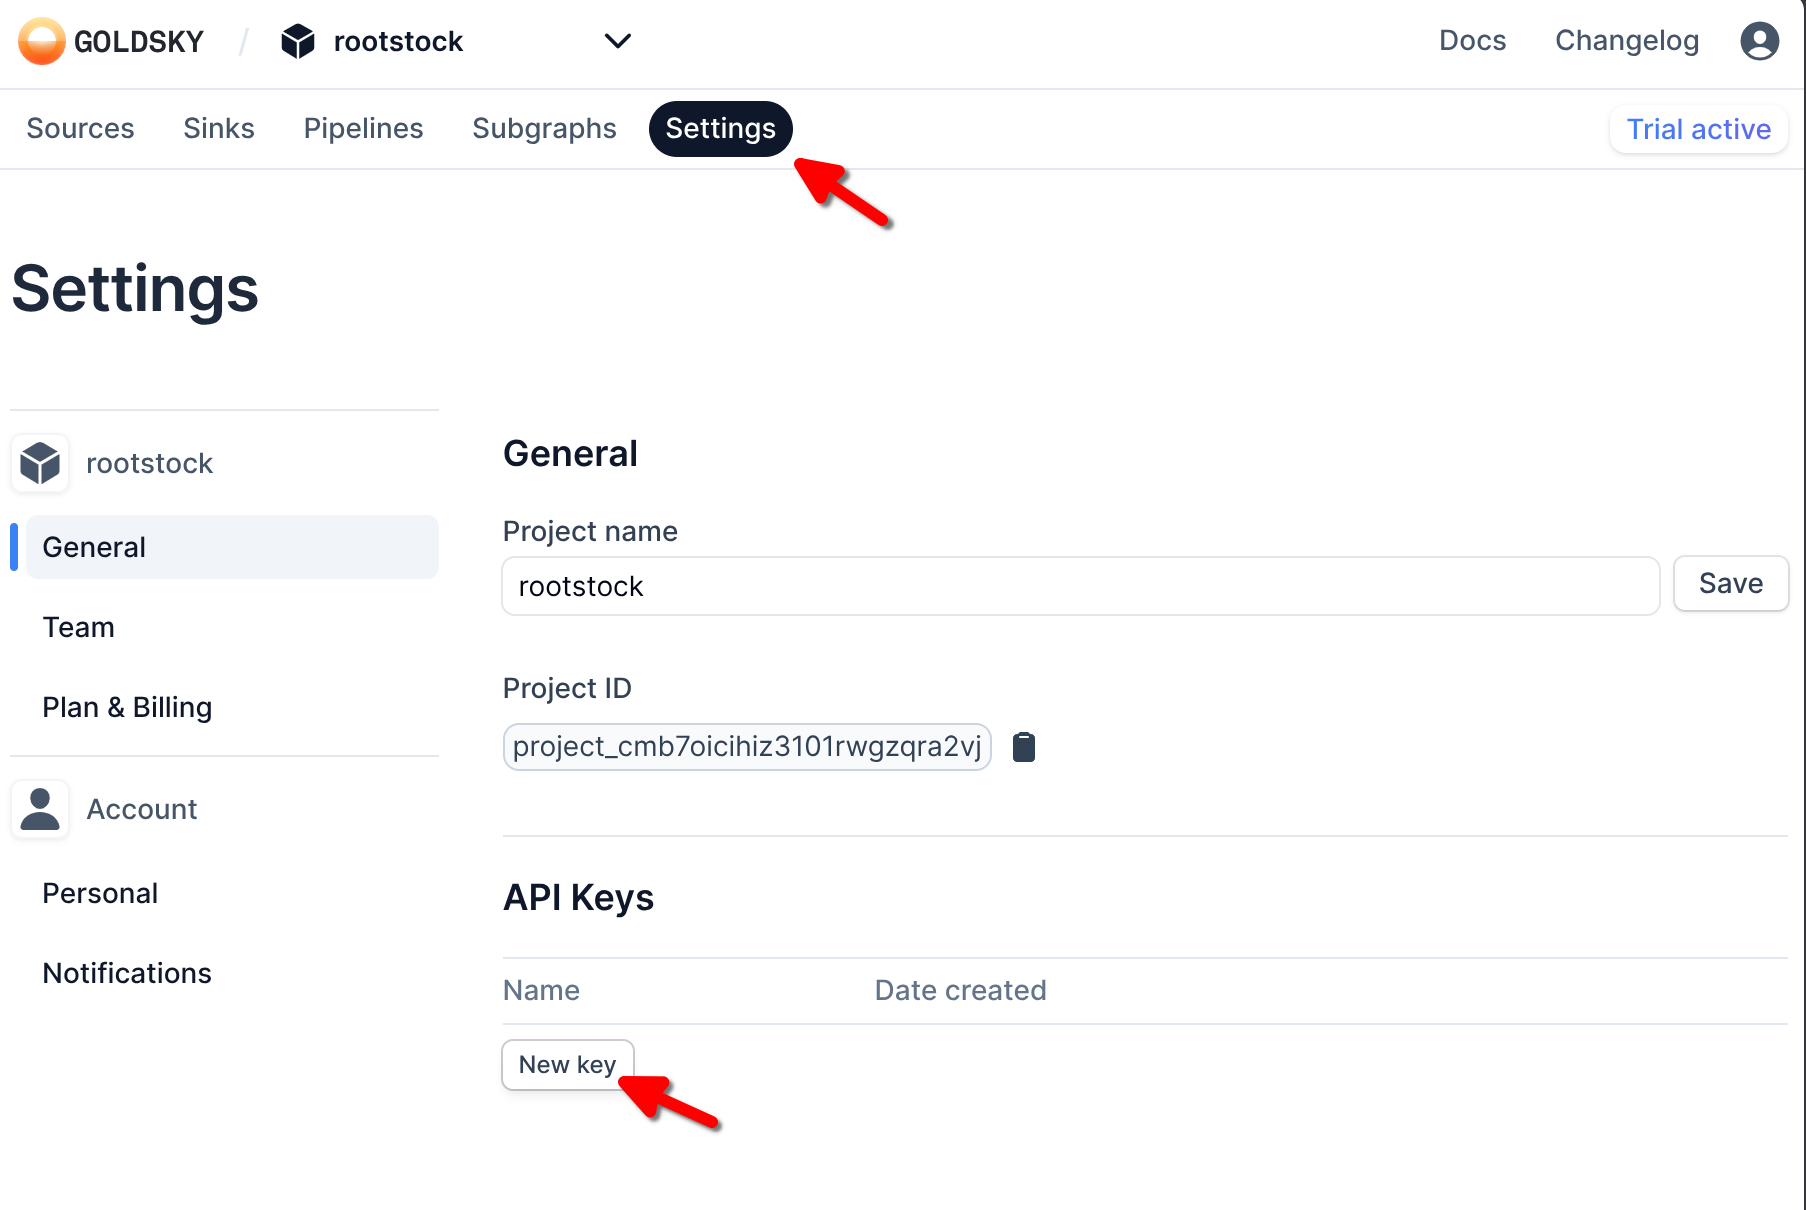
Click on the settings tab and create an api key. Make sure to copy this as soon as you create it, it will not be visible afterwards.
Go back to your terminal and run the following command
goldsky login
You will get a prompt to paste in your token like below, after which you will be successfully logged in to your project.
│
◆  Enter or paste in your Goldsky API token (you can create a new
one at https://app.goldsky.com/dashboard/settings)
│  _
└
Deploy the subgraph
The command below is used to deploy the subgraph.
goldsky subgraph deploy name/version --from-abi <path-to-config-file>
For this case, this is the command to use with the values substituted in.
Make sure you are in the same directory as the rif-config.json file.
goldsky subgraph deploy rif/1.0 --from-abi ./rif-config.json
This will automatically generate your subgraph and return an endpoint for you to query.
│
◇  Subgraph generated, deploying to your goldsky project
│
◇  Deployed subgraph API: https://api.goldsky.com/api/public/project_cmb7oicihiz3101rwgzqra2vj/subgraphs/rif-rootstock/1.0/gn
Go back to your dashboard to check the indexing status of the subgraph. This shows the percentage of data indexed so far from the defined starting block to the latest Rootstock block.
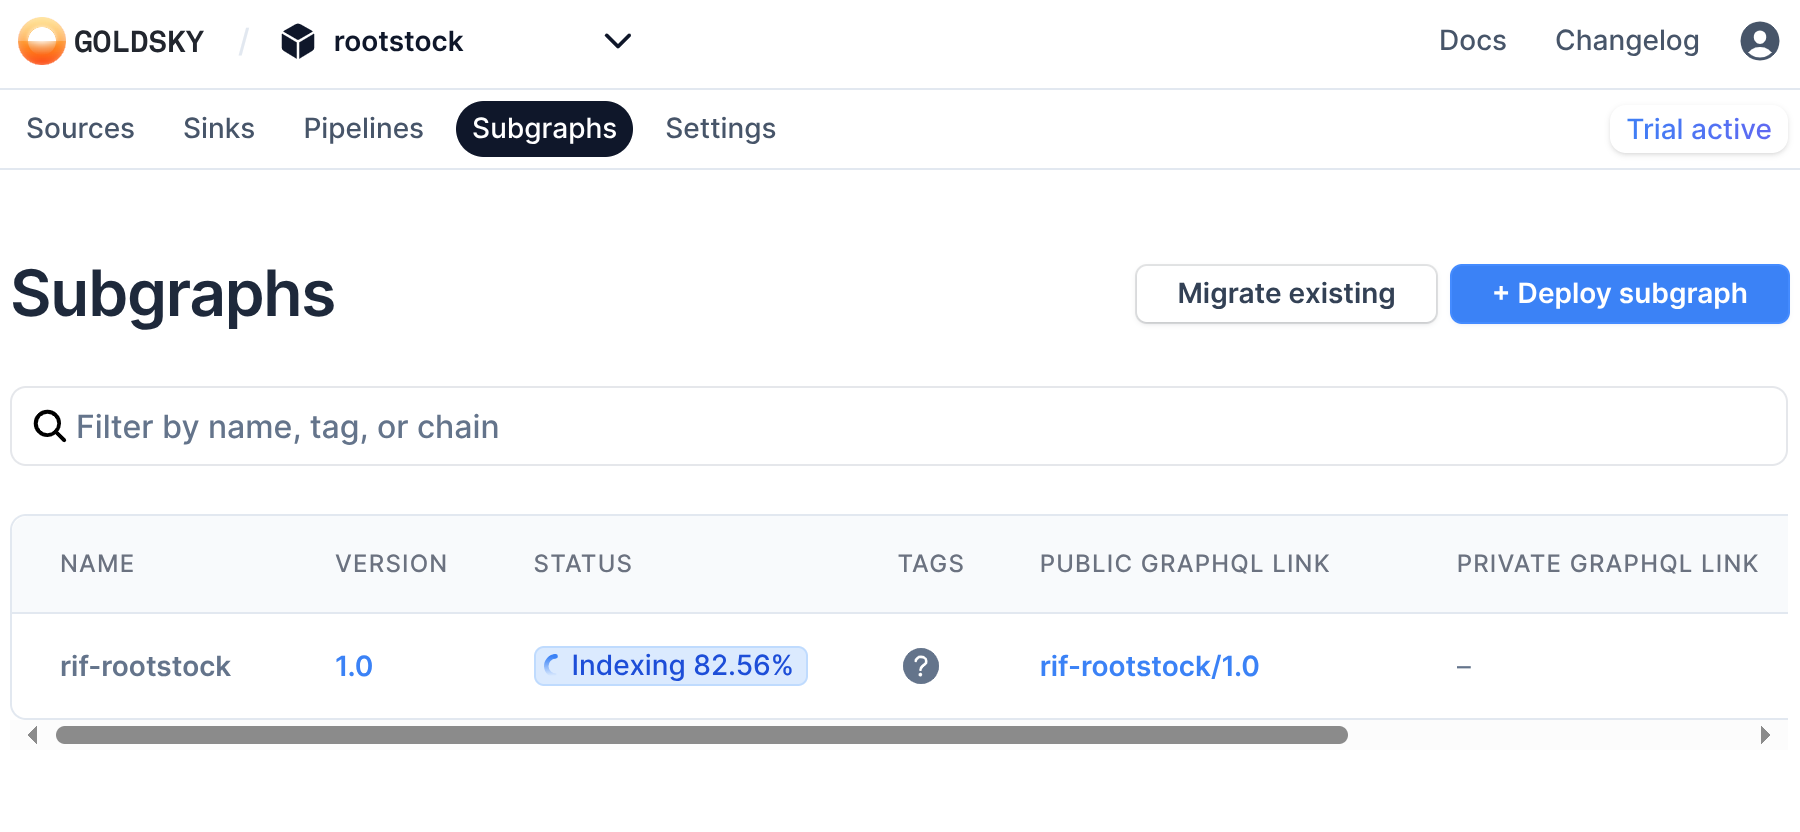
Wait until the status is Live, otherwise the data queried from the subgraph may not reflect the latest changes.
No code deployment
You can also deploy a subgraph directly from the dashboard instead of creating a config file.
In your project's dashboard, click on the Deploy subgraph button. You will be presented with the list of options below, fill in where appropriate.

The optional values may be automatically inferred by Goldsky, but they are required in some cases. Where necessary, use the values in create a project section above.
The generated subgraph endpoint is available on the PUBLIC GRAPHQL LINK column in your dashboard.
Query the subgraph
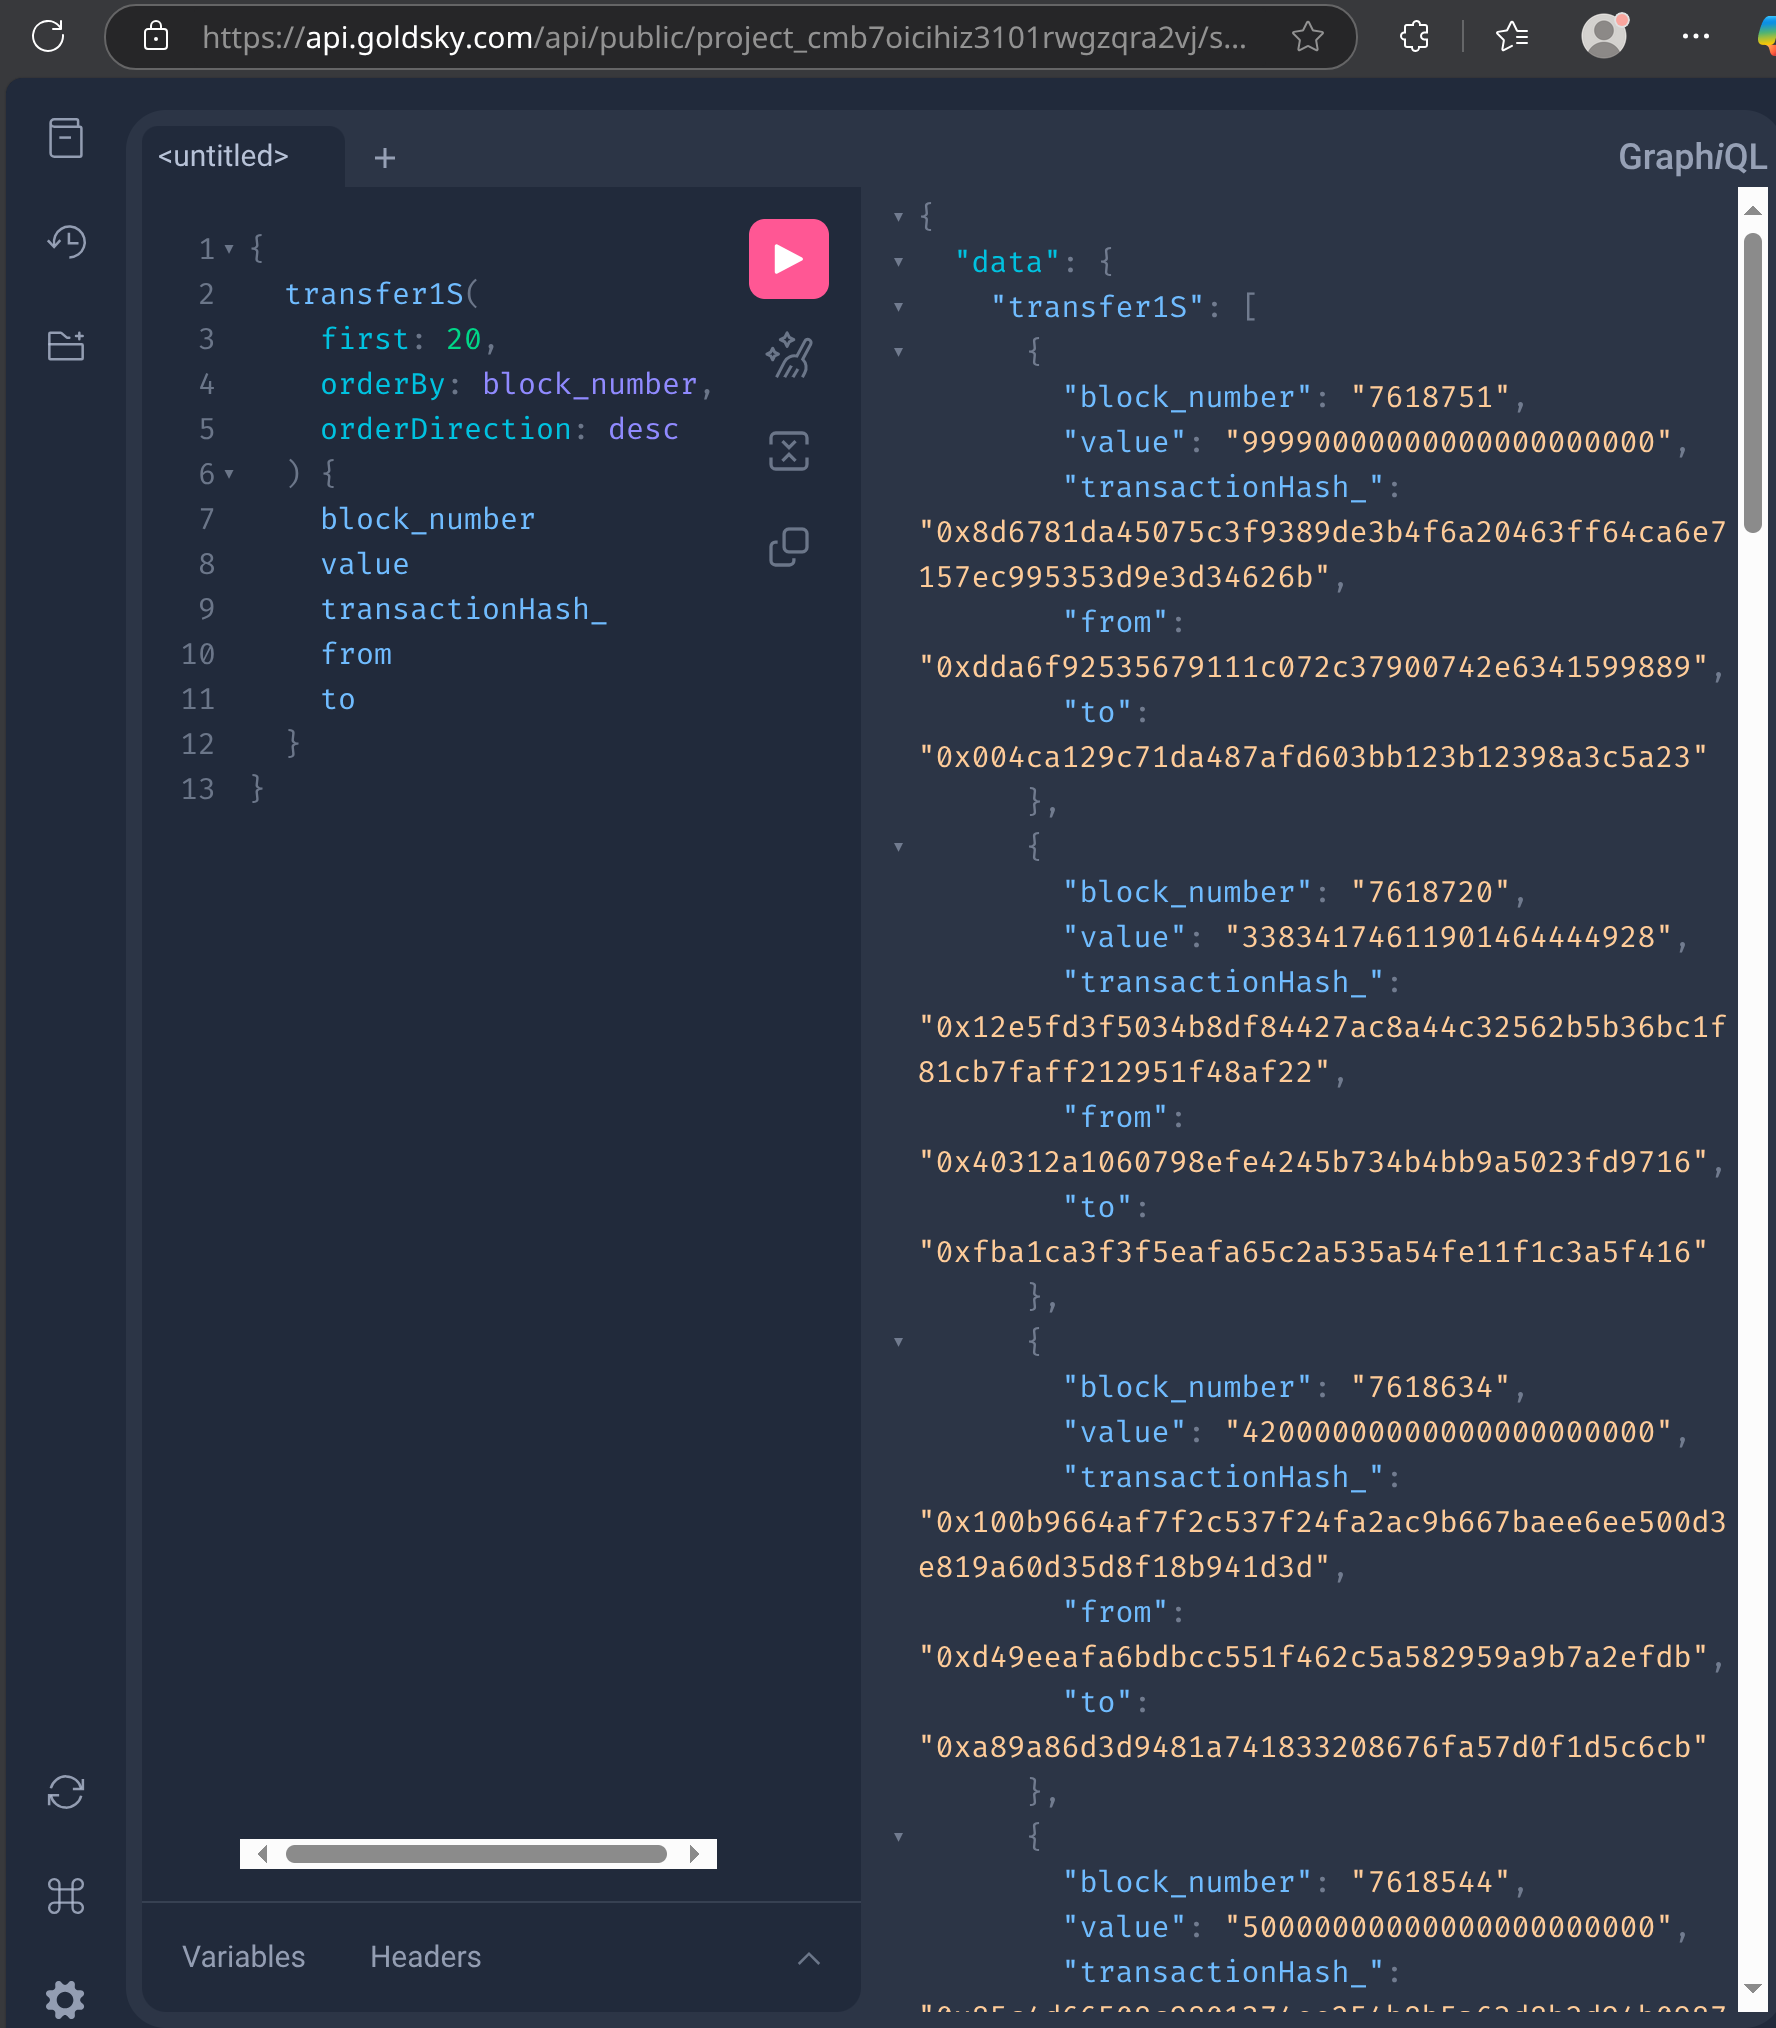
Paste the subgraph endpoint into a browser. It leads to a GraphiQL environment.
Sample query to get the latest 20 token transfers that occurred in the RIF contract
{
  transfer1S(first: 20, orderBy: block_number, orderDirection: desc) {
    block_number
    value
    transactionHash_
    from
    to
  }
}
Paste the query as follows in the GraphiQL playground and press the execute button.
Additional Resources
This content was contributed by @iMac7 as part of the Rootstock Hacktivator. For full details, please review the Hacktivator Terms and Conditions.